Google Calendar Integration
The following steps are required to be performed to integrate with Google Calendar.
Steps in this procedure must be performed by the institution's Google administrator.
- Login to GCP using Gsuite Admin account credentials (https://console.cloud.google.com/).
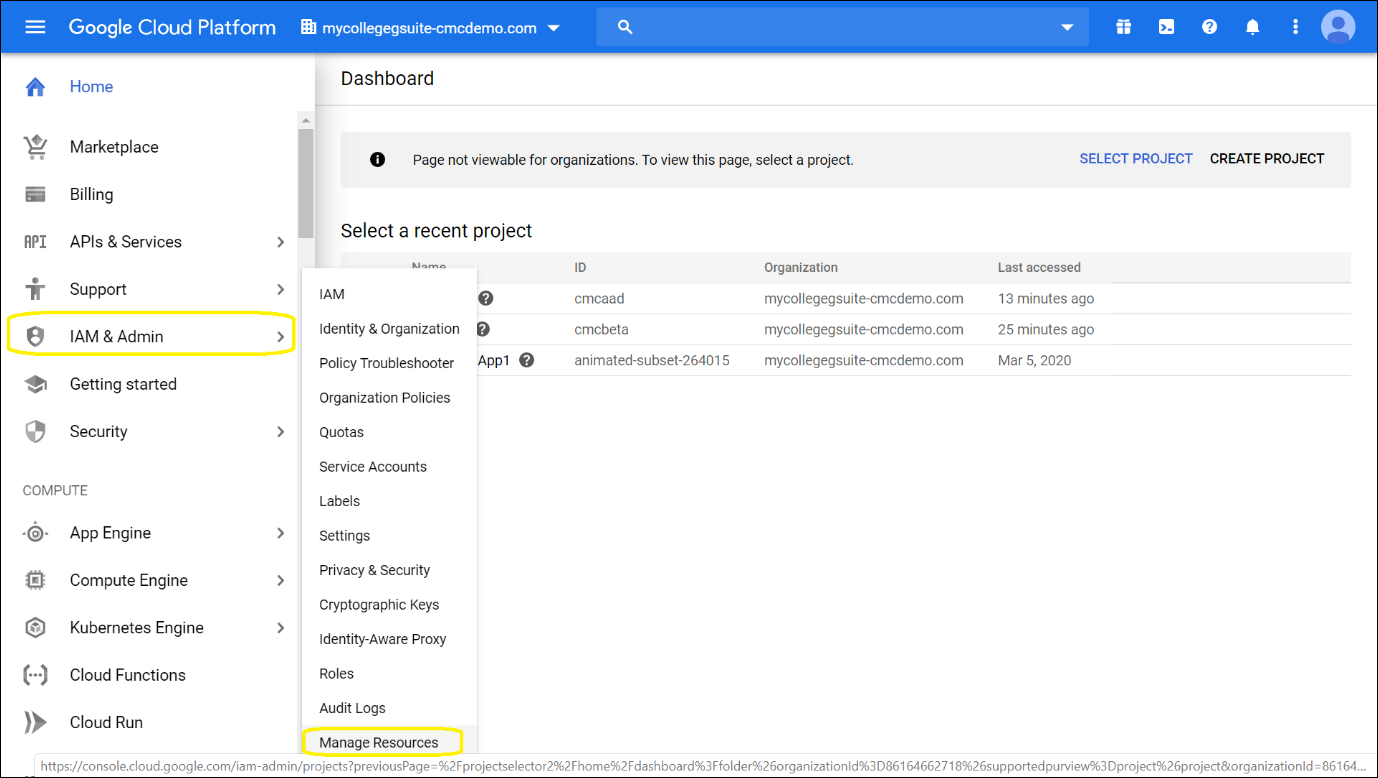
- After login, In the GCP Console, click IAM & Admin > Manage Resources.
- Click Create Project
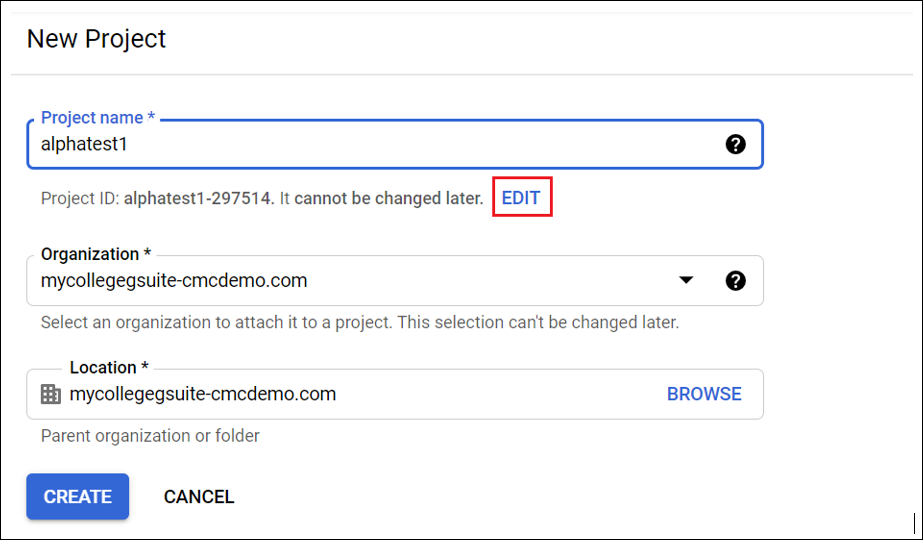
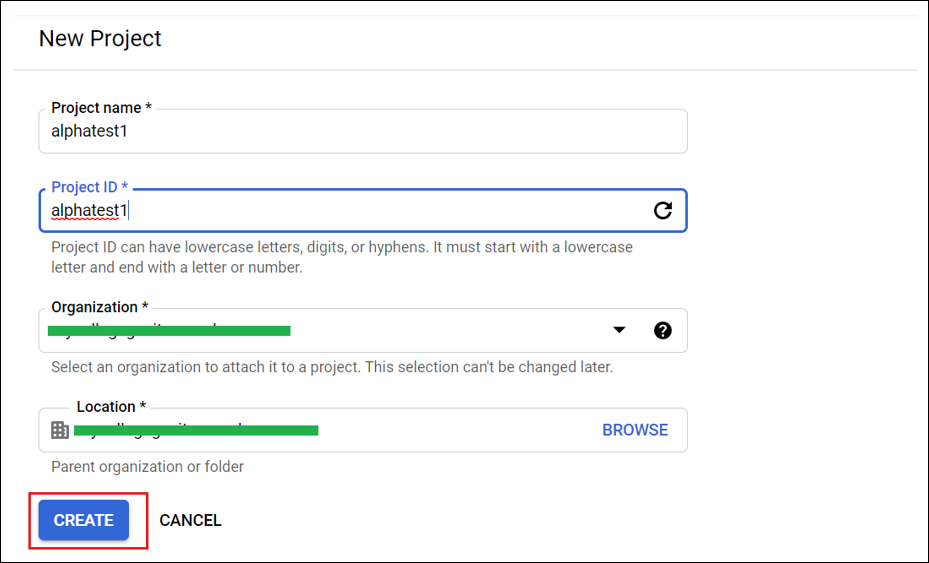
- In the new project window, enter the required field values and click Create.
For example:
Project Name: alphatest1
Project ID : alphatest1
- On the Home page, click the projects dropdown and open the newly created project alphatest1:
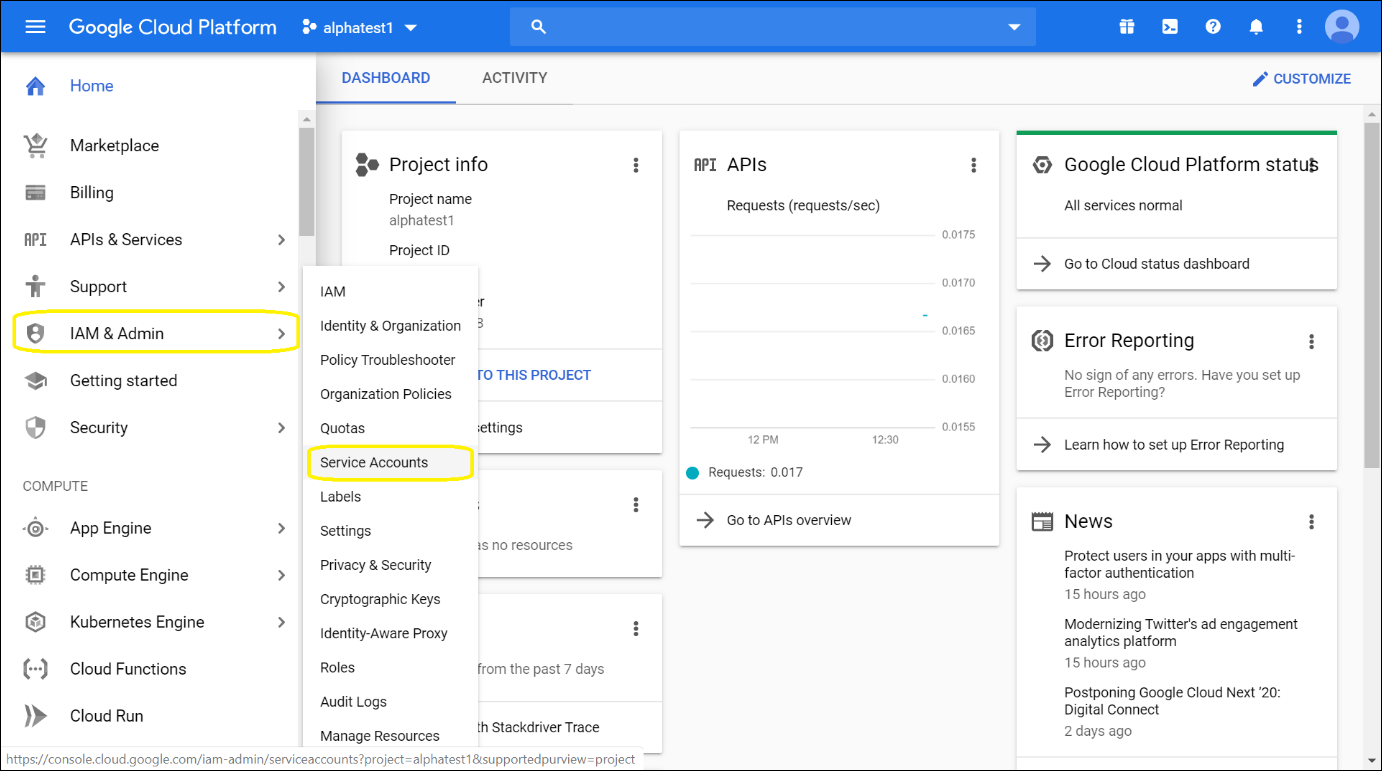
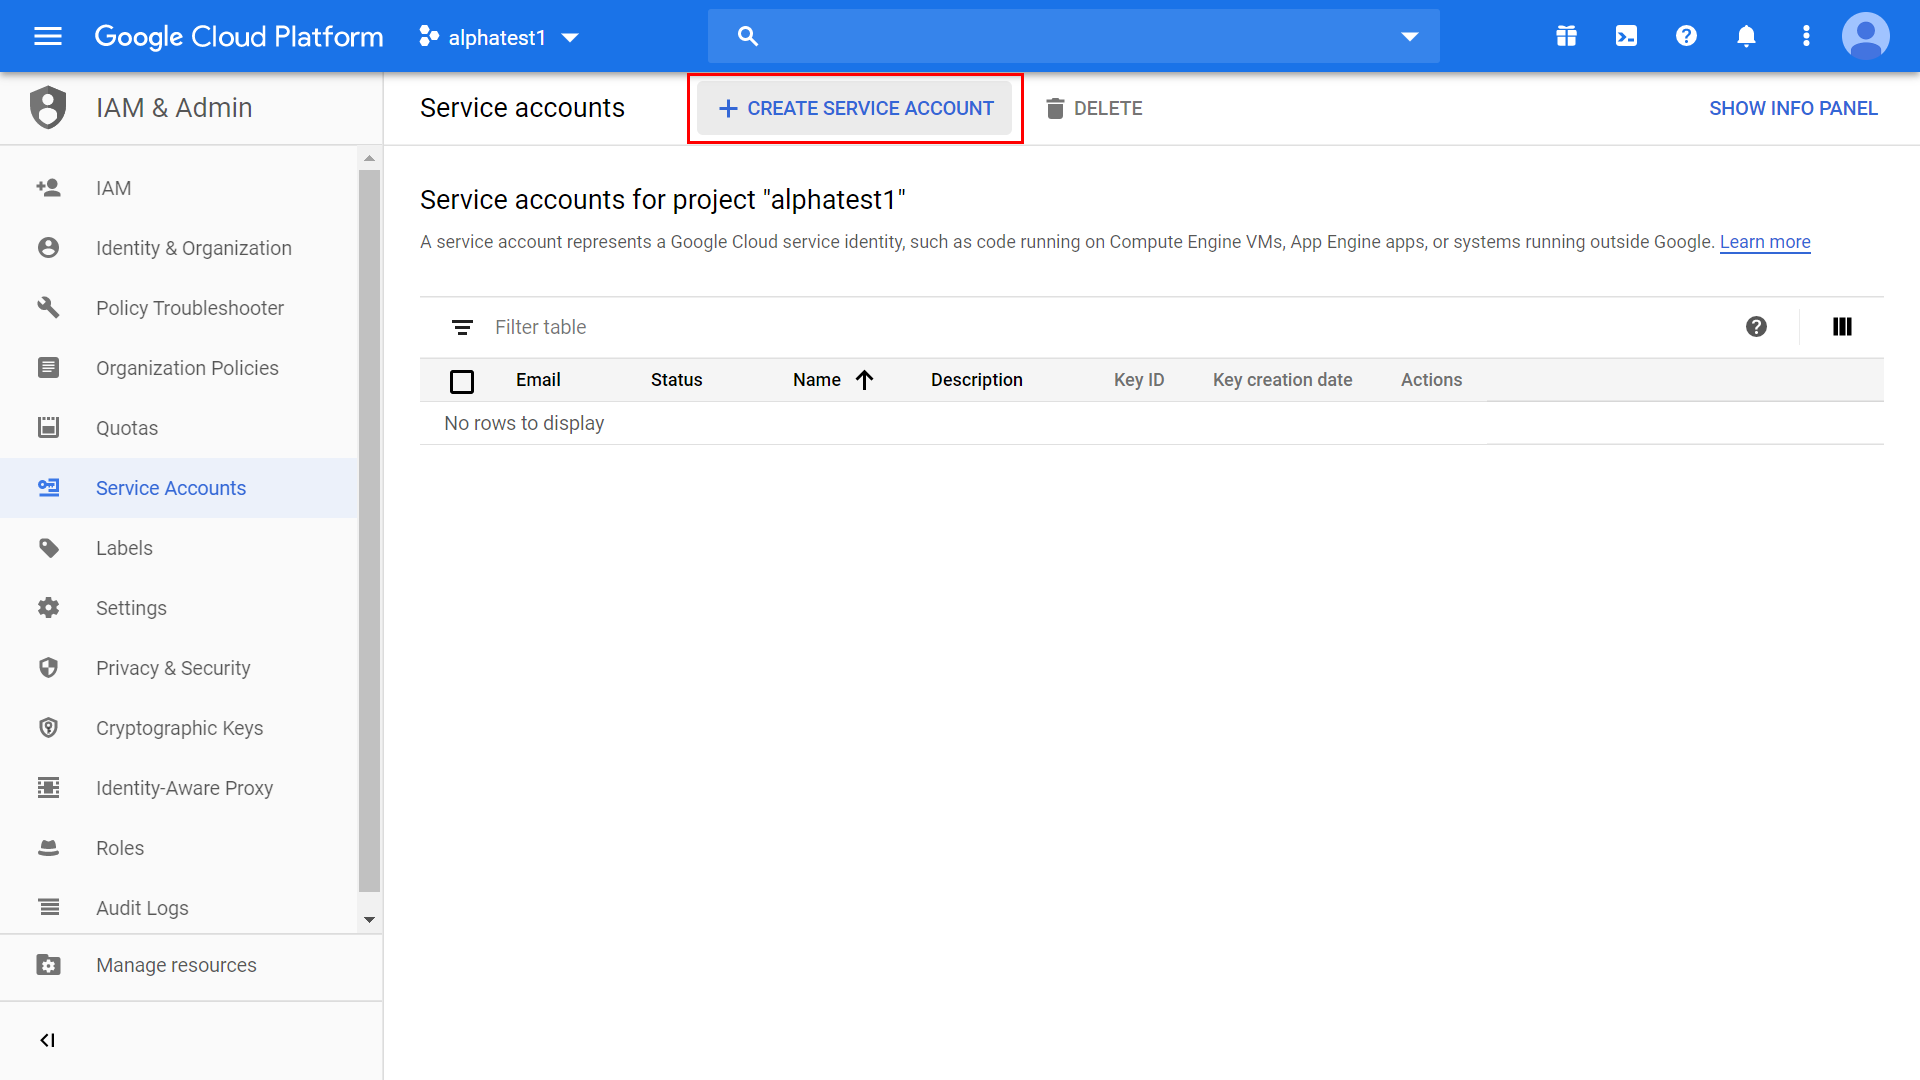
- Click IAM & Admin > Service Accounts.
- Click Create Service Account.
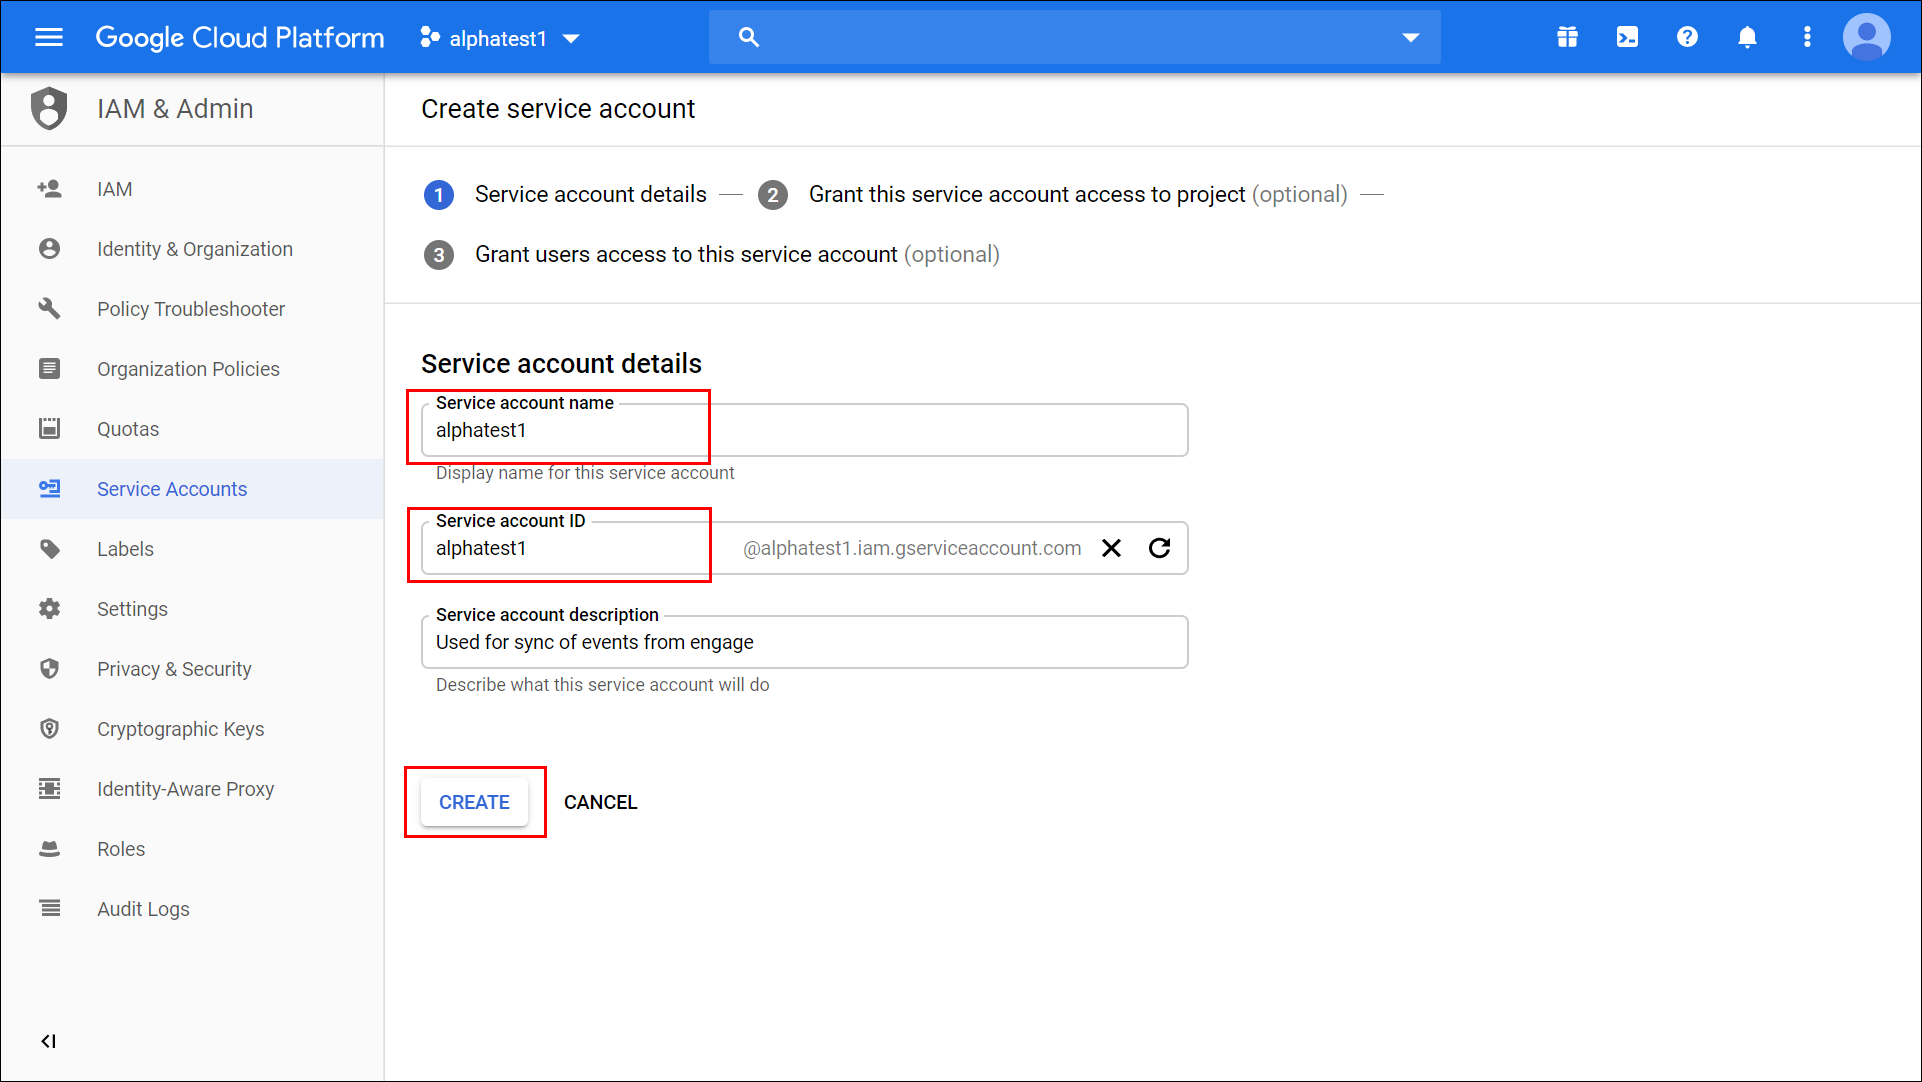
- Type the Service account name and Service account ID field values and click CREATE
-
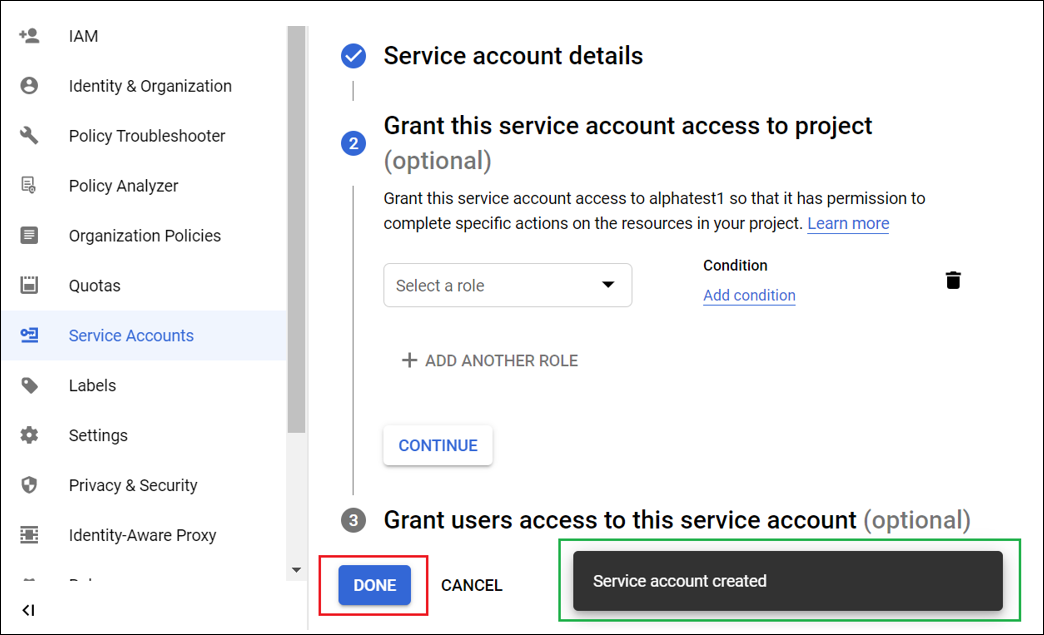
A message "Service account created" will be displayed. Click DONE.
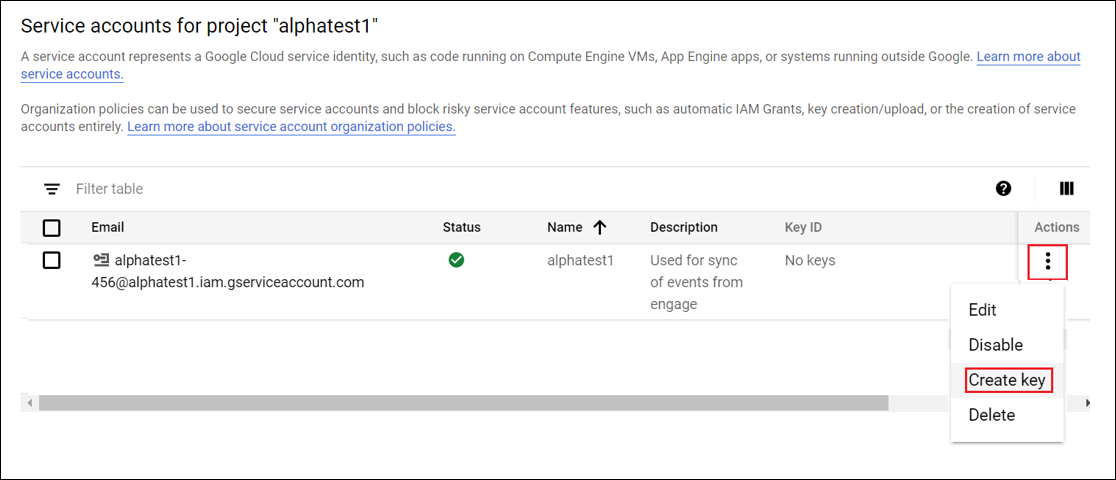
- In the newly added service account, click Actions > Create Key.
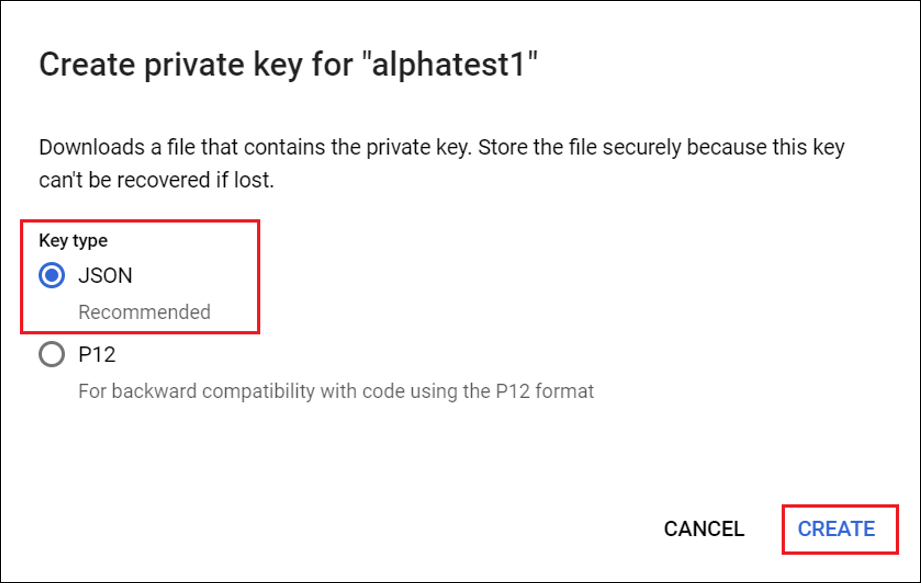
- Select the JSON option and click CREATE.
- A message will display that the service account JSON key file has been created and downloaded to your computer. Make a note of the name of this file. You’ll need it later.
Important
For large domains, service accounts can take up to 24 hours to propagate through the domain.
If you lose the key, repeat these steps to create a new key.
Steps in this procedure must be performed by the institution's Google administrator.
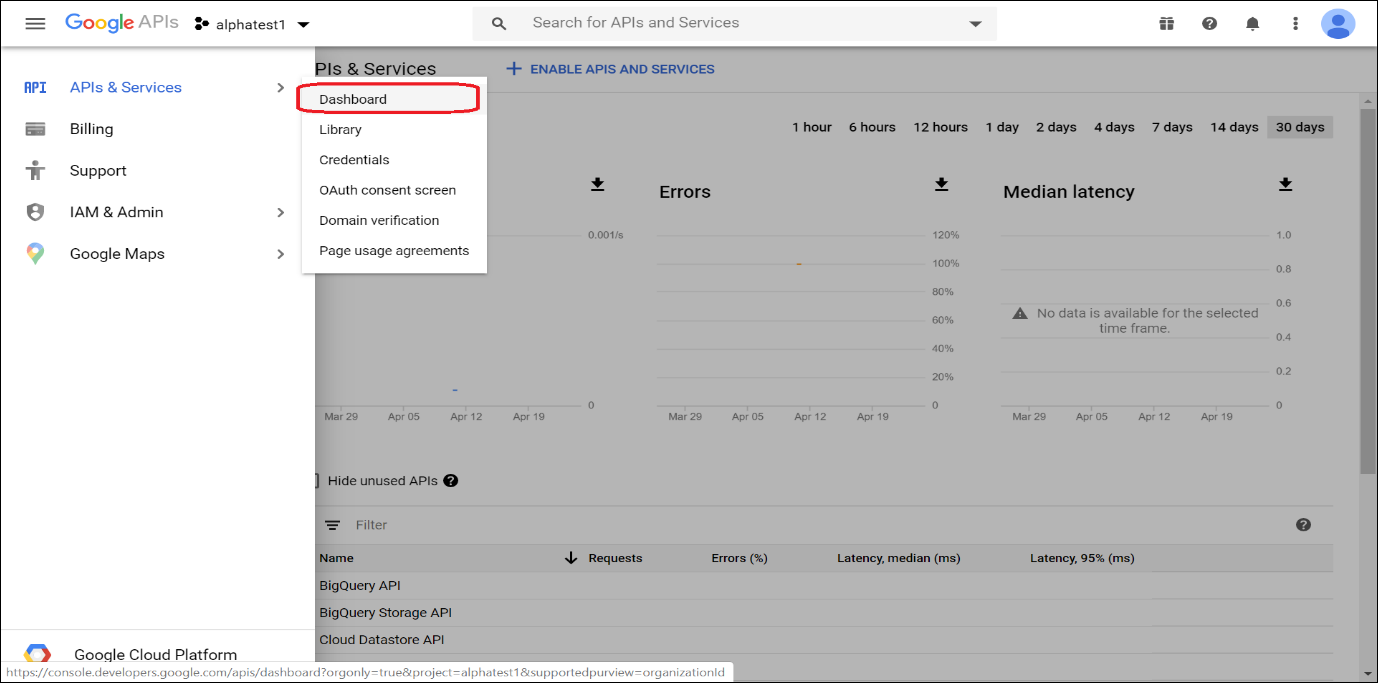
- Navigate to the Dashboard.
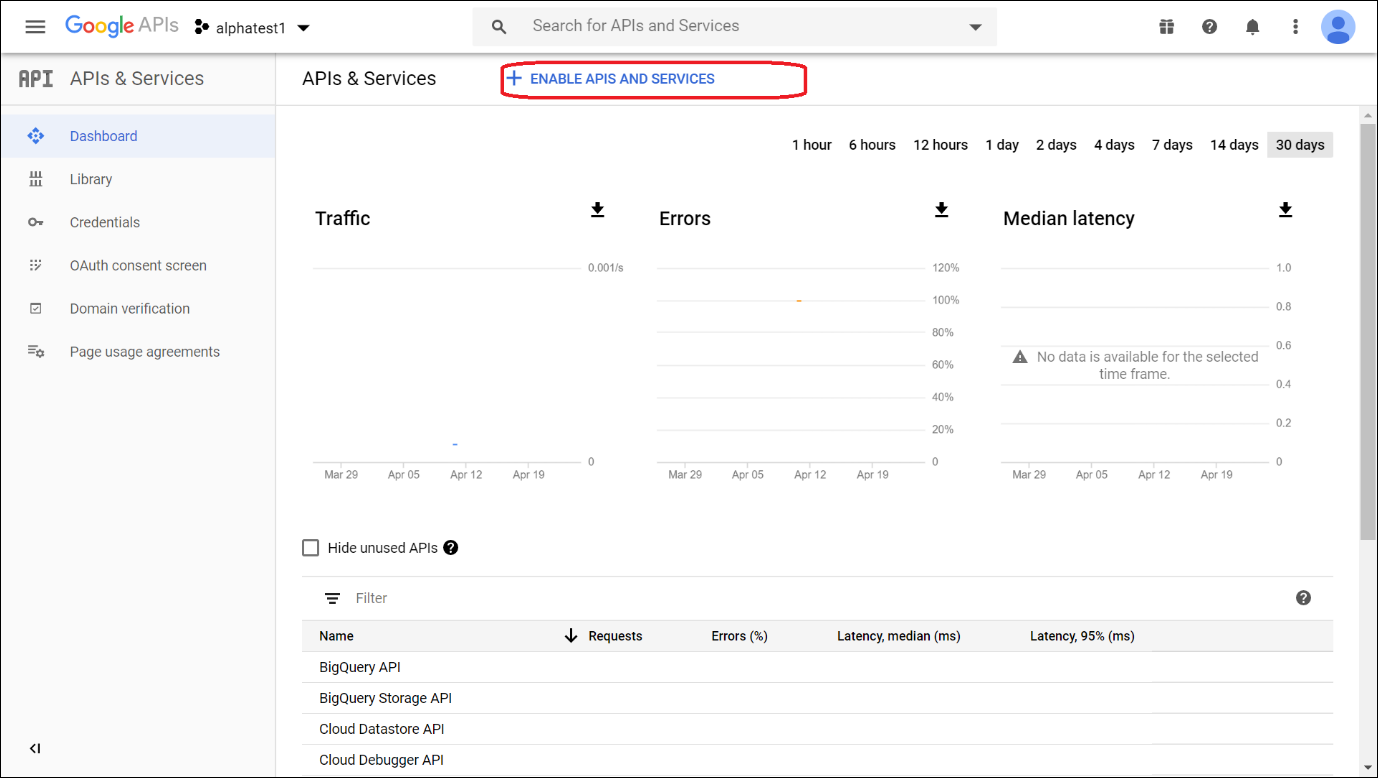
- In the displayed screen, click ENABLE APIS AND SERVICES.
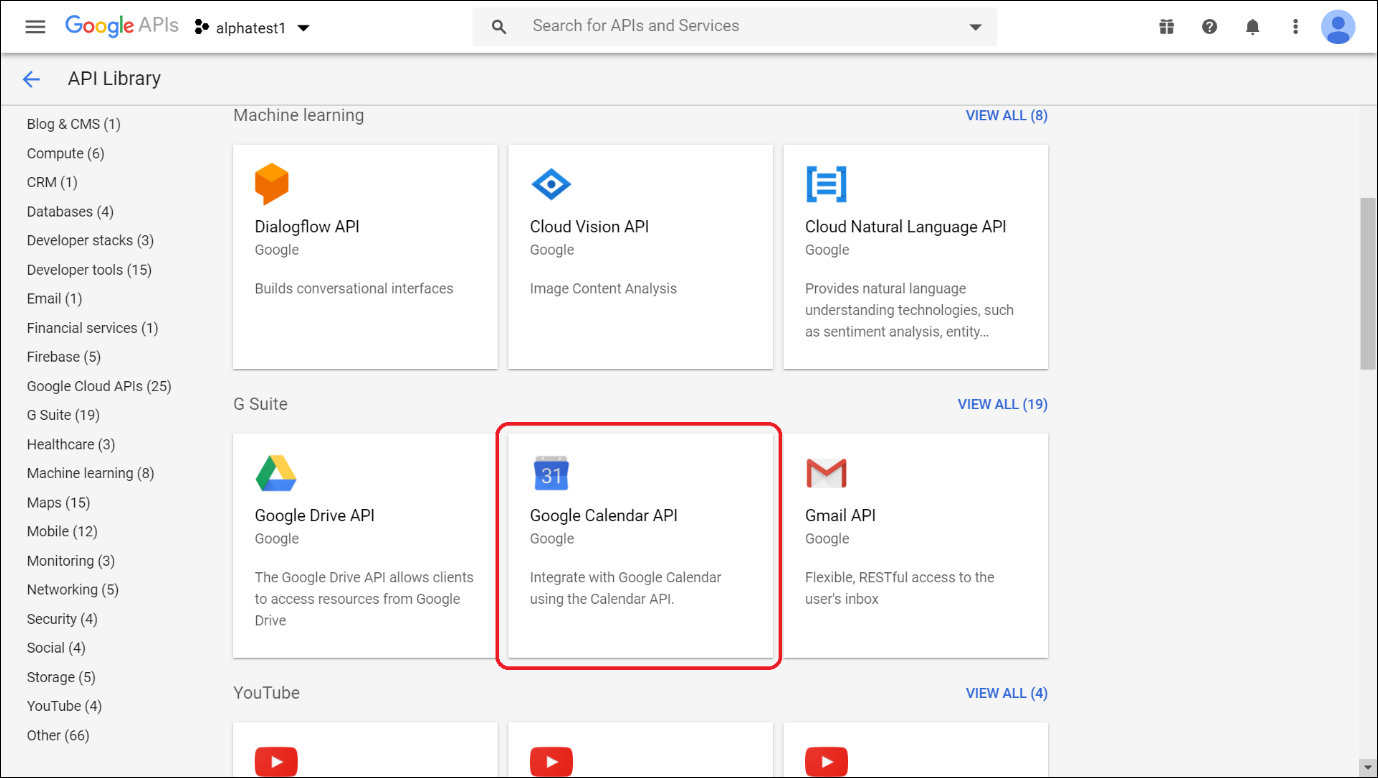
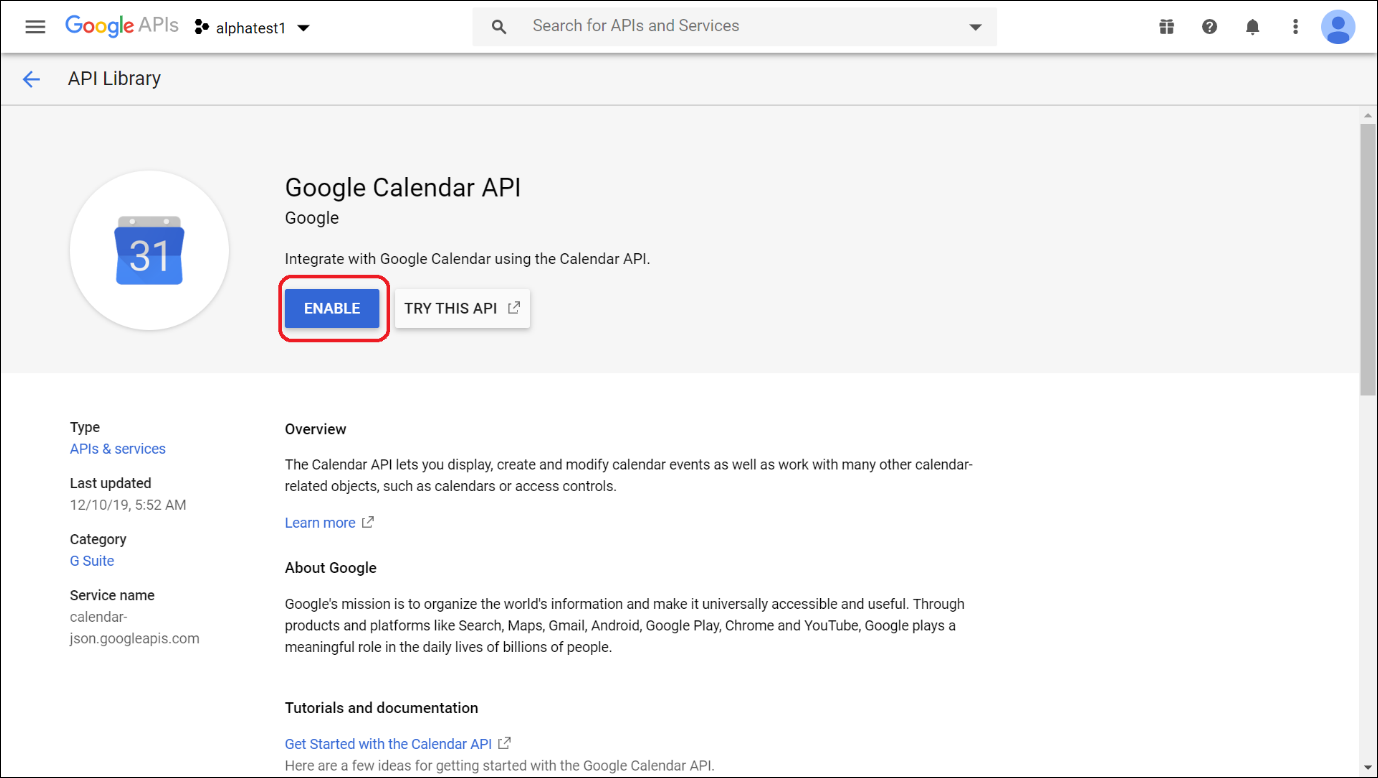
- In the next screen, click Google Calendar API.
- In the next screen, click Enable.
It will take few seconds to activate.
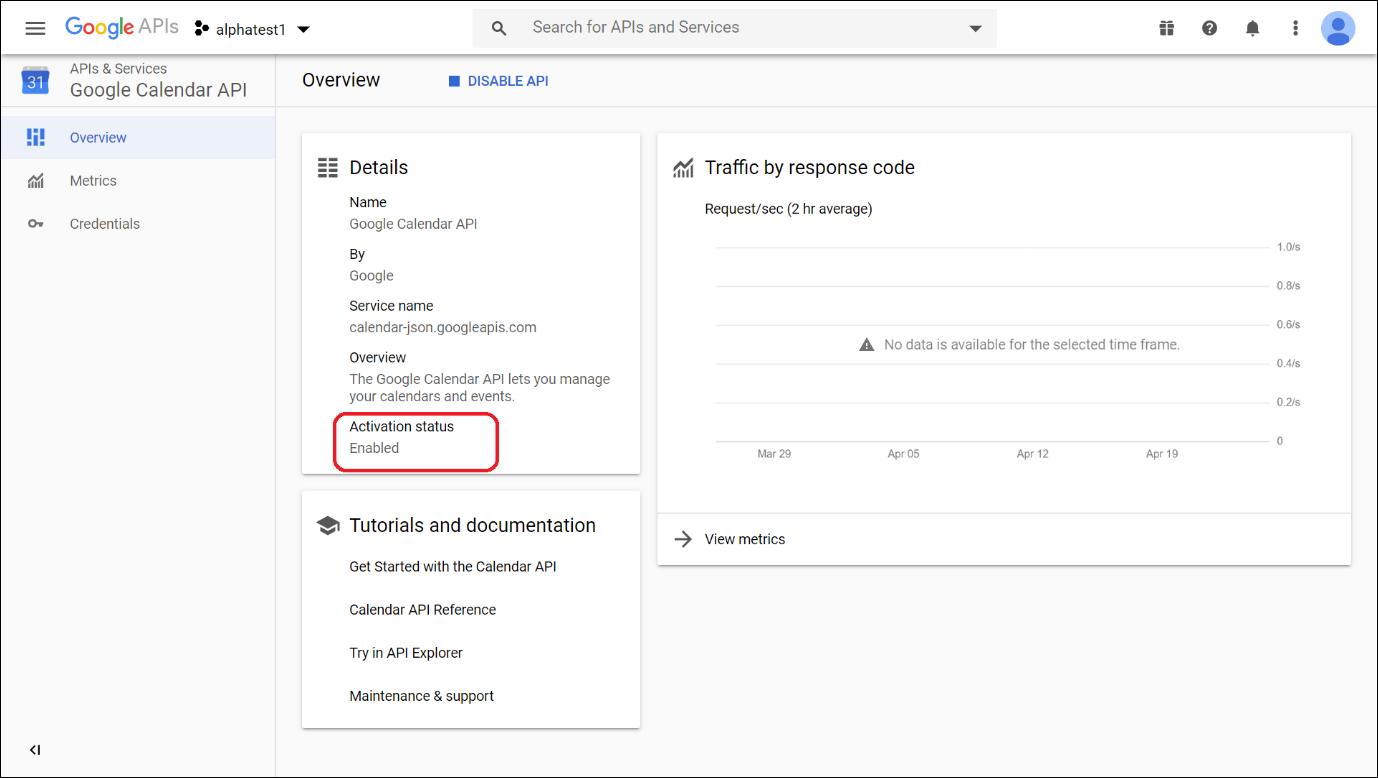
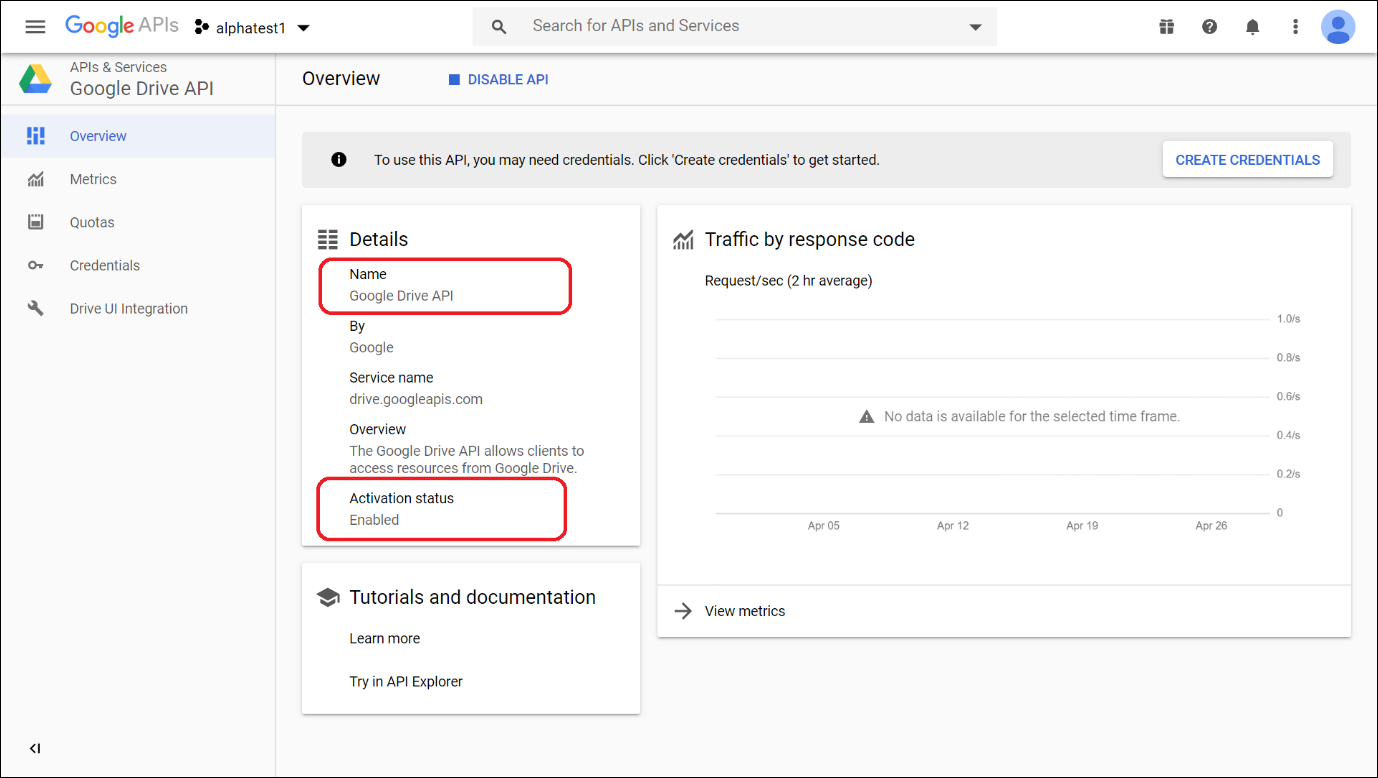
- On successfully being enabled, the Activation status will display the text Enabled.
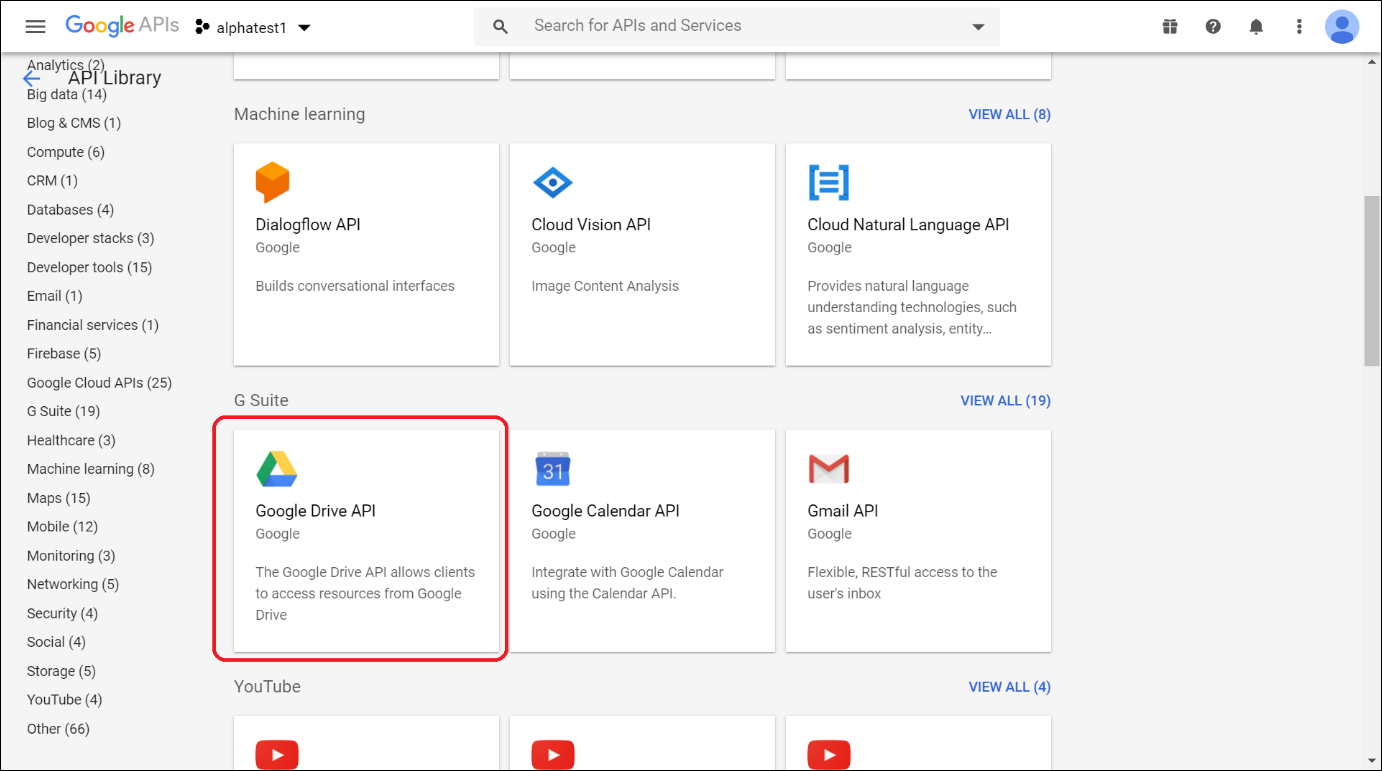
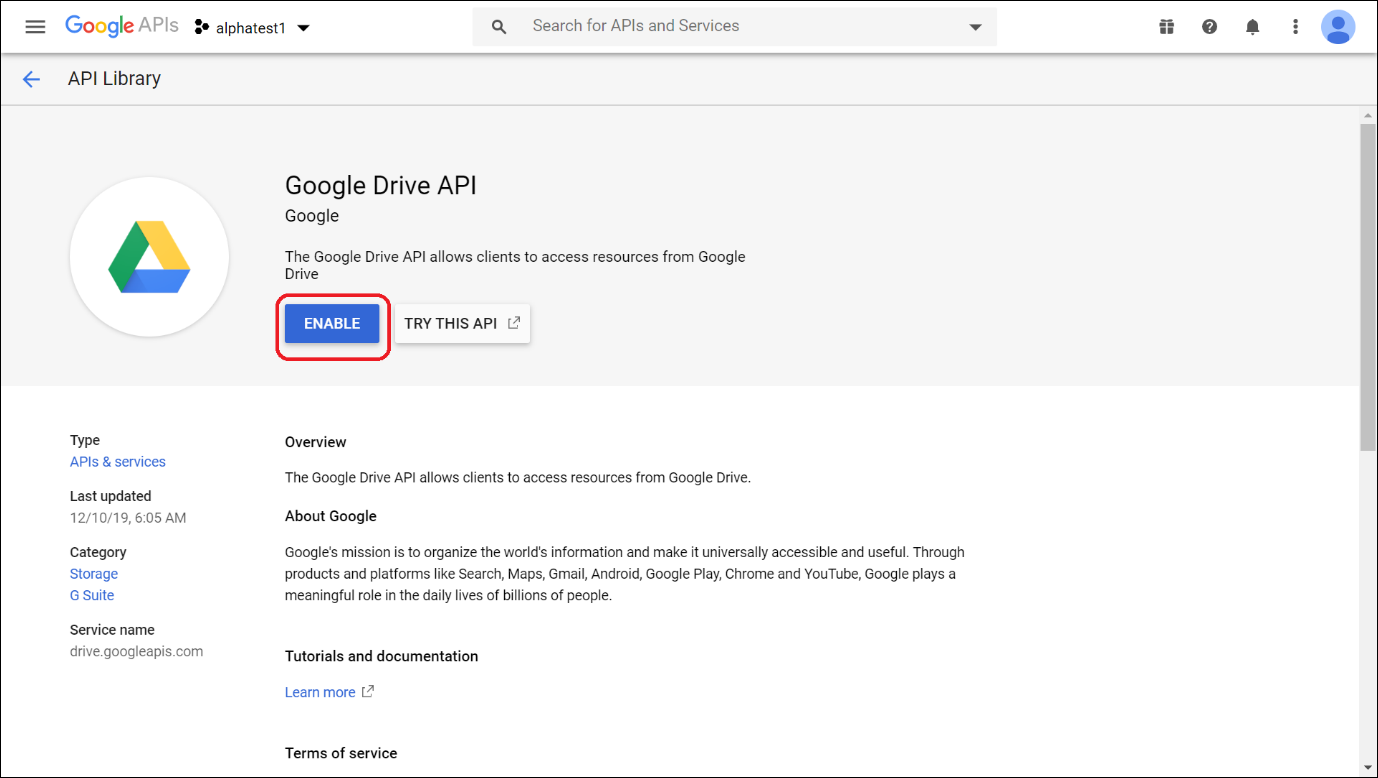
- Repeat step 2 - 5 to enable Google Drive API.
Steps in this procedure must be performed by the institution's Google administrator.
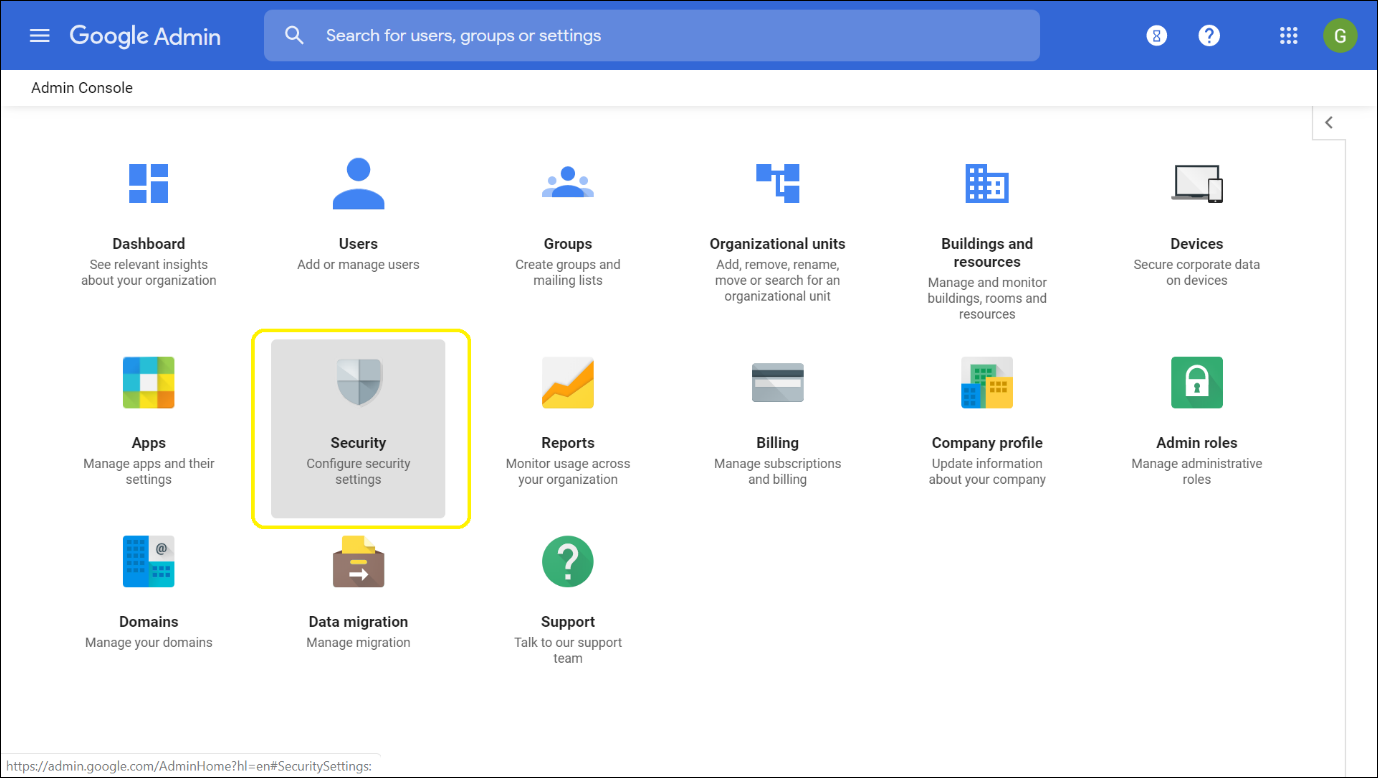
- Authorize the service account in your Google Admin console. Log in to the Admin console, https://admin.google.com/.
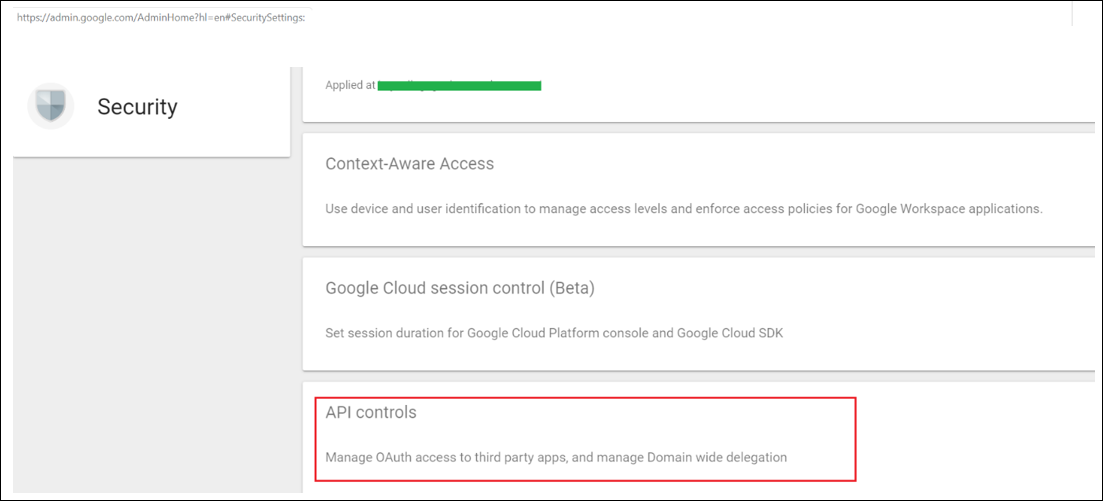
- Click Security > API controls.
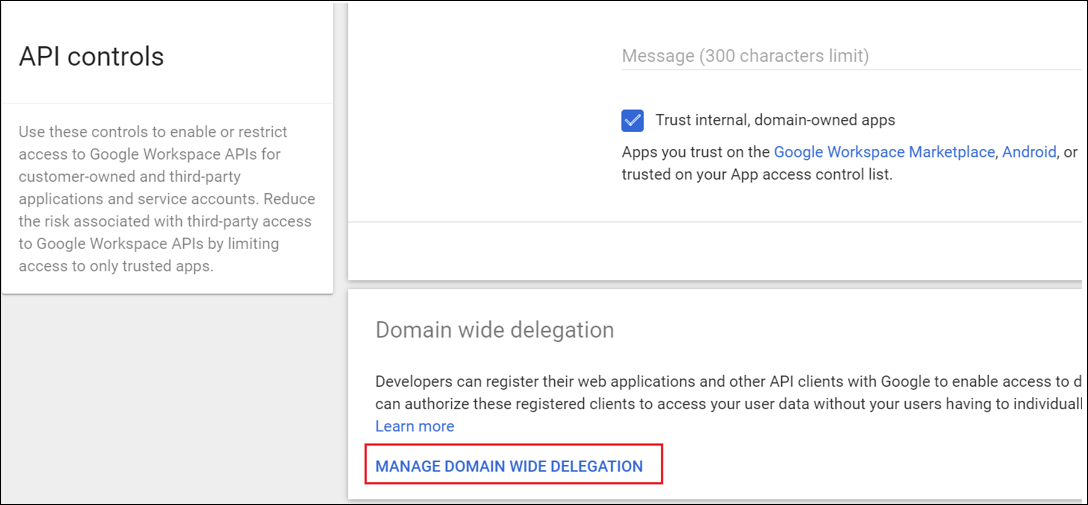
- Click MANAGE DOMAIN WIDE DELEGATION.
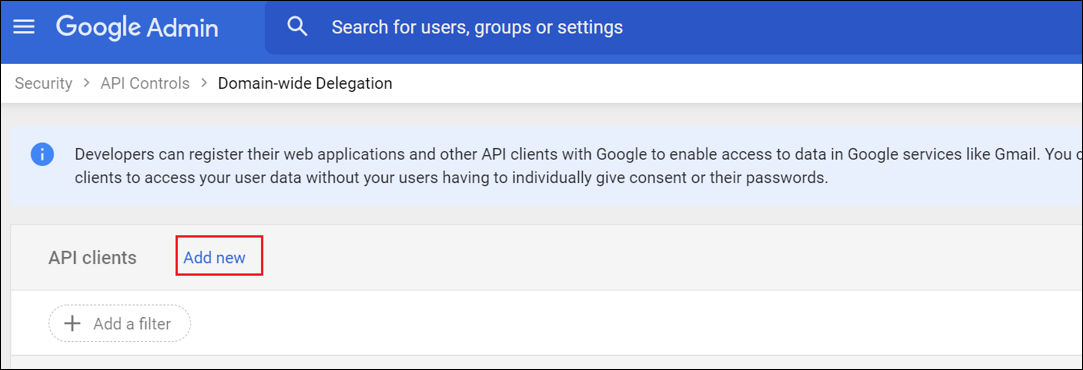
- Click Add new.
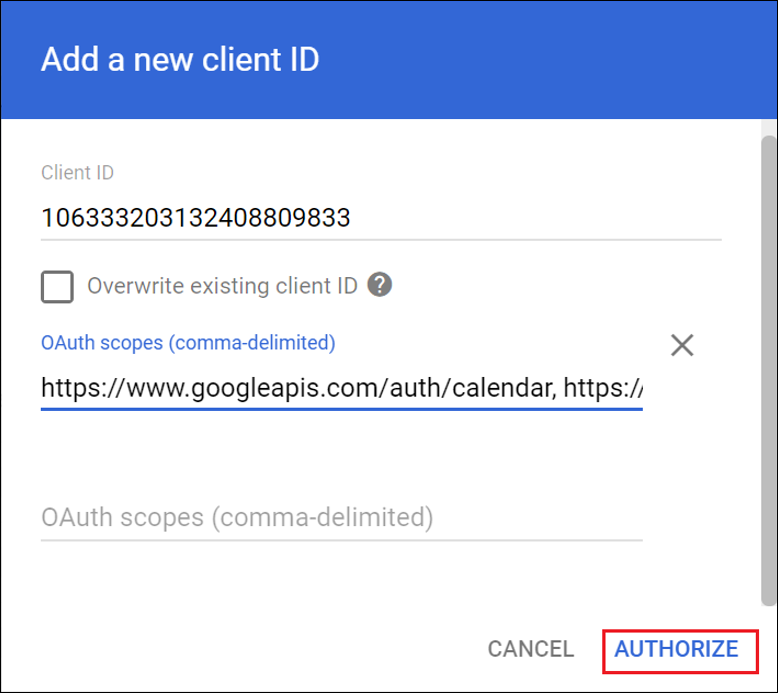
- In the Add a new client ID dialog:
- In the Client id field, type your service account client ID.
- In the OAuth scopes field, copy the following comma-separated scopes:
The Client ID will be available in the JSON file you downloaded when you created the GSuite service account.
- Click Authorize.
Note
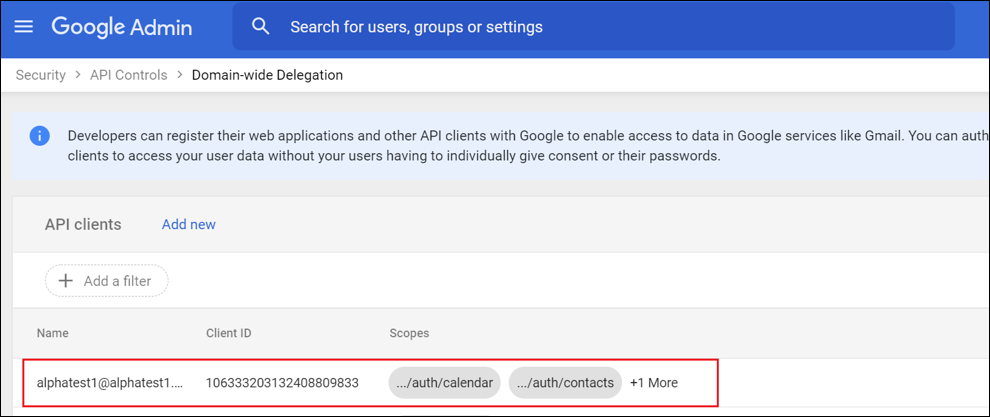
It might take some time for the authorization process to complete. On successful authorization, information will be displayed in the API clients section.
Steps in this section must be performed by staff from Professional Services / Deployment team. Professional services must obtain JSON file information from the institution and create a Support ticket for the Deployment team to update the Azure function. The sensitive JSON file information should then be shared via the confidential section of the Support ticket.
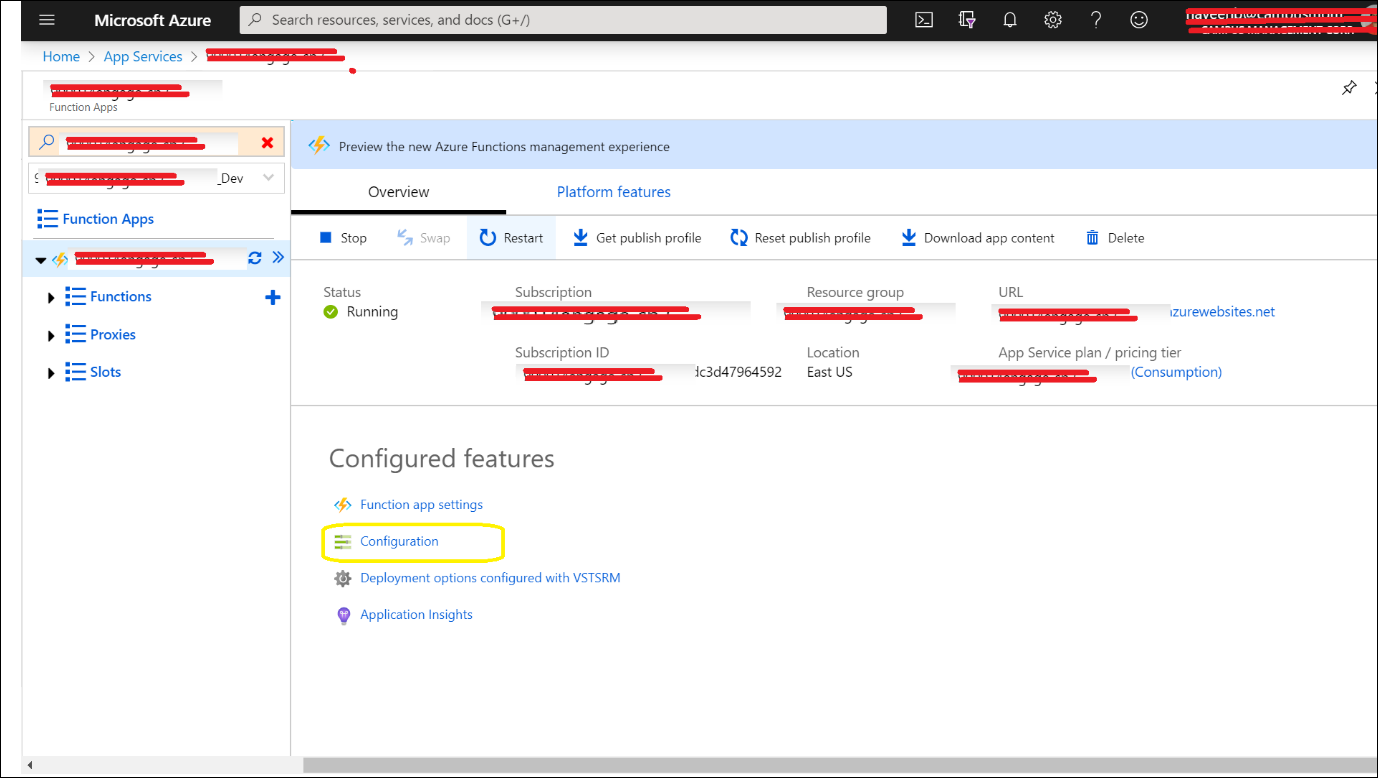
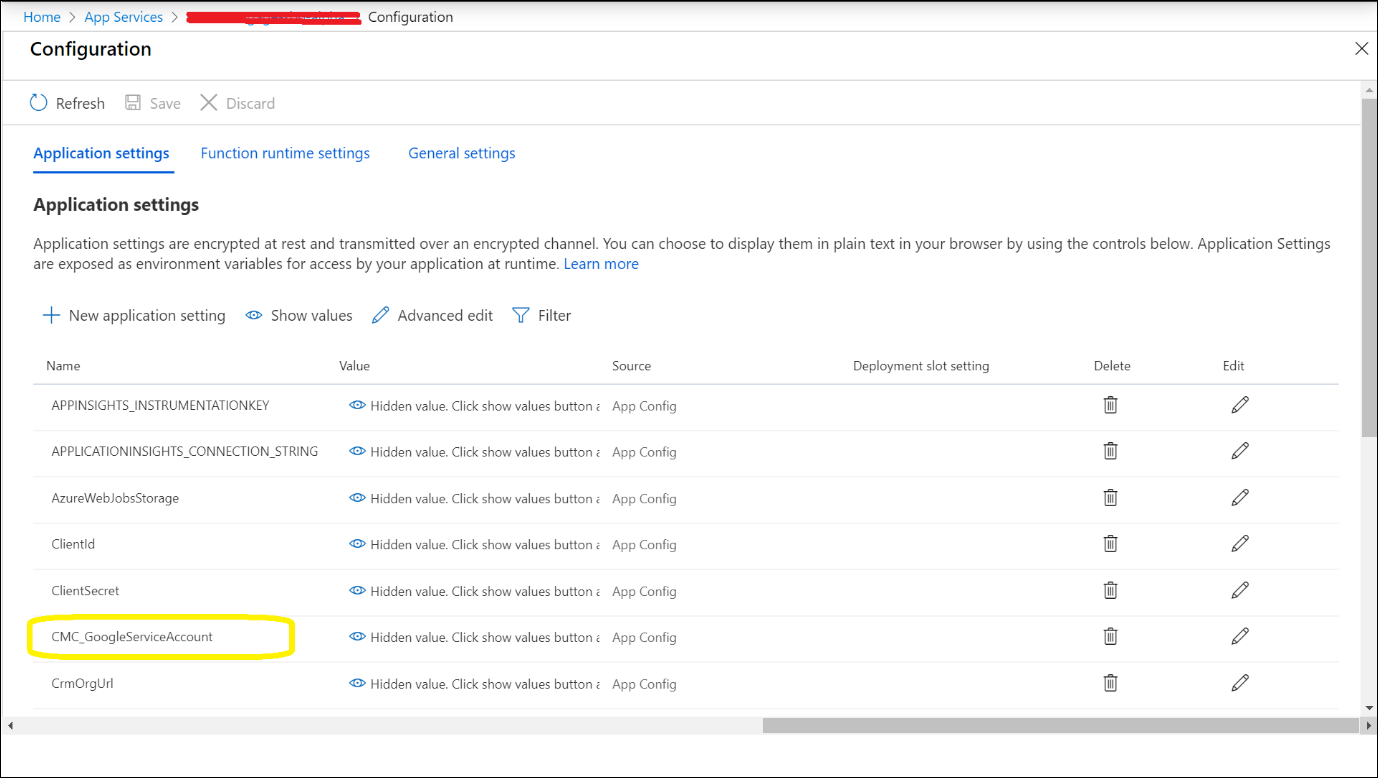
- In the Azure app service, click Configuration.
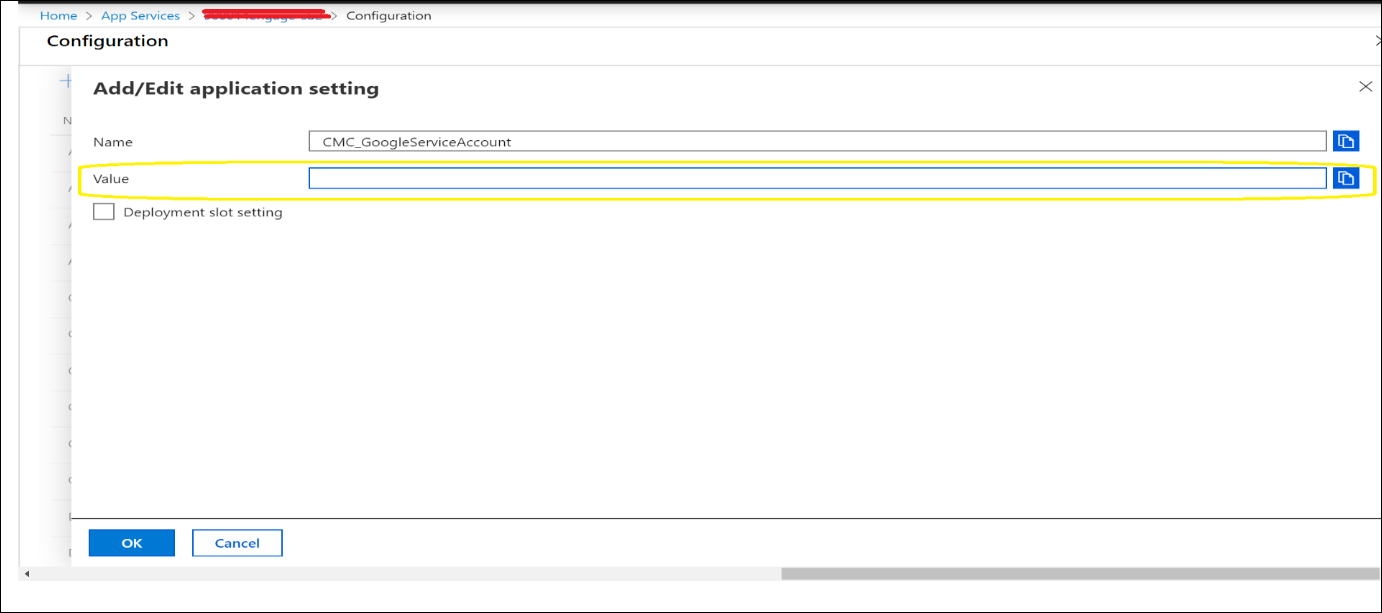
- From Application settings, click CMC_GoogleServiceAccount
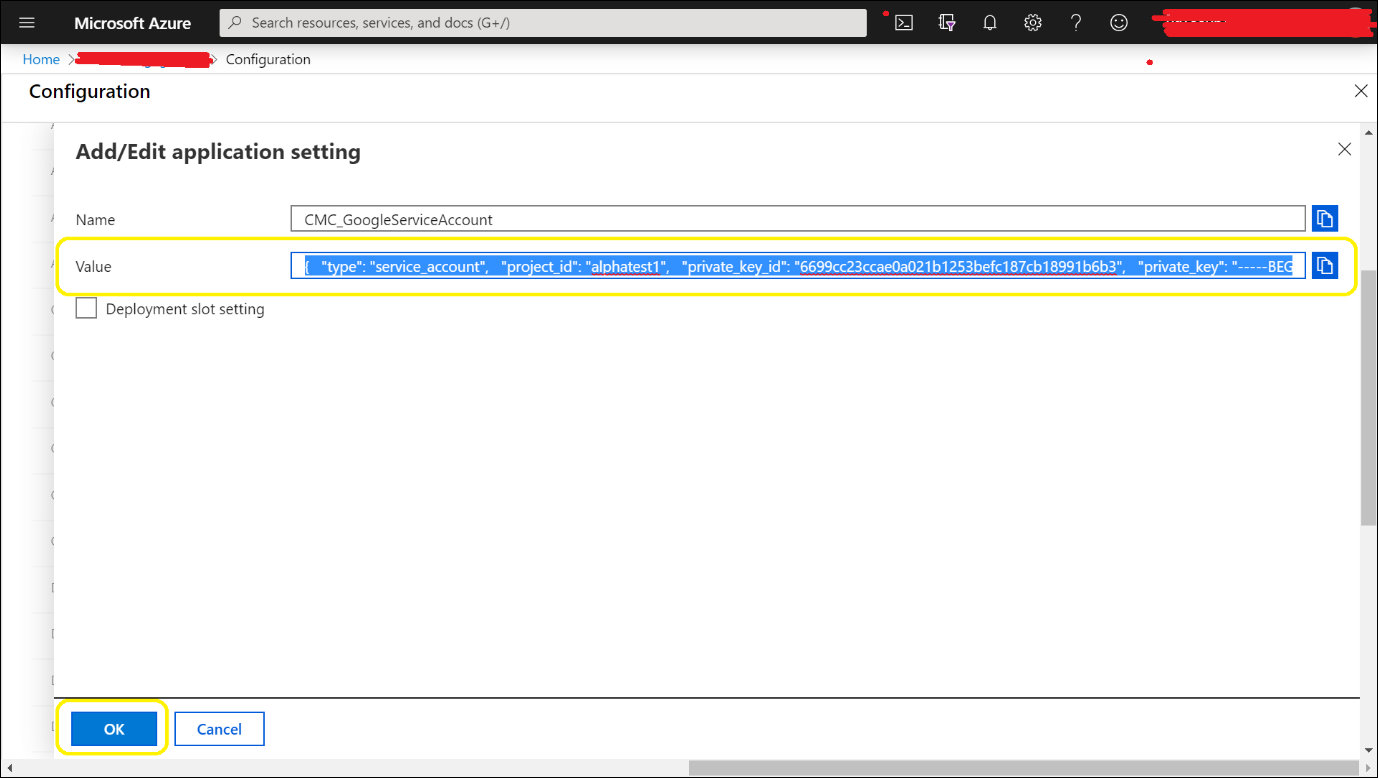
- In the Value field, type the JSON file data downloaded when the Google service account was created.
Copy the JSON file data into the Value field.
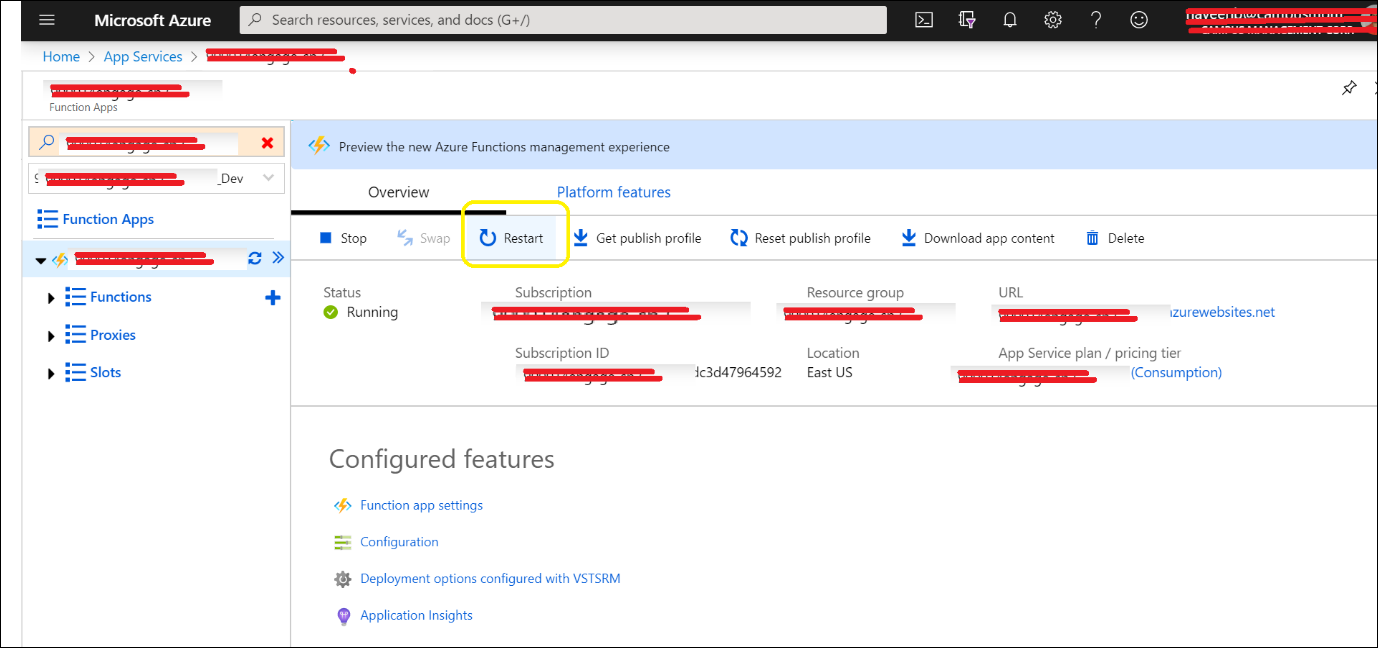
- Click OK and then restart the Azure App Service.
-
Update the Customer Variable CMC_GoogleServiceAccount with the JSON file value to retain the Azure function configuration after upgrades.
- Step owner: Professional Services staff or institution’s administrator.
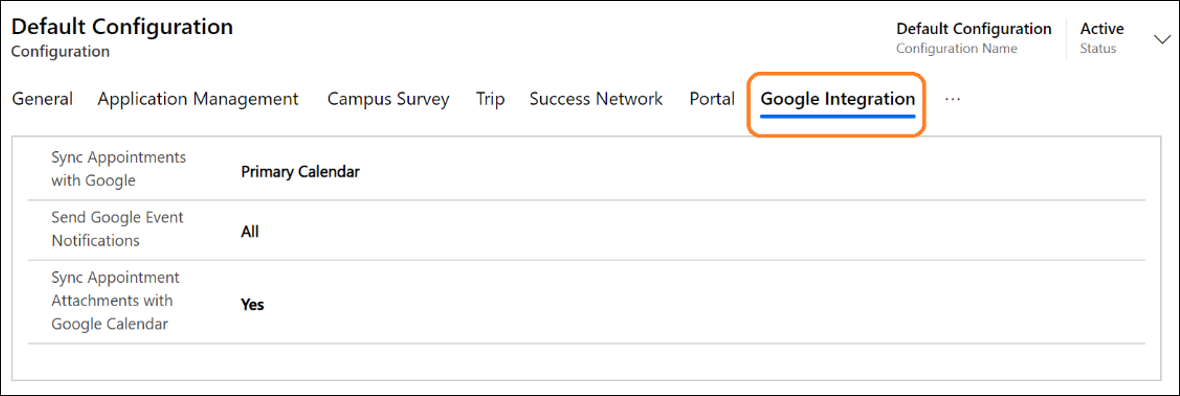
In the Default Configuration page, based on your business need set the following values.
For example:
-
Step owner: Professional Services staff or institution’s administrator.
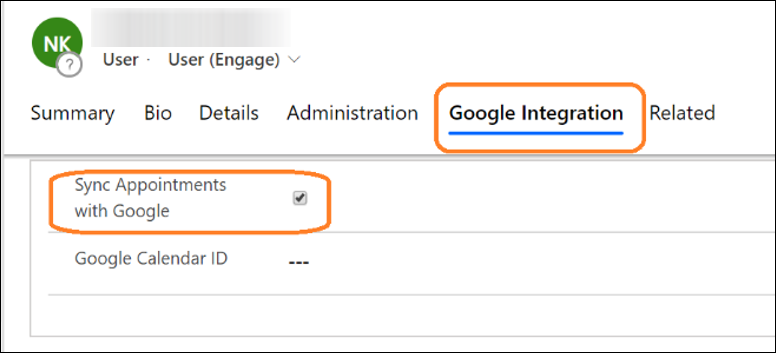
For users who need appointments to be synced with their Google account, ensure
- Step owner: Deployment team
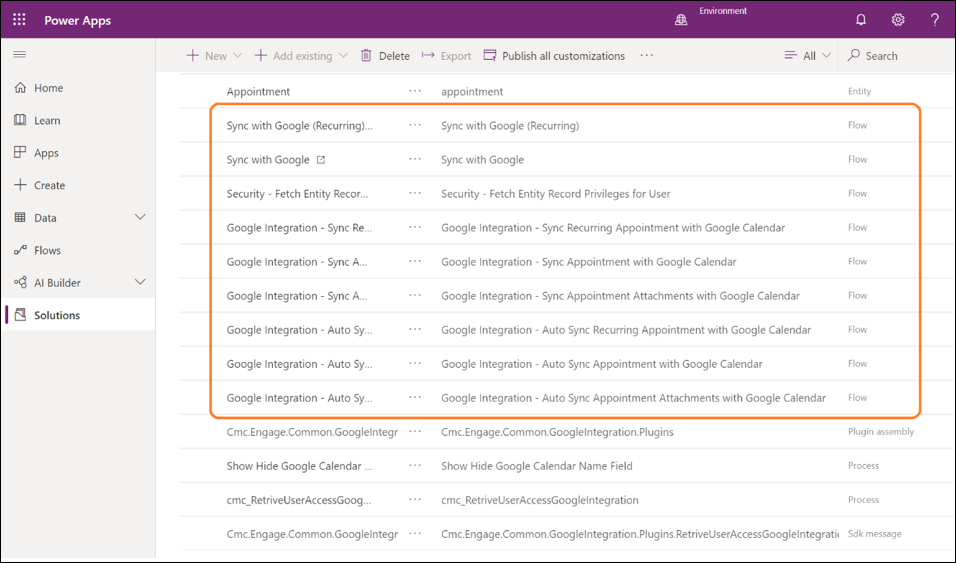
Ensure the following processes are activated:
- Google Integration - Sync Appointment with Google Calendar
- Google Integration - Sync Recurring Appointment with Google Calendar
- Google Integration - Sync Appointment Attachment with Google Calendar
- Google Integration - Auto Sync Appointment with Google Calendar
- Google Integration - Auto Sync Recurring Appointment with Google Calendar
- Google Integration - Auto Sync Appointment Attachment with Google Calendar
- Security - Fetch Entity Record Privileges for User
-
Step owner: Professional Service / Deployment team
Domain details from the Import/Export tab must be passed to the institution.
-
Step owner: Institution's Google administrator
-
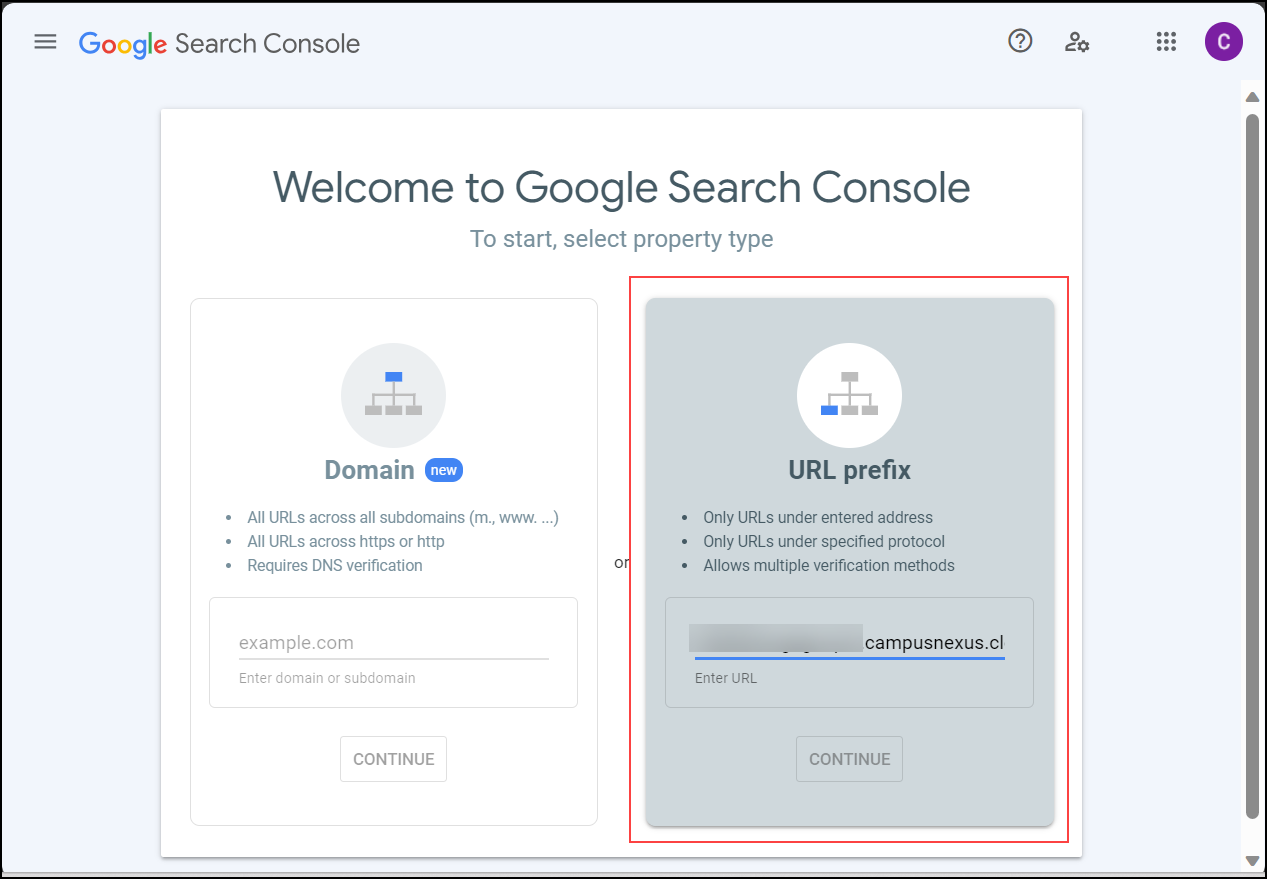
As Google admin go to https://search.google.com/search-console/welcome.
-
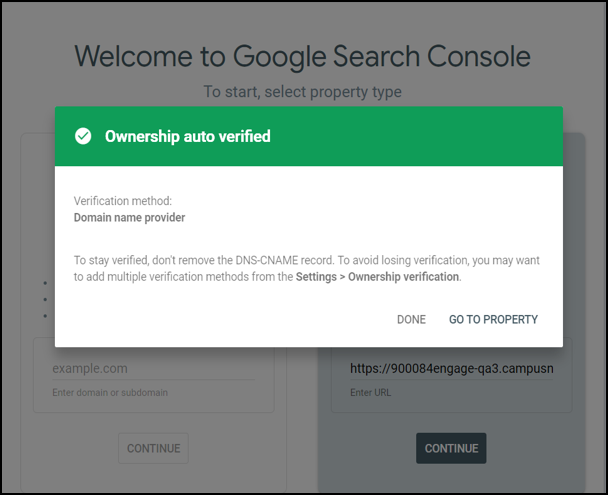
In the URL Prefix tile, specify the URL of the Reach environment for domain verification, and click Continue.
The following message will be displayed to indicate that the domain is successfully verified.
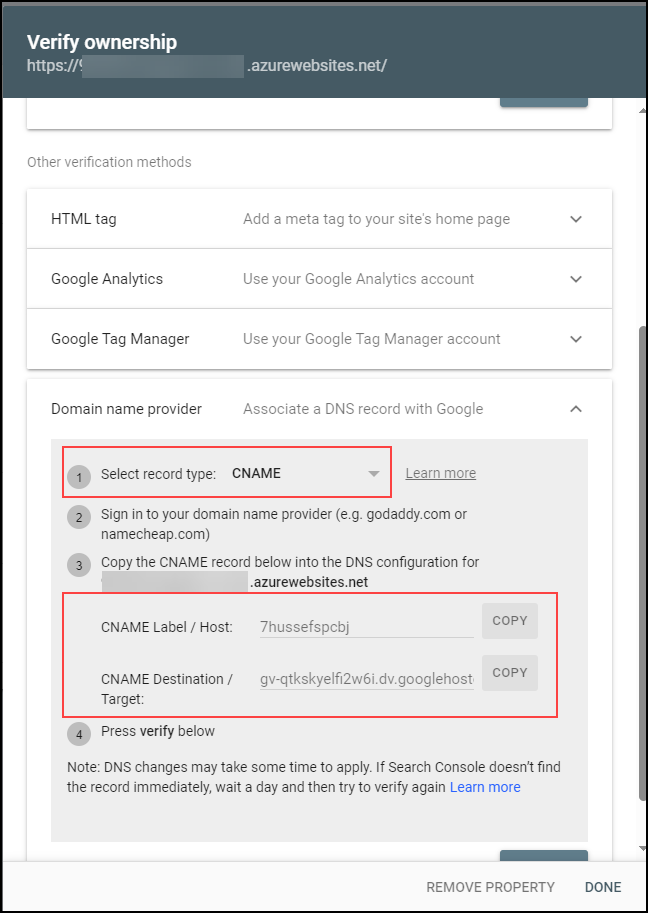
If the domain is not added in the Google cloud the Verify ownership dialog box is displayed.
Perform the following steps:
-
-
Step owner: Professional Services / Cloud Platform
-
Staff from Professional Services will pass the CName record details to the Cloud Platform team.
-
The Cloud Platform team will need to add the CName details in the DNS and confirm with Professional Services that it's done.
-
Professional Services must then communicate with an administrator at the institution to verify domain ownership.
-
-
Repeat step 2for domain verification.
