Form Sections
A Form Section has a set of fields and section dividers in the Layout pane of Form Designer. Form sections can be styled as distinct segments within a form, and they can be saved to reusable units.
Style Form Sections
For any Form Section, you can use the Class and Title properties to change the rendered display of the Form Section.
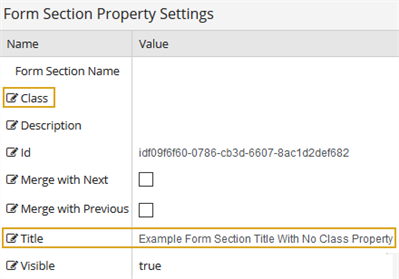
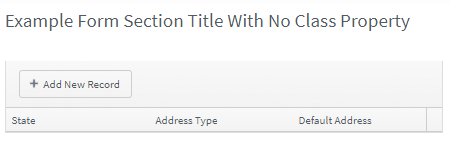
Default Rendering of a Form Section Title without Class Property
Apply a Style to a Form Section
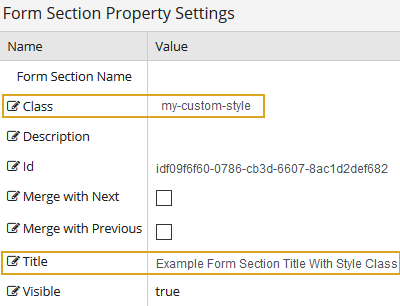
When a custom style defined in a .css file and specified in the Class property is applied to a Form Section, it modifies entire Form Section, not just the Title.
The following "my-custom-style" definition is rendered as shown below.
.my-custom-style {
    white-space: normal;
    background-color:lightblue !important;
    }
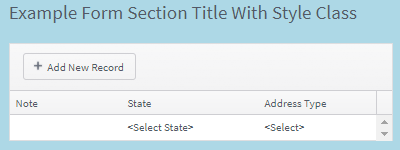
Rendering of a Form Section Title with Class Property Applied to Entire Form Section
Apply a Style to a Form Section Title
To apply a class style only to the Form Section Title, use a .css definition similar to the following example:
.my-custom-TitleStyle > span.fb-form-section-title {
    width: 100%;
    white-space: normal;
    display: inline-block;
    background-color:darkgray !important;
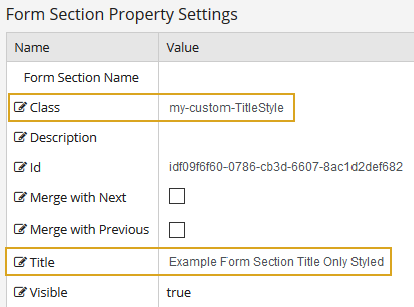
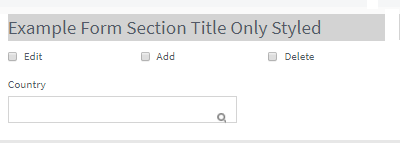
Rendering of a Form Section Title with Class Property Applied Only to Title
Hide Empty Space for a Form Section with E-Sign Components
When you design a form with hidden fields or Form Sections, you may need to hide the empty space for e-sign components to ensure that the form is rendered as intended. To hide the space for e-sign components:
-
Place the e-sign components in their own Form Section (usually at the bottom of a form).
-
In the Form Section Property Settings, specify the Class name hideDocuSignWhiteSpaceInFormSection.
-
Save the form. Forms Builder will not render the Form Section on the screen but will allow it to render when it is printed to a PDF.
Visible Property
The Visible property is available for Form Sections in Forms Builder 3.4 and later. If set true (default), all contents of the Form Section will be displayed when the form is rendered. If set to false, all contents of the Form Section will not be displayed at render time.
In Forms Builder 3.6 and later, this property can be dynamically bound using a vm.models. value or an expression that evaluates to true or false. The default is true.
The Visible property can be used for many reasons, e.g.:
-
You have added a custom script to an HTML component and stored it as a Form Section. You want the ability to drop this custom script on any page. However, if the Form Section cannot be hidden, there will be an empty panel on the page.
-
You have workflow logic bound to an argument or just bound variable logic on a page which makes a given Form Section conditionally visible. This makes it possible to hide a group of controls programmatically instead of hiding each control and being unable to hide the panel that contains them.
-
You specify an argument (e.g., vm.models.showSection) in the Model property of a Checkbox control and then use the same argument in the Visible property of a Form Section. The Form Section will be displayed only if a user selects the check box.
Layout Enhancements
In Forms Builder 3.6 and later, the column layout options for Form Sections provide additional flexibility. You can select from 1-12 columns, set up columns with different widths, and you can merge Form Sections using the 'Merge with Next' and 'Merge with Previous' properties.
Flexible Column Layout
The Form Section below has 4 fields with different widths. The first 2 fields take up 2 columns each; the other 2 fields take up 4 columns each. The maximum width is 12 columns. The left pointing arrows above the controls indicate that the width of each field can be decreased, but not increased.

After reducing the width of the Note field, right pointing arrows appear above the fields indicating that there is space available to increase the width of any field.

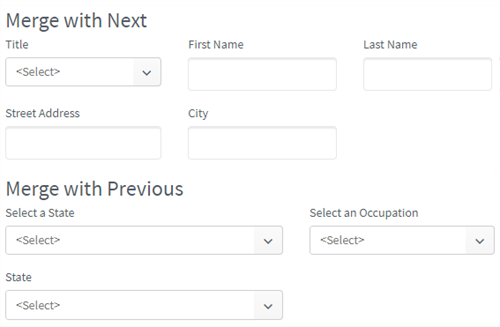
Merged Form Sections
To render Form Sections without the horizontal rule that divides Form Sections by default, you can use the "Merge with Next" and "Merge with Previous" properties. These properties must be paired, i.e., when "Merge with Next" is selected for a Form Section, the next Form Section must have "Merge with Previous".
The image below shows how two Form Section are rendered when the first Form Section has the "Merge with Next" property and the following Form Section has the "Merge with Previous" property. Note that there is no visible section divider.
Reusable Form Sections
Forms Builder provides ability to create and save Form Sections as independent reusable units. Once saved, Form Sections are accessible from the Form Sections tab in Form Designer and can be dropped on to other forms. A Form Section in a form is saved with all of the included form properties as well as any applicable properties that exist for the Form Section itself.
Create and Save a Form Section
-
In Form Designer, click New to activate the Layout pane.
— OR —
Click the vertical Forms tab to the left of the Field Properties area and select a form. Continue with step 4.
-
Select a Column layout (1, 2, or 3 columns) and click
 to add a section divider.
In Forms Builder 3.6 and later, the Column layout options include 1-12 columns and the Merge With Next / Merge With Previous properties.
-
From the Fields panel, drag a Field into the Layout pane, and/or select a Component from the Components panel and drop it into the Layout pane. Specify any applicable values in the Property Settings pane.
Repeat this step as necessary to assemble the desired Form Section in the Layout pane.
-
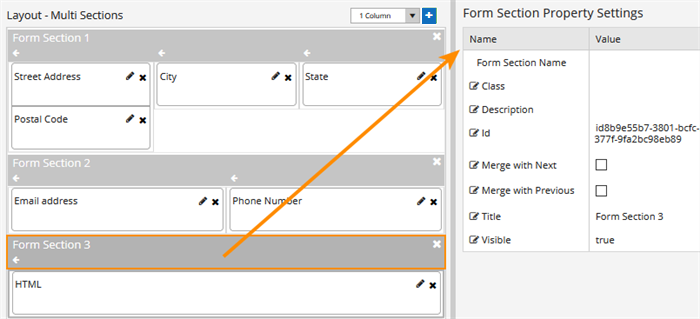
Select the section divider in the Layout pane and specify the Form Section Property Settings.

-
Class is an optional CSS class (or space separated classes) added to the top level of the control. CSS specific to the control can be applied. The class must be defined in a Renderer CSS file. For more information, see Custom Styles.
-
Description is an optional field to describe the Form Section.
-
Id is required. It can be any valid JavaScript id attribute value. (Must start with a letter followed by 0 to 9, a to z, dash, or underscore characters).
-
Using a globally unique identifier (GUID) from GuidGen or GuidGenerator prefixed by at least one letter prevents a clash with any other id.
-
Id should contain only a to z (uppercase or lowercase), 0 to 9, dash, or underscore. It should not have spaces.
-
Binding is not supported for this property.
-
-
Merge with Next and Merge with Previous enable you to merge sections on a form. For more information, see Merged Form Sections above.
-
Title is displayed at the top of the Form Section when the form is rendered.
-
Visible makes the Form Section visible or hidden. This property can be dynamically bound using a vm.models. value or an expression that evaluates to true or false.
Forms Builder validates the Forms Section properties. Invalid properties will be marked with an icon (
 ). The Layout pane will display a red border on the affected Form Section. If you try to save a Form Section with errors, an error message will be displayed.
 -
-
Click the Save Section button. The section divider in the Layout pane now indicates the Title of the Form Section and, in parentheses, the Form Section Name.
-
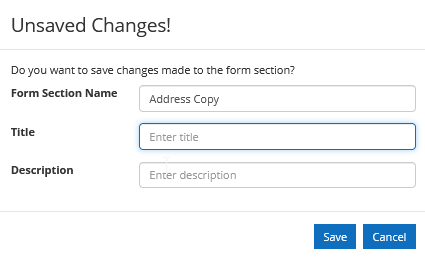
In the Unsaved Changes dialog specify the Form Section Name (required), Title (optional), and Description (optional). Click Save to continue.
The Form Section tab indicates the Form Section Name after the Form Section is saved.
All applicable data for the Form Section is persisted to the database.
Edit a Form Section
-
In Form Designer, click New to activate the Layout pane.
-
On the Form Sections tab, select a Form Section, and drop it into the Layout pane.
-
Edit the Form Section by adding or removing Fields and/or Components and/or editing the Form Section Property Settings.
-
Select the section divider for the Form Section.
Click Save Section to retain the Forms Section Name, Title, and Description.
— OR —
Click Save Section As to change the Forms Section Name, Title, and Description.
Note: When a Form Section is edited as described above after the Form Section has already been used in one or more forms, the edits are not propagated to the form instances where the Form Section is used.
Add a Form Section to a Form
-
In Form Designer, create a new form.
-
Click New to activate the Layout pane.
-
Select a Column layout (1, 2, or 3 columns) and click
. -
From the Fields panel, drag a Field into the Layout pane, and/or select a Component from the Components panel and drop it into the Layout pane. Specify any applicable values in the Property Settings pane.
-
Repeat this step as necessary to assemble the desired form in the Layout pane.
— OR —
-
Click the vertical Forms tab to the left of the Field Properties area and select a form.
-
-
Select the Form Sections tab and drag a Form Section to the Layout pane.
Edit a Form Section in a Form
-
Click the vertical Forms tab to the left of the Field Properties area and select a form that contains a Form Section.
-
Edit the Form Section.
-
Select the section divider of the Form Section and click Save Section or Save Form Section As.
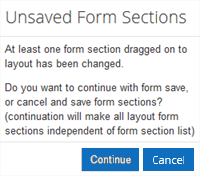
The "Unsaved Form Sections" dialog is displayed:
-
If you click Save instead of Save Section or Save Form Section As after editing a Form Section within a form.
— OR —
-
If you click
 to navigate back to the home page.
When this dialog is displayed, you have the following options:
-
Click Cancel and then click Save Section to save the changes to the Form Section. In the Unsaved Changes dialog specify the Form Section Name (required), Title (optional), and Description (optional). Click Save to continue. The revised Form Section is saved to the database and listed on the Form Sections tab.
-
Click Continue to save the form. In the Unsaved Changes dialog, specify the Form Name (required), Title (optional), and Description (optional). Click Save to continue.
Notice that the section divider in the Layout pane no longer indicates the Form Section Name after the form is saved.
Note: Changes made to a Form Section in a form are not saved to the Form Section in the database. The Form Section in the database will retain the original Form Section fields.
-
Delete a Form Section
On the Form Sections tab, select a Form Section, and click Delete Section. The Form Section is removed from the Form Sections tab.
If the deleted Form Section is used in a form, the Form Section Name is removed from the section divider, but the fields of the Form Section remain on the form.
Delete a Form Section from a Form
In the Form, select a Form Section, and click the ![]() icon below the title bar of the Form Section.
icon below the title bar of the Form Section.