Payment Processing with PayPal
Note: This help topic contains several links to the paypal.com website. The links may change without notice. If a link is broken, please search the PayPal documentation or contact PayPal for the latest information.
Create a Payflow Pro Account
Set up an account (in test or live mode) at https://manager.paypal.com/.
-
Click the link to set up a new account.
-
On the next page, click Get Started Today.
-
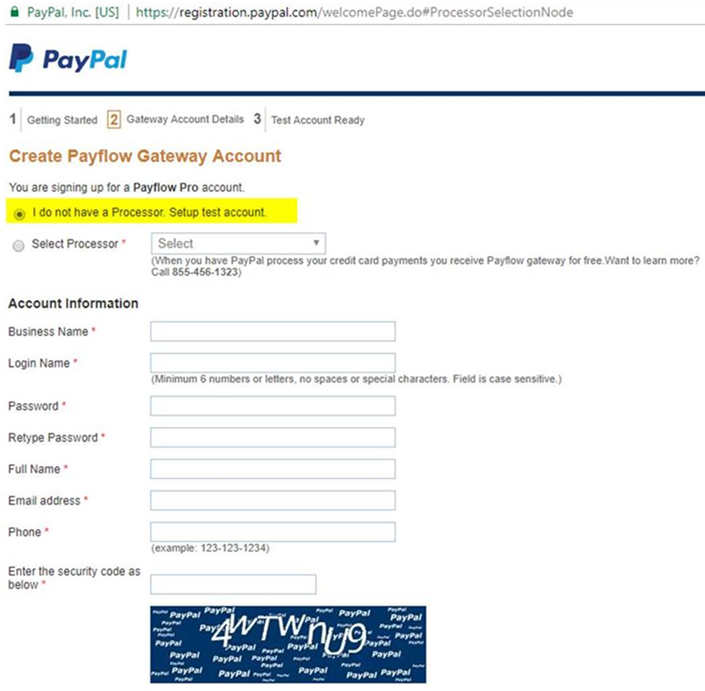
Select the PayFlow Pro option. The Create Payflow Gateway Account page is displayed.
-
Select the option I do not have a Processor. Setup test account and follow the instructions.

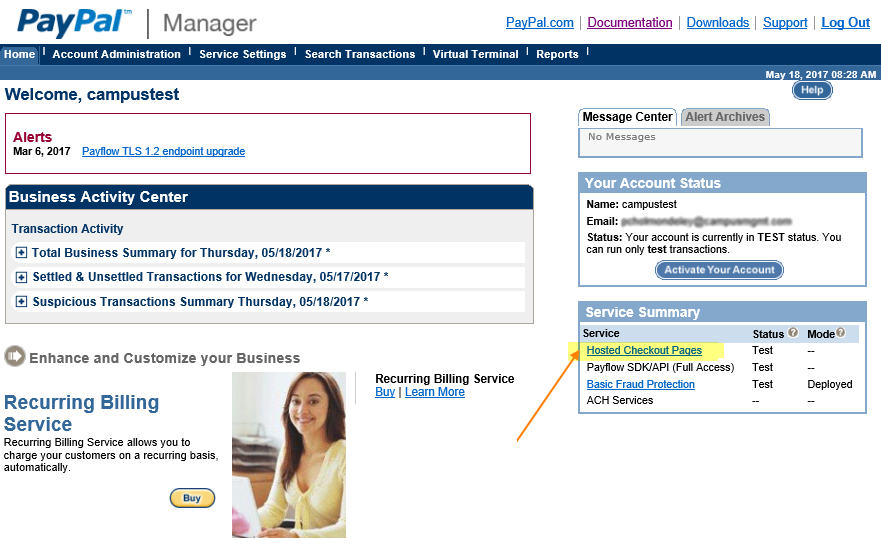
If you already have a PayFlow Pro account, ensure that Hosted Checkout Pages is enabled when you log in to https://manager.paypal.com/. ![]()
Contact a PayPal representative if you have any issues with doing this.
Set Fraud Protections Filters for Your Account
When you create a test account, all the fraud filters are turned on by default. When the account is used in Forms Builder, transactions will fail with the following message when users try to enter their card information on the PayPal checkout page:

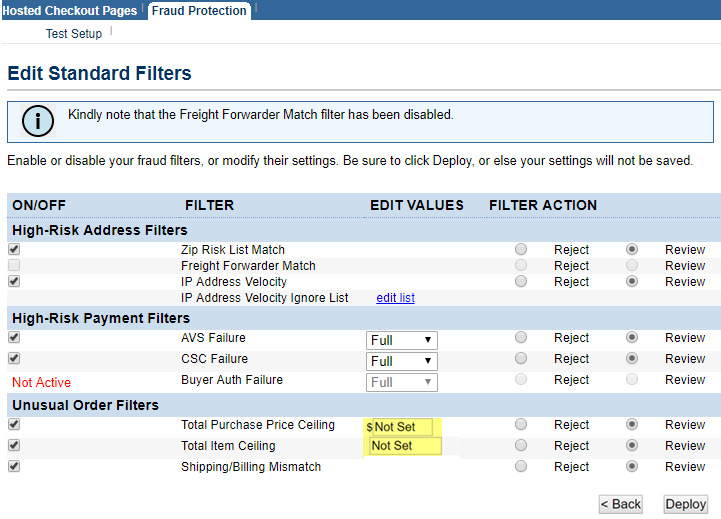
This is because the Total Purchase Price ceiling and Total Item Ceiling filters are enabled, but the amount is not set. The filters kick in and the transactions will need to be reviewed and manually approved. To fix this for future transactions, perform the following steps:
-
Go to your PayPal test account and navigate to Service Settings > Fraud Protection > Test Setup. The Edit Standard Filters page is displayed.
-
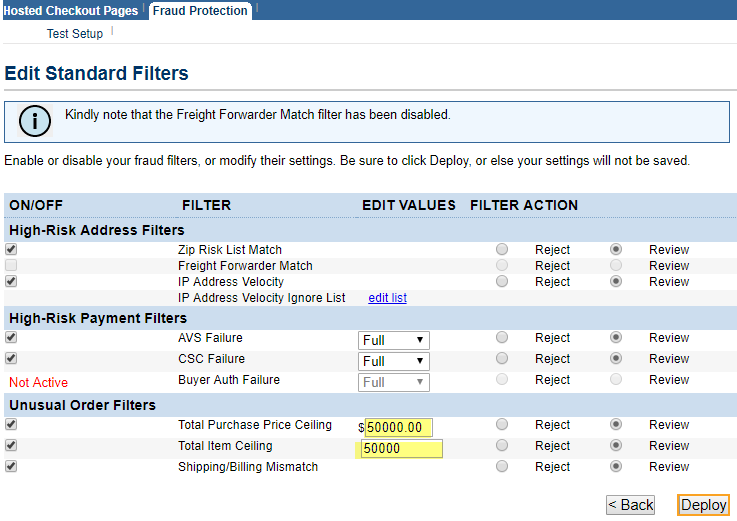
Enter some $ values in the Total Purchase Price Ceiling and Total Item Ceiling filters and click Deploy.
Populate Forms Builder Settings
In the Forms Builder Settings workspace, populate the HostedPageUrl, Partner, Password, PaymentUrl, User, and Vendor fields. ![]()
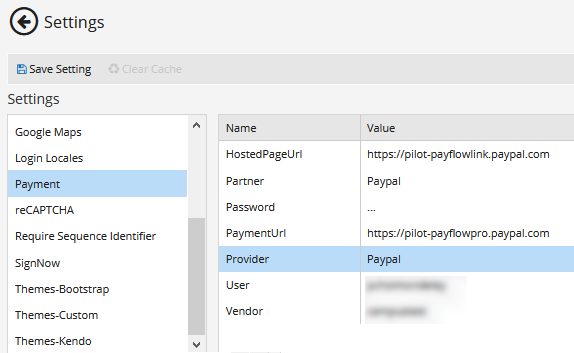
Provide the Password, User, and Vendor values. The remaining fields are preset. If you change the credit card payment provider later, you must update the URLs, remove the Partner entry, and update the Password, User, and Vendor. The values specified in the Settings workspace are saved to the web.config file for Form Designer.
| Name | Value | ||
|---|---|---|---|
| HostedPageUrl | URL that identifies the location of the payment processor's page: https://pilot-payflowlink.paypal.com
|
||
| Partner | Partner for your PayPal Manager account. It is the same field you use when you log in to https://manager.paypal.com/. | ||
| Password | Specify the Password (case sensitive) used to log in to https://manager.paypal.com/. | ||
| PaymentUrl | URL that identifies the payment page in live or test mode:
|
||
| Provider | Name of the credit card payment provider: PayPal. | ||
| User | Specify the User (case sensitive) used to log in to https://manager.paypal.com/. It can be the same as the Vendor. The User is optional, but PayPal highly recommends using it. Create a User against which API calls can be made. Create a User from the Account Administration > Manage Users > Add User page. Refer to PayPal Manager documentation for more information. |
||
| Vendor | Specify the Vendor (case sensitive) used to log in to https://manager.paypal.com/. |
|
|
Whenever you edit a field in a Settings panel with hidden fields (i.e., sensitive data that are removed from the client-side view like passwords, keys, and secrets), you must re-enter the hidden values, otherwise they will get cleared upon update and resave of all the Settings. |
Configure the Hosted Payment Page
The fields displayed on the hosted payment page are configurable. To configure the fields, perform the following steps:
-
Log in to your account at https://manager.paypal.com/.
-
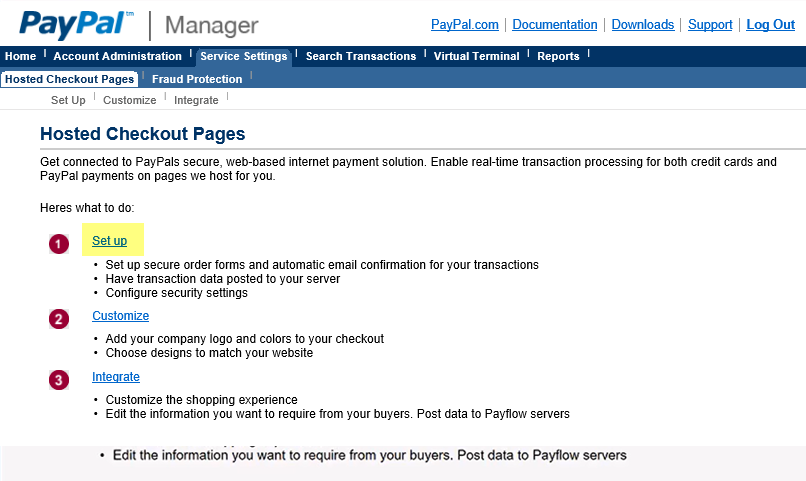
On the Home page, click the Hosted Checkout Pages link.
-
On the Server Settings page, click Setup.
-
On the Service Settings page > Set Up tab, select the billing information settings that are appropriate for your institution. Specify which fields are required or optional, which fields are editable, and so on. Refer to the PayPal Manager documentation for more details about these settings.

In the Payment Information section of the Set Up tab, specify the text for the Return URL link and ensure that the Return URL Method is set to POST (default: GET). Without this setting, the payment process with the Credit Card Payment component and VerifyCardPayment activity will not work. 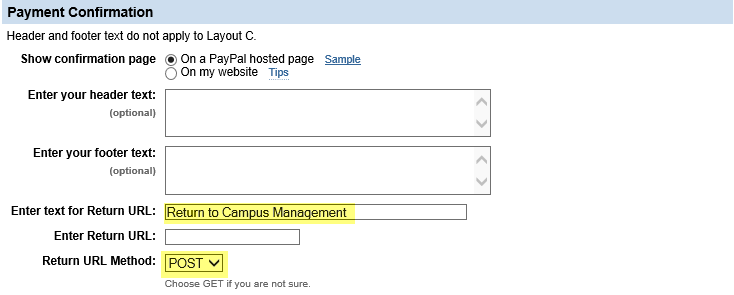
-
In the Security Options section, select Yes to Enable Secure Token.

-
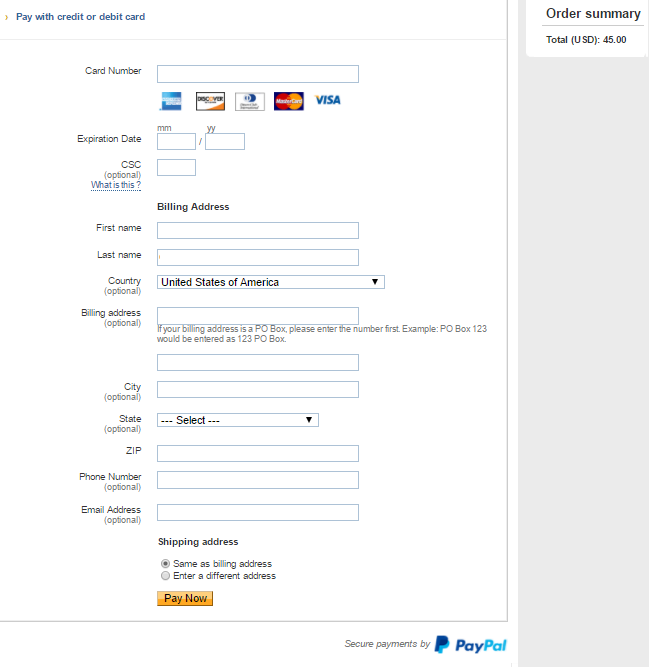
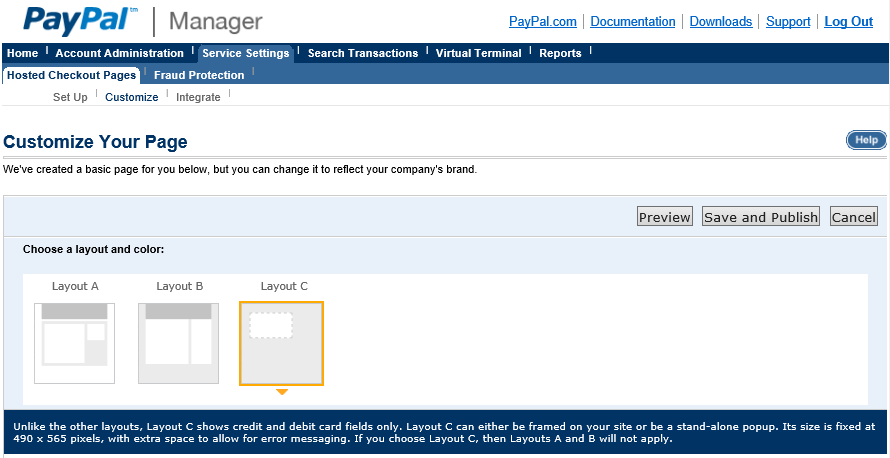
On the Service Settings > Customize tab, select either Layout A or Layout B for the hosted payment page.
Example: Layout ANote: Layout C cannot be used with Forms Builder sequences because it does not provide a Return URL link to return to the Forms Builder site after the payment is made.
Refer to the PayPal Manager documentation for more details: https://developer.paypal.com/docs/classic/payflow/gs_ppa_hosted_pages/.
-
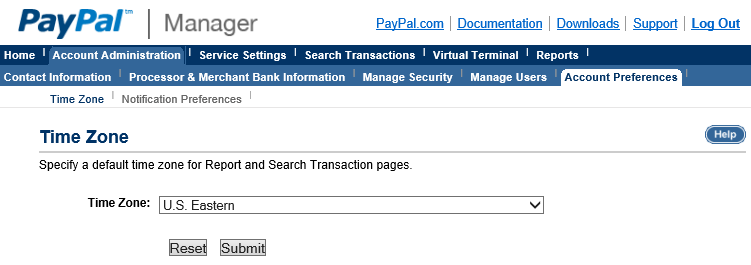
On the Account Administration > Account Preferences tab, select the Time Zone of the Forms Builder server. The VerifyCardPayment activity uses the time stamp returned by the PayPal server and compares it to the current time stamps in the workflow. If the time stamps don't match, the activity returns a negative result and the payment transaction is not verified.
Card Numbers for Testing
To test your form, refer to the following website to obtain credit card numbers for testing: