We recommend that you install this gateway on a server that is running the data source you will be connecting to. While you can install it on a different machine, you will reduce potential network latency by having it on the same machine.
-
Go to https://powerbi.microsoft.com/en-us and click the See all downloads link at the bottom of the page.
-
Click the Download button for the Microsoft on-premises data gateway and complete the setup steps.
-
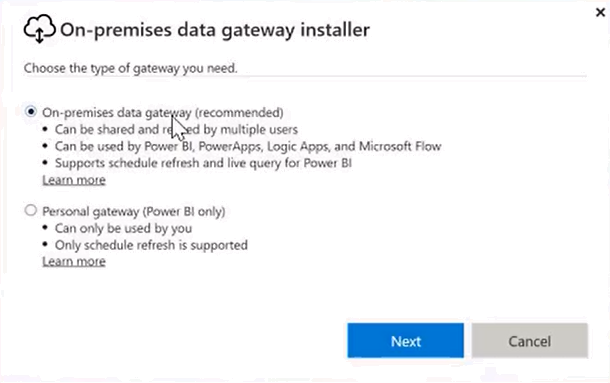
When the download is complete, install the on-premises data gateway on your desktop. Click Next.
-
Select the option to install the On-premises data gateway (do not select the "Personal gateway"). Click Next to start the download.
-
Note that the gateway should be installed on a computer that is always on and not asleep. Click Next.
-
Select a location for the gateway to be installed, accept the terms of use and privacy statement, and click Install.
-
When prompted, enter the email address of the account set up within the Power BI tenant. This should be a generic (not personal) email address, e.g., PowerBi@campusmgmt.com.
-
Select your Power BI email address to sign in to the gateway at Microsoft Azure.
-
When you are signed in and ready to register the gateway, select Register a new gateway on this computer and click Next.
-
Specify the Gateway name and Recovery key and click Configure.
Note: The recovery key is a password used to restore the gateway.
-
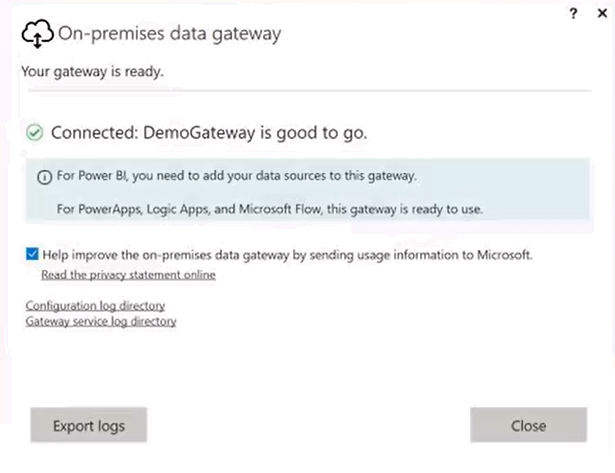
A confirmation message is displayed. Click Close.
-
Now we need to add data sources to this gateway. To do so, go to https://powerbi.microsoft.com/en-us and click Sign in.
-
In Power BI, click
 and select Manage gateways.
 -
Select the gateway you just added and click Add data sources to use this gateway.
-
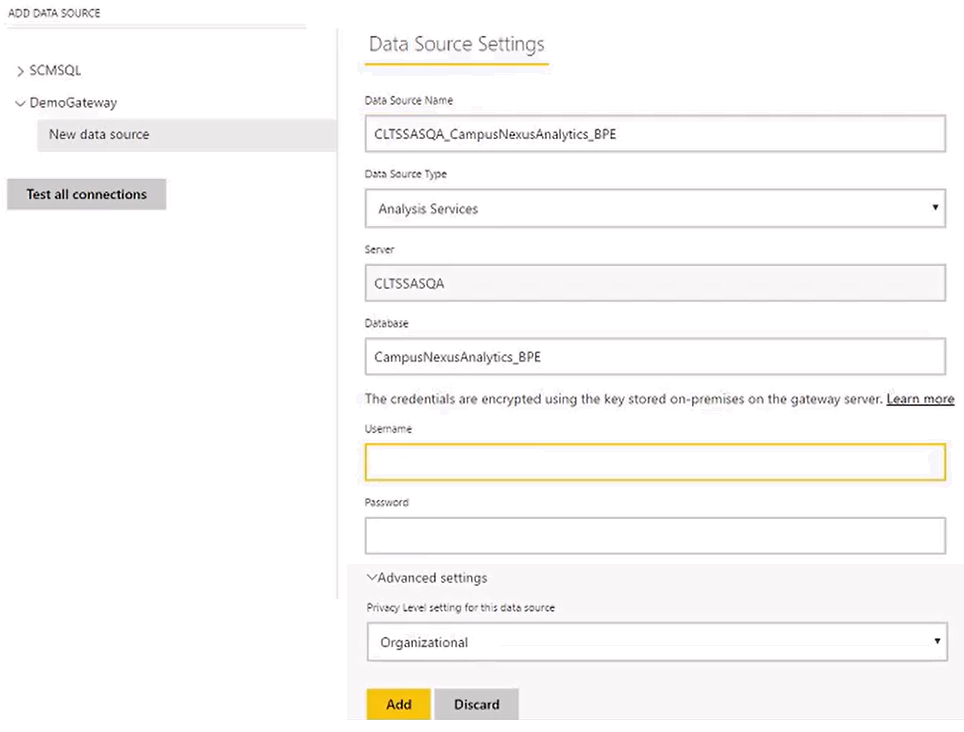
Complete the "Data Source Settings" form and click Add.
Notes:
-
A naming convention for the Data Source Name could be <server>_<database>
-
The user specified on this form must have permissions to the database.
-
Click Advanced Settings and verify that the privacy level is set to Organizational.
-
-
The message Connection successful! is displayed. The data source is now created under the new gateway. The data source is ready for use for any pbix files that are created for this data source.


