|
|
This section applies only when you are installing Analytics on-premises. When you are installing Analytics for PaaS, you do not need to set up the Microsoft On-Premises Data Gateway. |
Power BI connects to Analytics using the Microsoft Data Gateway. The gateway provides a secure connection from the Power BI Service to Analysis Services data sources for Analytics. Establishing a connection to Analysis Services through the gateway is required to publish and view Power BI reports for Analytics.
Prerequisites
Review the prerequisites to ensure they are met before moving forward.
You must have:
-
A Power BI Pro account with admin access to register and manage the Microsoft Data Gateway. This account should be a generic account not linked to an actual user (for example, PowerBIadmin@yourdomain.com).
-
If you are self-hosted, a machine to host the gateway (see server requirements)
-
Credentials for a Service Account with server administrator access to the Analysis Services server
-
Data Source settings information to connect to the Analysis Services data models:
- Server Name
- Data Model Names
- Service Account credentials
We recommend that you install this gateway on a server that is running the data source you will be connecting to. While you can install it on a different machine, you will reduce potential network latency by having it on the same machine.
Power BI connects to Analysis Services via the Microsoft On-Premises Data Gateway. The gateway is installed and registered to the customer tenant as part of the post installation tasks for Analytics. This enables the Microsoft Power BI service to connect reports to the Analysis Services data models.
Cloud customers will have the gateway installed and registered as part of the post installation process after Analytics is installed.
The steps outlined below are required to install and register the data gateway if you are self-hosted.
Note: The minimum screen resolution supported for the on-premises data gateway is 1280 x 800.
Download and Install the Gateway
-
On the machine where you will install the gateway, visit https://app.powerbi.com/ (Power BI Service) and sign in using the Power BI Pro Account.
-
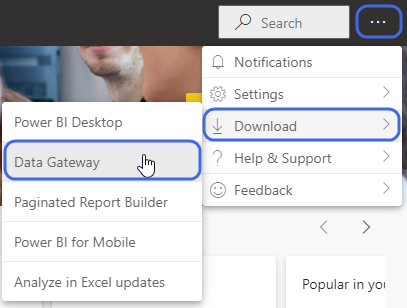
Click the options (...) at the top right, select Downloads and select Data Gateway.
-
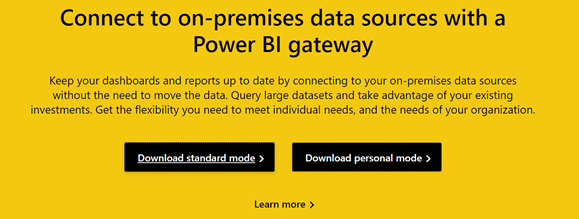
Click Download standard mode and install the GatewayInstall.exe file.
-
When the download is complete, install the on-premises data gateway on your desktop.
In the gateway installer, keep the default installation path, accept the terms of use, and then select Install.

-
Enter the email address for your Office 365 organization account and then select Sign in.

Note: You need to sign in with either a work account or a school account. This account is an organization account. If you signed up for an Office 365 offering and didn't supply your work email address, your address might look like nancy@contoso.onmicrosoft.com. Your account is stored within a tenant in Azure AD. In most cases, your Azure AD account’s User Principal Name (UPN) will match the email address.
The gateway is associated with your Office 365 organization account. You manage gateways from within the associated service.
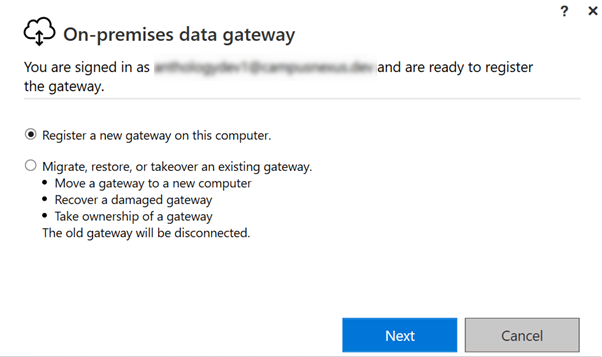
You're now signed into your account.
-
Select Register a new gateway on this computer and click Next.
-
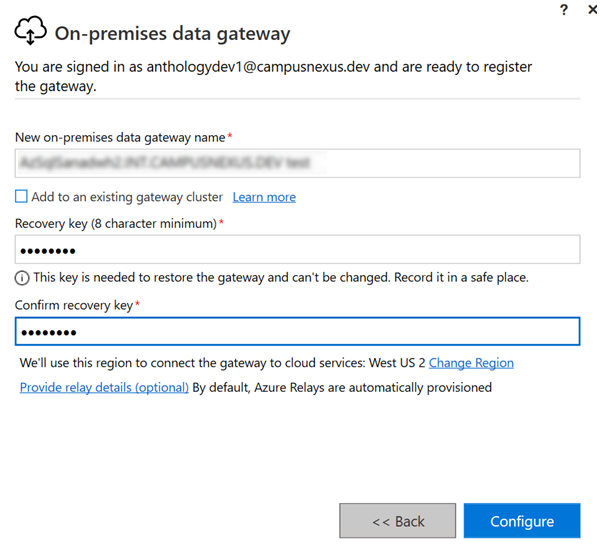
Enter a name for the gateway. The name must be unique across the tenant.
Also enter a recovery key. You'll need this key if you ever want to recover or move your gateway.
Select Configure.
-
Review the information in the final window. Because this example uses the same account for Power BI, Power Apps, and Power Automate, the gateway is available for all three services. Select Close.
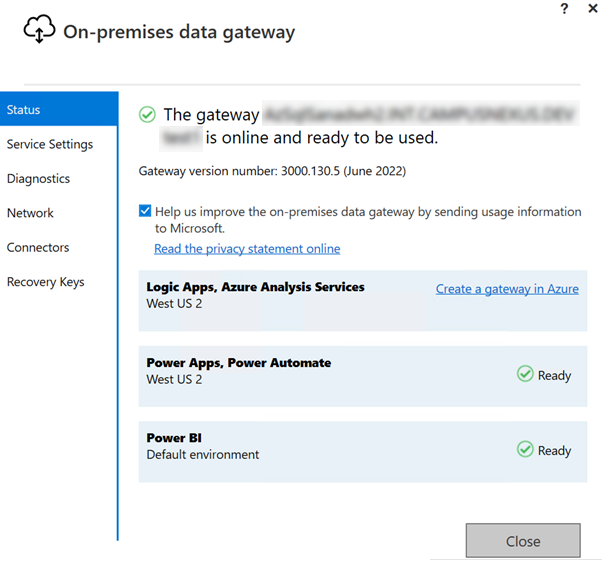
Verify the Gateway Connection
Note: Manage gateways will not show up until you're the admin of at least one gateway. You become an admin either by being added as an admin or because you installed and configured a gateway.
-
Log in to Power BI Service (https://app.powerbi.com/) with the tenant account used to register the gateway.
-
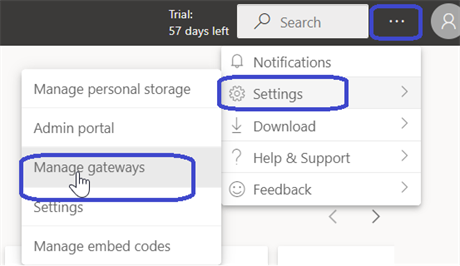
Click options (...) at the top right, select Settings, and select Manage gateways.
-
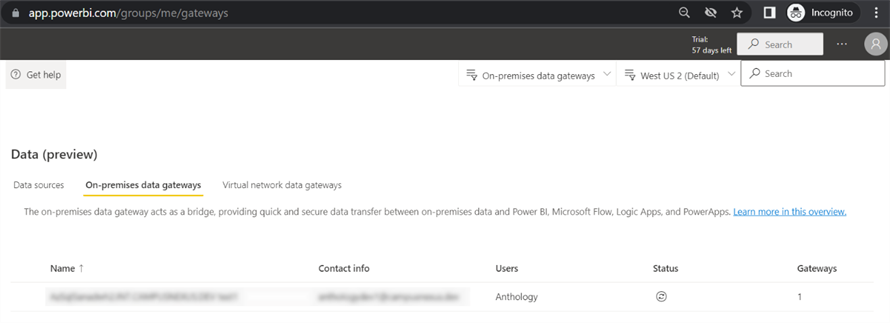
Verify the gateway is available on the On-Premises data gateways tab.
Provision Gateway Administrators
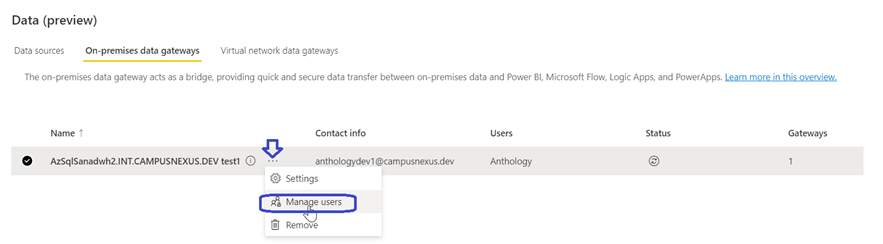
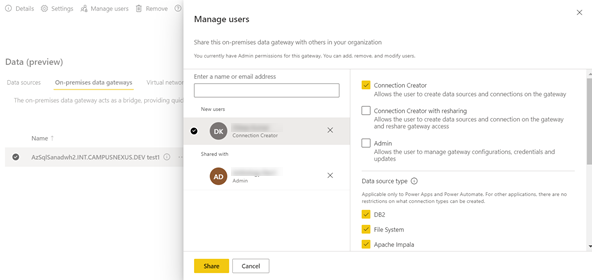
After the Power BI gateway is installed and verified, provision other users' access to administer the data gateway. Users provisioned as an Administrator on the gateway will be able to manage the gateway in Power BI.
-
Select the Gateway that was created for Analysis Services. Click options (...) and select Manage users.
-
Enter the email address for the user and click Add. Repeat this step for all users who will have access to administer the gateway.
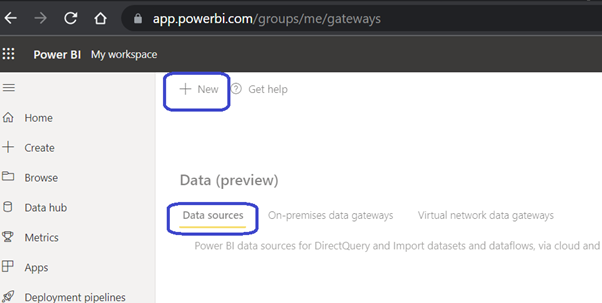
Set Up Gateway Data Sources
After the gateway is installed, you will need to add the Analysis Services data sources that will be used by the gateway for Analytics. It should now be available in Power BI as an available gateway cluster. To connect the gateway to the Analytics data models, administrators need to add the Analysis Services data models to the gateway in Power BI.
Anthology Student Data Sources:
-
Academic & Admissions Model (for example, SISACADSemanticModel)
-
Financial Aid Model (for example, SISFASemanticModel)
-
Student Accounts Model (for example, SISStudentAccountsSemanticModel)
-
Career Services Model (for example, SISCSSemanticModel)
-
Contact Manger Model (for example, SISCMSemanticModel)
CampusNexus CRM Data Sources:
-
CRM Model (if applicable)
Add Analysis Services Data Sources to the Gateway
-
Log into https://app.powerbi.com/ with the Microsoft Power BI account used to register the gateway to verify the gateway has been added.
-
Select options (...) at the top right, select Settings, and select Manage gateways.
-
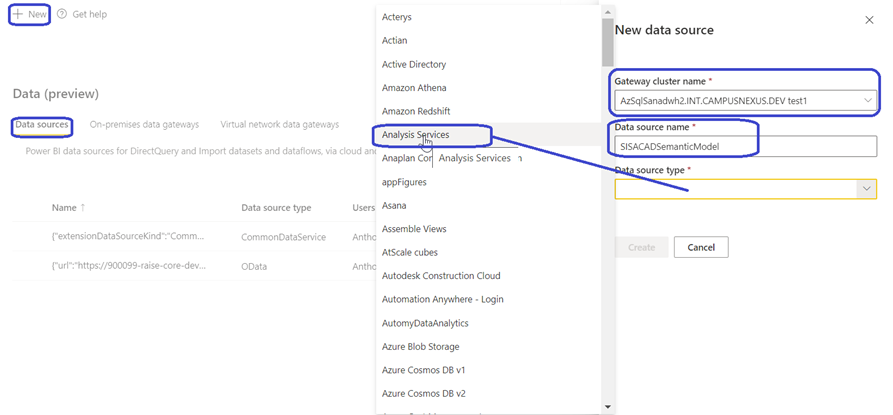
Go to Data sources and click New.
-
Select Gateway cluster name, add Data source name, and select Analysis Service.
-
Configure Analysis Services Data Source Settings as shown in the image below.

-
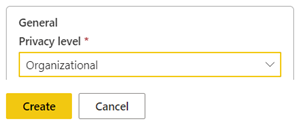
Expand Settings, select Organizational, and click Create.
-
Repeat same data source creation steps to add the remaining Analysis Services data models (depends on the Analysis Service data sets that need to be created for each model).
Provision Gateway Data Source User Access
After the Power BI data source is set up and connected successfully, provision users access to the data source. Users provisioned as a User on the data source will be able to manage the data within the source in Power BI.
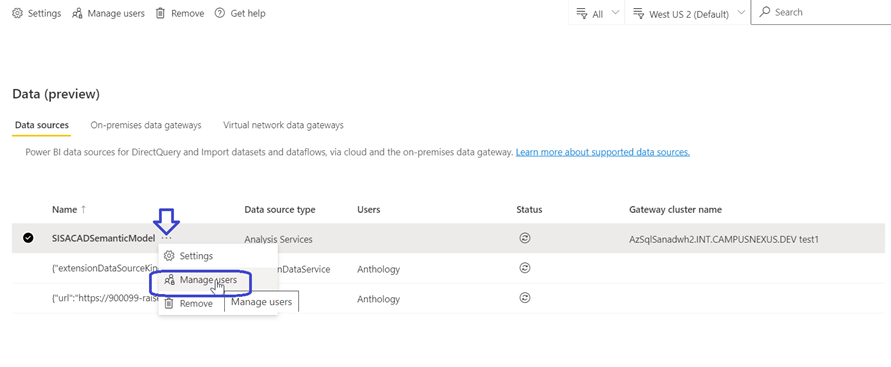
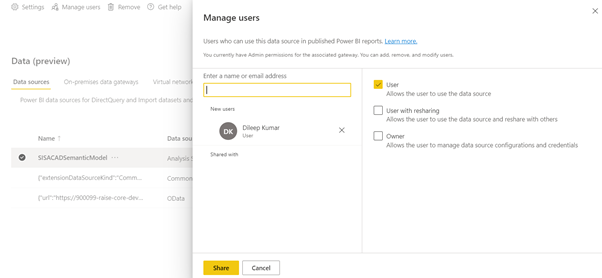
Repeat this step for remaining Analysis Services data source users.
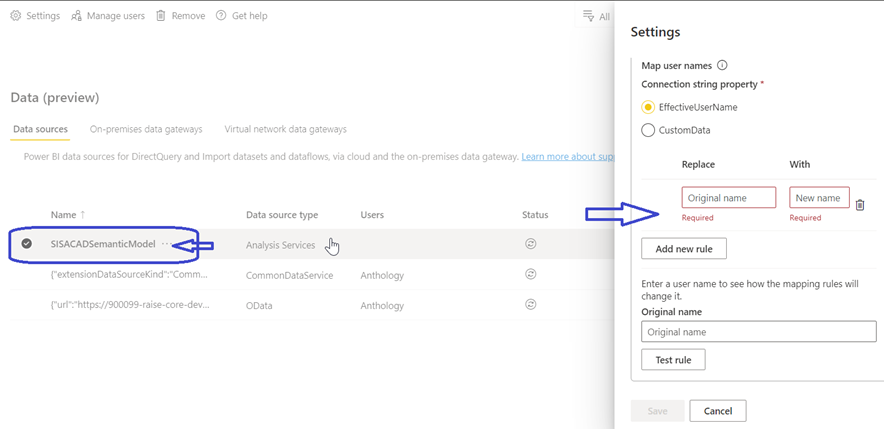
Mapping User Names
In some cases, the user names or emails used to log into Power BI may differ from the logon account name used in AD or AAD to provision access to Analysis Services data models. In these scenarios, user names mappings are needed. The scenario below outlines a case where Mapping Usernames may be necessary.
-
Power BI account is: jdoe@yourdomain.com
-
Local AD account used to access Anthology products is: jdoe@campusnet.local
A user name mapping can be created to have the user authenticate through the gateway using the Local AD Account. If mapping user names is used, it will need to be added to each data source.
Synchronize On-premises Active Directory with Azure Active Directory
-
You want each of your on-premises Active Directory accounts to match an Azure AD account, because the UPN for both accounts must be the same.
-
The cloud services know only about accounts within Azure AD. It doesn’t matter if you add an account in your on-premises Active Directory. If the account doesn’t exist in Azure AD, it can't be used.
-
There are different ways to match your on-premises Active Directory accounts with Azure AD.
-
Add accounts manually to Azure AD.
-
Create an account on the Azure portal or within the Microsoft 365 admin center. Make sure the account name matches the UPN of the on-premises Active Directory account.
-
-
Use the Azure Active Directory Connect tool to synchronize local accounts to your Azure AD tenant.
-
The Azure AD Connect tool provides options for directory synchronization and authentication setup. These options include password hash sync, pass-through authentication, and federation. If you're not a tenant admin or a local domain admin, contact your IT admin to get Azure AD Connect configured.
Azure AD Connect ensures that your Azure AD UPN matches your local Active Directory UPN. This matching helps if you're using Analysis Services live connections with Power BI or single sign-on (SSO) capabilities.
User name examples:
-
CustomerForms@Customer.edu is a Power BI Pro user.
-
CustomerForms@100569cust.campusnexus.cloud is a service account user which has Analysis Service server access.