-
Install the Power BI Desktop if you have not done so previously.
-
Go to https://powerbi.microsoft.com/en-us and click the See all downloads link at the bottom of the page.
-
Click the Download button for Microsoft Power BI Desktop and complete the setup steps as prompted.
-
-
Launch the Power BI Desktop.
-
Download the .pbix file from the Anthology Inc. FTP site, e.g., Anthology Student Analytics_<version>.pbix. The pbix file contains the report definitions for Anthology Student or CampusNexus CRM.
-
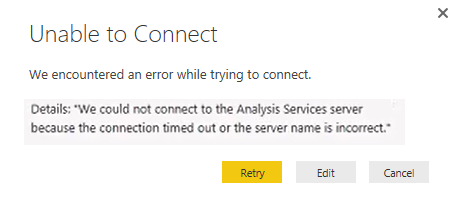
In Power BI Desktop, select File > Open and browse to the downloaded pbix file. The message "Unable to Connect" is displayed. The reason for this message is that the pbix file does not have the connection information for the Analysis Services database that is used as the source.
-
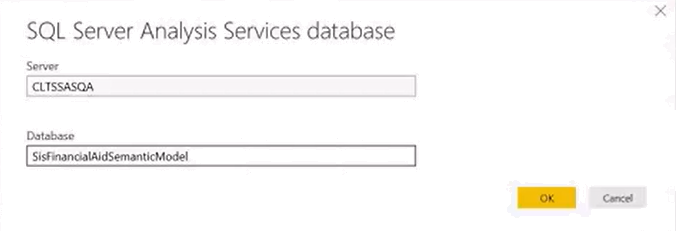
Click Edit on the "Unable to Connect" message. The SQL Server Analysis Services Database form is displayed.
-
Enter the name of your SSAS Server, specify the Database, and click OK.
Note: The datasource of the pbix file in the example below is the SisFinancialAidSemanticModel.
-
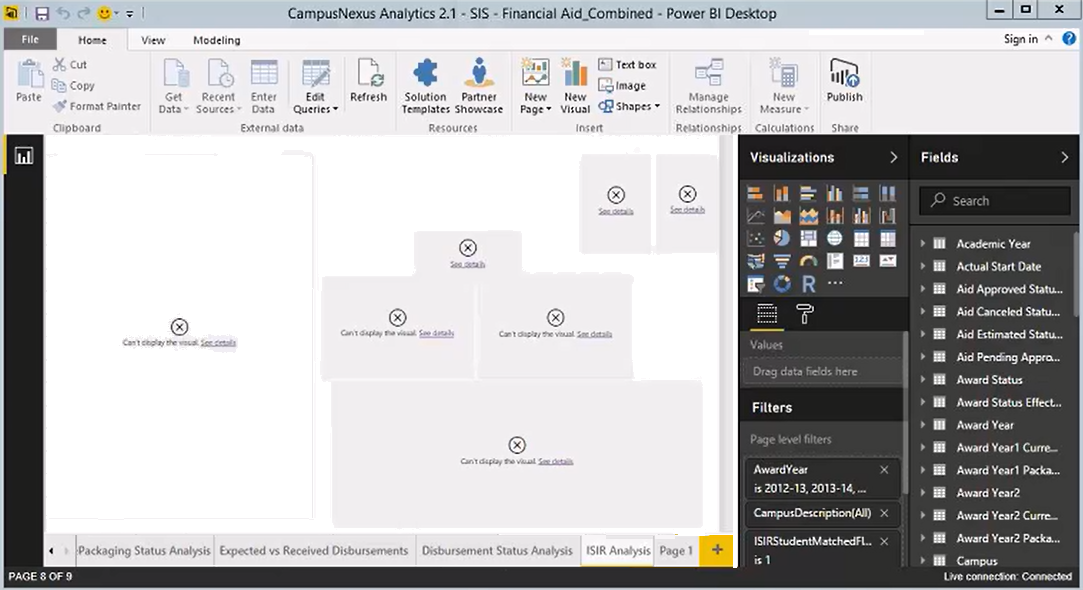
The pbix file will now be loaded to the new database. Power BI Desktop points to the new data source, i.e., the Analysis Services database which was just installed. Click the tabs at the bottom of the screen to view the sample reports provided with the product.
-
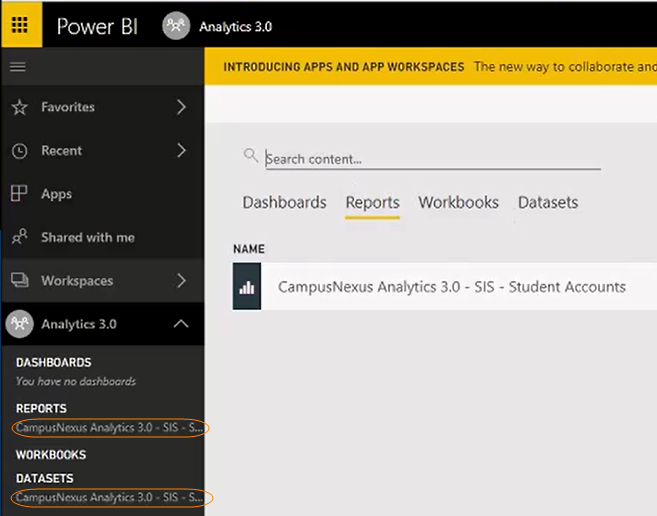
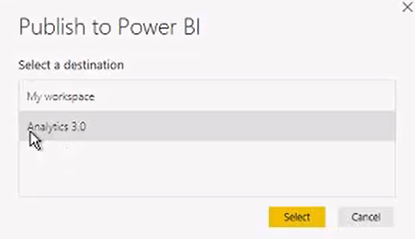
Once you have created an app workspace, Power BI prompts you to select the destination to publish to. The default is "My workspace". Select the app workspace created above. In our example the app workspace is Analytics 3.0.
-
Click Got it on the publishing success message. The pbix in our example contains a report and a dataset that were published to the Analytics 3.0 app workspace.

-
The Power BI service now shows that the Analytics 3.0 Reports and Datasets have been published.