This article describes the manual steps that must be performed to enable users to connect to Web Client on a reverse proxy server that is hosted in a Demilitarized Zone (DMZ).
The reverse proxy server must be configured using the URL Rewrite component, which can be downloaded using Web Platform Installer, and is available in IIS Manager. The URL Rewrite component is dependent on Application Request Routing (ARR), a component that is downloaded along with URL Rewrite.

The Web Client hosted in the DMZ must have the same name as the Web Client installation hosted inside the network (and behind the firewall). The identical names ensure that minimal processing and configuration is required to configure rewrite rules using the URL Rewrite component. Further, it is not required to install Web Client (and STS) or create Web Client and STS-specific folders on the reverse proxy server.
Configurations on Web Client Installed inside the network:
-
Navigate to the following code in the web.config file and update the parameters in angular brackets with appropriate values:
<audienceUris>
<add value="http://<ReverseProxyWebsiteName>:<ReverseProxyPortNumber>/<ReverseProxyServerWebclientApplicationName>/" />
</audienceUris>
<wsFederation passiveRedirectEnabled="true" issuer="http://<ReverseProxyWebsiteName>:<ReverseProxyPortNumber>/<ReverseProxyServerWebclientSTSApplicationName>" realm="http://<ReverseProxyWebsiteName>:<ReverseProxyPortNumber>/<ReverseProxyServerWebclientApplicationName>/" requireHttps="false" />
-
Save and close the web.config file.
-
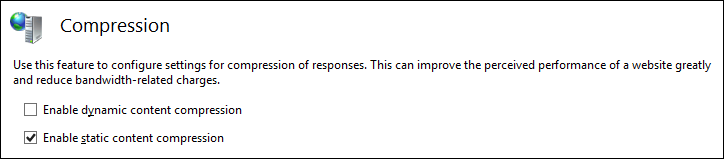
In the IIS Manager, double-click Compression and then clear the Enable dynamic content compression option.
Perform the above steps on the STS Component also.
Save your changes in IIS Manager.
Reverse Proxy Server Configuration
After configuring Web Client & STS Application in IIS, configure the following:
-
Create a Rule to Enable SSL for Web Client
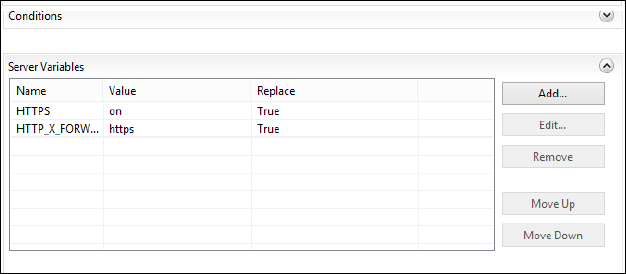
On the reverse proxy website, create two server variables - HTTPS and HTTP_X_FORWARDED_PROTO (if a load balancer is available).
-
Click the URL Rewrite option in IIS Manager.
-
In the Actions menu in the right pane, click the View Server Variables link and then click Add to add the server variables indicated above.
-
-
Add a new Inbound Rule
The inbound rule adds the HTTPS header to enable forms authentication to work correctly with SSL.
-
In the Actions pane on the right, click Add Rules. The Add Rule(s) dialog box is displayed.
-
Select Blank rule and click OK. The Edit Inbound Rule page is displayed.
-
In the Name field, type a name that uniquely identifies the rule.
-
In the Pattern field, type .*. This ensures that any call that is routed through the reverse proxy website has the HTTPS header set correctly.
-
Under Conditions, set the server variables that were defined earlier. See the following figure:
-
In the Action Type list, set the value None. This procedure completes the setting of the server variable.
-
-
Create an Inbound Rule to Match any Pattern
-
Perform the steps described in step 5 (ignore step e). However, in the Pattern field, type the value (.*). This ensures that any request can land on the website.
-
In the Action type list, select the value Rewrite.
-
In the Rewrite URL field, type the URL of the Web Client website located inside the network where the request needs to be routed and suffix the URL with {R:1}. This ensures that subfolders, if any, are also mapped and routed appropriately.
-
As query string is used in Web Client, WebAPI and XMLHttp request calls, ensure that the Append query string option is selected.
-
Ensure that the rule is stopped after processing so that additional rules, if any, are not processed. To do so, select the option Stop processing of subsequent rules.
-
-
On the reverse proxy computer, create individual virtual directories for Web Client and STS. The names of these directories must match with virtual directory names on the computer where Web Client is installed.
Save your changes in IIS Manager.