Internationalization
Perform the following procedures to apply internationalization features to your Portal.
| When your Portal is hosted in a Anthology Cloud environment, your Portal administrator does not have access to upload branding files and cannot reset IIS either. Please contact Anthology Inc. Support (1-800-483-9106) to accomplish the tasks related to updating branding files or resource files for internationalization. |
Add a new language
-
Access the Portal Admin Console and log in using the credentials provided.
-
In the Settings and Environment tab, select Language Options.

-
You will be redirected to the Language.aspx page.
-
Enter the New Languageand Language Code and click Add.

-
Verify that the newly added language is activated for the Portal.
Activate or deactivate a language
-
Access the Portal Admin Console and log in using the credentials provided.
-
In the Settings and Environment tab, select Language Options.
-
You will be redirected to the Language.aspx page.
-
Select a language from the list of inserted languages.

-
Click Activate to activate a language or click Deactivate to deactivate a language. Once deactivated, the language will be removed from language drop-down control in Portal. End-users will have to reload the page in Portal to see the changes.
Change the text of labels and titles
Note: These changes need to be carried out in all the language resource files.
-
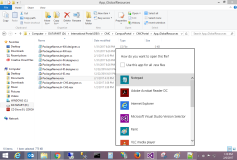
Using a text editor such as Microsoft™ WordPad or Notepad™, open the following file: App_GlobalResources\PackageName.resx.
-
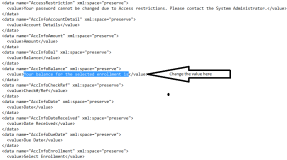
Change the labels and titles by editing the text within the <value>... </value> tags.
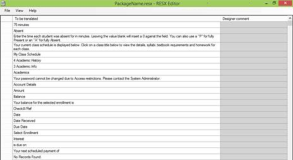
You can open packageName.Resx file in any open source resource file editor and convert the values in particular language. Save the file as per naming convention PackageName.Languagecode.resx.
Add/change configurable values from the Portal Admin Console in the resource file
These changes will be applicable only to the resource files for languages other than English. For English, the configurable values will be always retrieved from the Config Tool Settings.
When a student or staff member visits the application, based on default language, the respective resource file is loaded into the application using resource manager and all labels are bound.
-
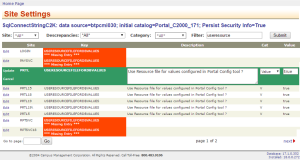
Log in to the Portal Admin Console and navigate to Site Settings.
-
Locate UseResourceFileForDBValues and set the value to true or false.
If UseResourceFileForDBValues is set to true, the page title, description, portal messages, page wise messages, and security questions configured in the Portal Admin Console are retrieved from the resource files.
Following are the conventions of various configurable items in the resource file when UseResourceFileForDBValues is set to true.
-
Title and descriptions:
To Add/Retrieve title and descriptions from the resource file, the convention is “Title_PageTitle_CampusID_wpPageID” and “Description_PageTitle_CampusID_wpPageID”.
The PageTitle, CampusId, and wpPageID can be retrieved from the wpCampusPage table in the Portal database.
Example
“Title_AccountInformation_1_9” and “Description_AccountInformation_1_9”
-
Portal messages:
To Add/Retrieve portal messages from resource file, the convention is “MessageName_CampusId”.
Example
“Login_Error_1”
-
Page wise messages:
To Add/Retrieve page wise messages from resource file, the convention is “MessageKey_CampusId_PageID”.
Example
“FacultyDesc_1_1”
-
Security questions:
To Add/Retrieve Security questions from Resource file, the convention is “SecurityQuestion_Role_SecurityQuestionId”.
Example
“SecurityQuestion_APPL_12”
For the list of configurable values from the Portal Admin Console along with the conventions described above, see ConfigTool Messages in Resource File.


