Gradebook
The details of all your assigned courses are displayed in the Gradebook. You can view all the classes assigned to you and all the courses for which you are the primary instructor. Refer to the following procedures:
- Use the Class Center to Access the Gradebook
- View Your Primary Courses
- View and Post Attendance
- Post Attendance for Classes Scheduled At Various Day or Time
- Manage Assignments and Exams
- Post Grades
Note: The page size is not configurable on the Gradebook pages used to post final/midterm grades and attendance. Portal will continue to display all records on a single page.
Use the Class Center to Access the Gradebook
A convenient way to manage your courses is to personalize the Faculty Portal home page by adding the Class Center web part.
-
In the Class Center component, use the carousel
 to select a course. The component checks the start dates of the class sections assigned to the staff member and displays 5 classes with start dates closest to the current date (irrespective of the term).
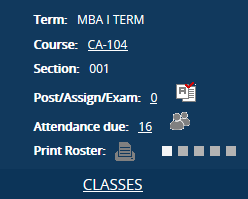
-
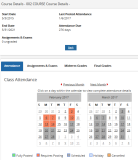
Click the link on the Course name. The Course Details page is displayed and the Attendance tab is selected. See View and Post Attendance.
-
Click the number in the Post Assign/Exam column. The Course Details page is displayed and the Assignment & Exams tab is selected. See Manage Assignments and Exams.
-
Click the number in the Attendance Due column. The Course Details page is displayed and the Attendance tab is selected. See View and Post Attendance.
-
Click the
 icon to print the class roster. The Class Roster is displayed in a pop-up window.
-
By default, class attendance for the day is displayed. Click Week to display class attendance for the current week.
-
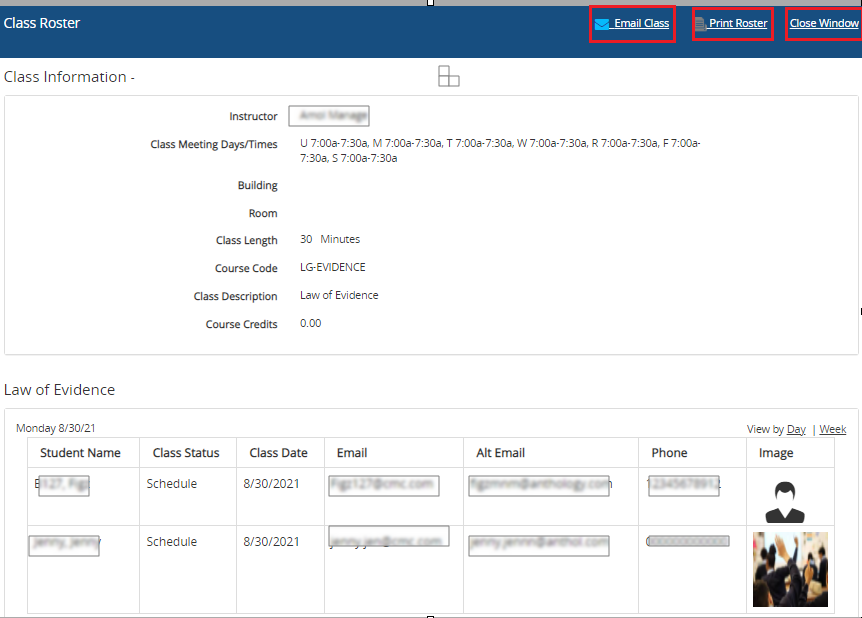
You can view the email, phone number and student’s image in the Class Roster’ report.
-
Click the Email Class button to send email to students.
-
Click Print Roster to set print options and print the class roster using your local printer.
-
Click Close Window to close the Class Roster pop-up.
-
-

View Your Primary Courses
-
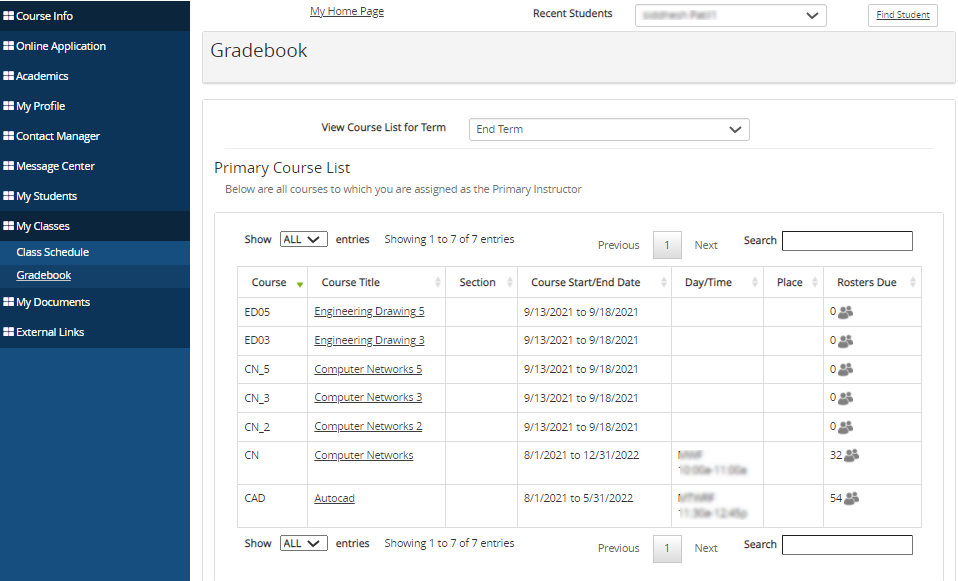
Navigate to My Classes > Gradebook. The Gradebook page is displayed.
-
Select the term in the View Course List By Term list.
The sorting order in the drop-down list is configured by the administrator.
To configure the sorting list for the term drop-down list:
-
As a Portal administrator, access the Portal Configuration tool.
-
Expand the appropriate Campus Portal.
-
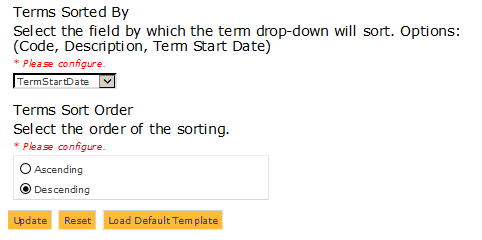
Navigate to Page Transactions > Staff Gradebook > Staff/Acad/Gradebook_Detail.aspx and scroll to the bottom of the page to locate the "Terms Sorted By" and "Terms Sort Order" options. The default setting for these options are shown in the image below.
-
In the Terms Sorted By drop-down list, select one of the following values:
- Code
- Description
- Term Start Date
-
For the Terms Sort Order, select one of the following values:
- Ascending
- Descending
-
Click the Update button. Wait a few minutes for the cache to be cleared and then verify that the changes took effect.
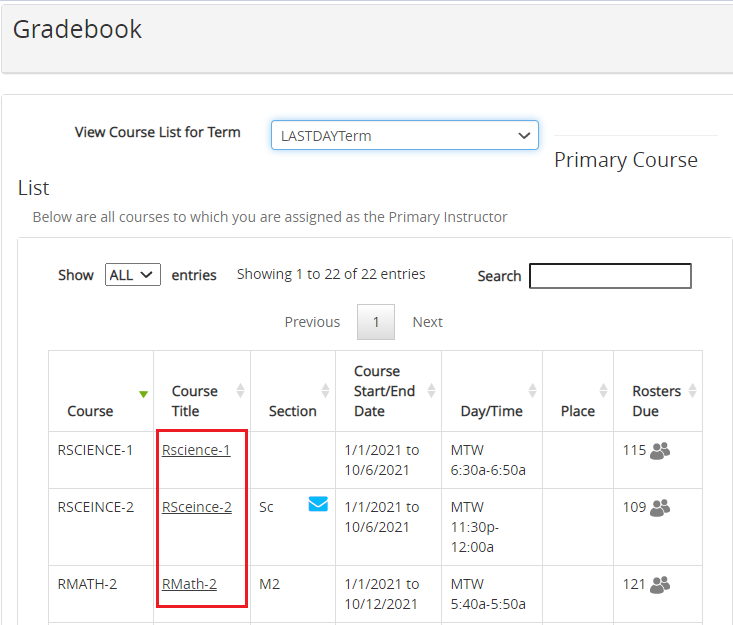
The Primary Course List page displays all courses for which you are assigned as the primary instructor for the selected term.

-
-
Click the column headers to sort the data. By default, the most recent classes are displayed first.
The course list is configurable by the Portal administrator. It can be configured to display all or a limited number of classes for perpetual terms and regular (published) terms.
To configure the class list for the gradebook:
-
As a Portal administrator, access the Portal Configuration tool.
-
Expand the appropriate Campus Portal.
-
Navigate to Page Transactions > Staff Gradebook > Staff/Acad/Gradebook_Detail.aspx and scroll to the bottom of the page.
-
Under Display All Classes for Perpetual Term, select the an option.
-
When Yes is selected, all classes from the perpetual term assigned to a staff member are displayed.
-
When No is selected (default), classes that have an End Date older than a specified number of days are Not displayed. The default number of days is 30, that is, classes with an End Date that is 30 days prior to the current date are not displayed. You can specify any value greater than 0.
-
-
Under Display All Classes for Regular Term, select the an option.
-
When Yes is selected (default), all active and expired classes associated with a selected term and within the published Term Duration are displayed.
-
When No is selected, classes that have an End Date older than a specified number of days are Not displayed. The default number of days is 30, that is, classes with an End Date that is 30 days prior to the current date are not displayed. You can specify any value greater than 0.
-
-
Click the Update button. Wait a few minutes for the cache to be cleared and then verify that the changes took effect.
-
-
Click a Course Title to view the Course Details page.

-
On the Course Details page, click the following tabs to view the relevant details:
View and Post Attendance
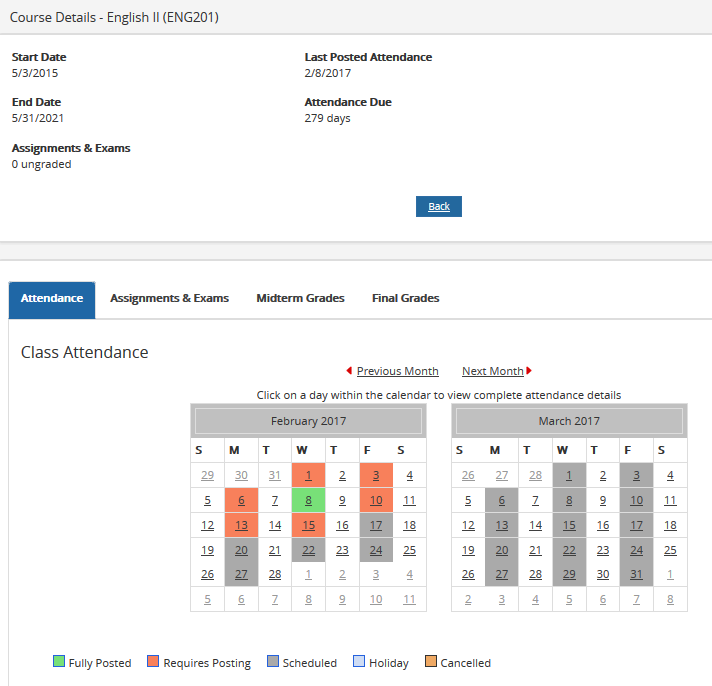
You can view detailed class attendance of all your courses on the Attendance tab of the Course Details page.
-
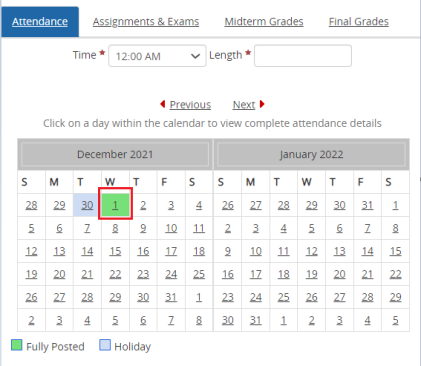
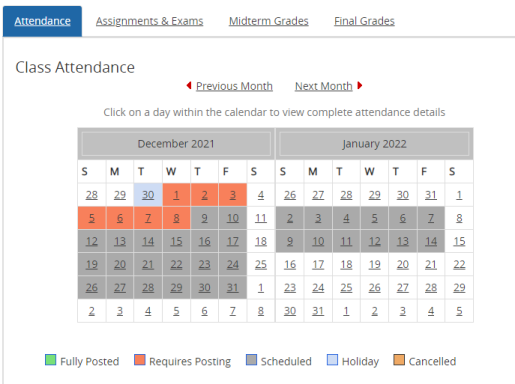
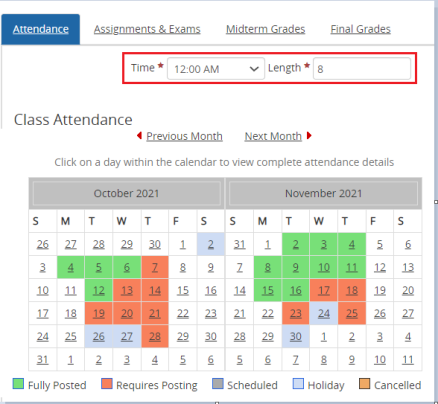
Click the Attendance tab on the Course Details page of the selected course. The calendar is displayed. A color code indicates the attendance status. Click Next Month and Previous Month to view the calendar for the next and previous month.
-
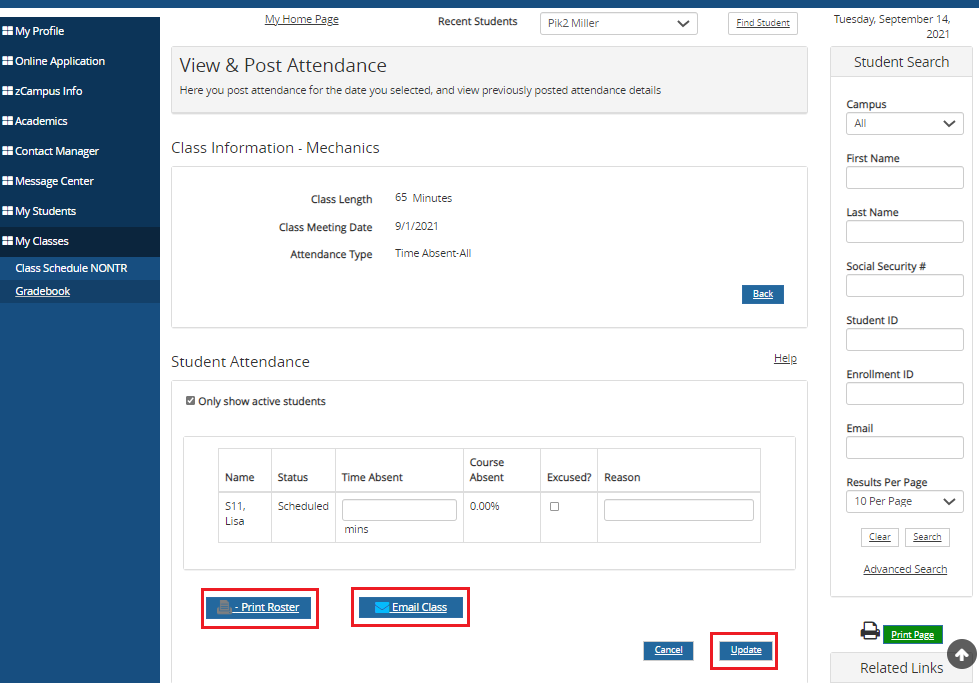
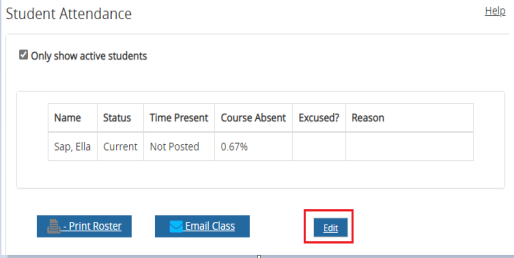
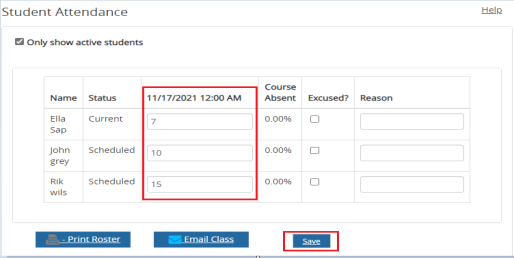
Click a date in the calendar. Details of the attendance for the class date are displayed in a grid with the following columns: Name, Status, Time Present, Course Absent (percentage), Excused, and Reason.
All students in the class are listed on a single page. The pagination and Show Entries controls are not displayed.
The default for the Time Present/Time Absent column depends on the Attendance Posting Type configured on the Class Schedule:
- For Absolute Attendance, the default is Present/Absent based on Attendance Posting Type.
- For Time-based Attendance, the default is blank.
-
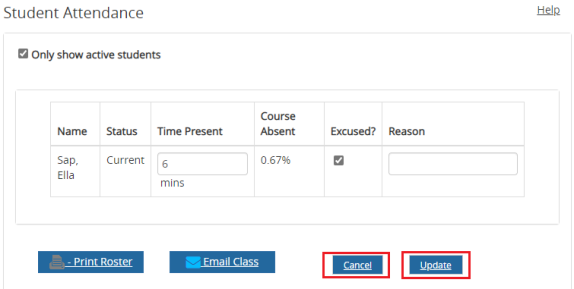
Click Edit and enter the attendance as applicable for each student. For example, in the Time Present column enter the minutes present, or select the Excused check box and specify a Reason for the absence.

-
Click Update to save the attendance posting.
Note: When attendance is posted in Portal, the attendance records in Anthology Student are updated in real time.
-
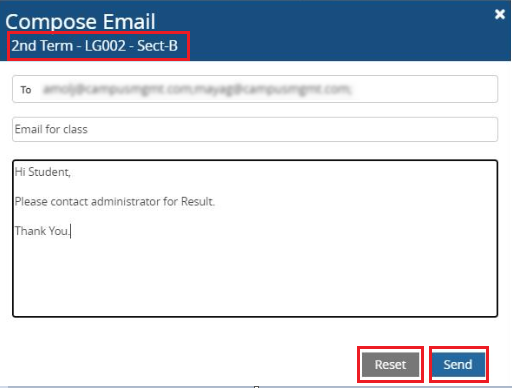
If you want to send email to students, click the Email Class button.
-
A Compose Email dialog box is displayed.
-
Email addresses of all active students in the class get auto-populated and a copy of the email is sent to the staff.
-
On clicking the Reset button, the subject and message box get cleared.
-
On clicking the Send button, mail on all students mail id is triggered which is mentioned in To.
-
Staff can add extra email ids.
-
In the mailbox, the mail is received with prefixed subject line: Subject > Email from Instructor > Term Description > Course Code > Section > Subject line.
If students do not have email id or invalid email ids, a validation message is displayed and the email could not be sent.
-
-
Click the
icon to print the class roster. The Class Roster is displayed in a pop-up window. 
-
By default, class attendance for the day is displayed. Click Week to display class attendance for the current week.
-
You can view the email, phone number and student’s image in the Class Roster’ report.
-
Click Print Roster to set print options and print the class roster using your local printer.
-
Click Print Enhanced Roster to print the class roster with student identifiable information.
-
Click the Email Class button to send email to students.
-
Click Close Window to close the Class Roster pop-up.
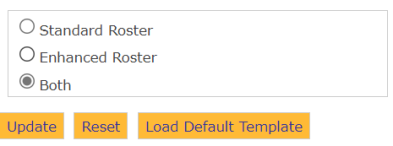
Note: You can select roster type for courses under the Course Roster Type in the Portal Configuration tool. You can select either Standard Roster, or Enhanced Roster or Both from the given options.
-

Post Attendance for Classes Scheduled At Various Day or Time
You can post attendance for a class schedule configured with:
-
VDT: Class meets at various days and times
-
Scheduled days and time
-
Hybrid class: Scheduled and unscheduled days
-
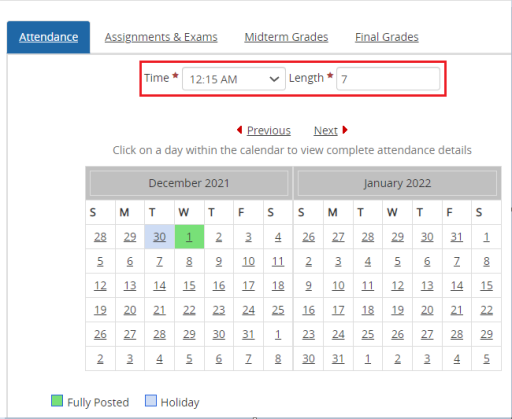
Click the Attendance tab on the Course Details page of the selected course. The calendar is displayed.
If you want to post attendance for VDT class:
-
Specify the Time and Length of the class in minutes.
-
Select the date you want to post the attendance for.
-
In the page that gets displayed, specify the length and click on Save
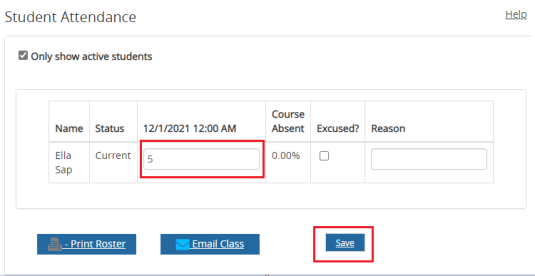
Note: The length you specify here should not exceed the class length. The length is specified in minutes.
-
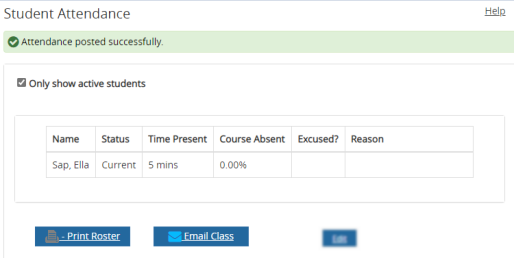
The attendance is posted successfully.
-
Click the Back button. The attendance posted is displayed in green.
If you want to post attendance for scheduled days and time:
-
Select the course.
-
The calendar gets displayed under the Attendance tab.
-
The dates displayed in red are the scheduled dates for which you can post the attendance.
-
Select the date you want to post the attendance for.
-
If you want to edit the attendance posted for the selected day and time, click the Edit button.
-
If you want to continue with the change, click on Update, else click Cancel.
If you want to post attendance for Hybrid class:
-
Select the course.
-
Specify the Time and Length of the class in minutes.
-
Select the date you want to post the attendance for.
-
In the page that gets displayed, specify the length in minutes the students attended the class and click Save.
-
Manage Assignments and Exams
You can add, view, and modify assignments and exams for all your assigned courses from the Course Details page. You can also view and upload documents related to the assignments and exams. The documents will be accessible from the student’s class resources page. You can also configure a percentage weight amount for each lesson that counts towards the student’s final grade. When the lessons are defined, you can return at any point in time and update the scores of the lesson.
Add Assignments and Exams
-
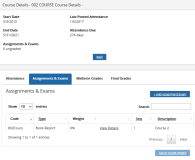
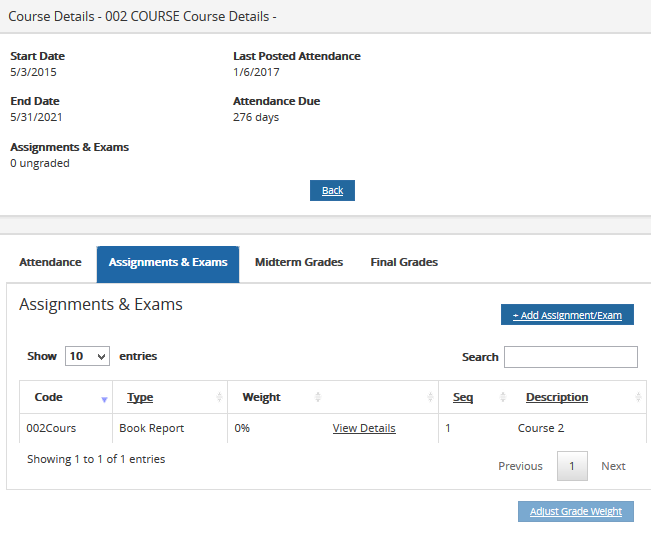
Click the Assignments & Exam tab on the Course Details page of the selected course. All existing assignments and exams of the selected course are displayed.
-
Click the Add Assignment/Exam link.
-
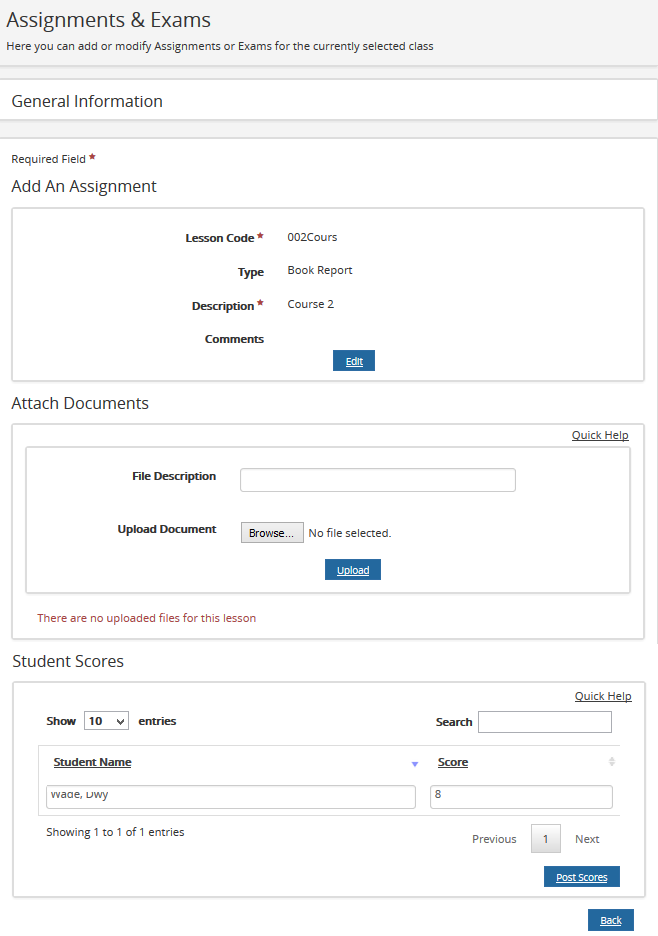
Specify the following details. Items marked with an asterisk are required.
- Lesson Code (Specify up to 8 alphanumeric characters to uniquely identify the lesson.)
- Type
- Description
- Comments
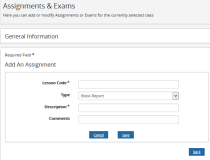
-
Click Save. The assignment or exam is added to the course.

View and Modify Assignments and Exams
-
Click the Assignments & Exam tab on the Course Details page of the selected course. All existing assignments and exams of the selected course are displayed.
-
Click the View Details link of an assignment or exam. Details of the assignment or exam are displayed including attached documents and student scores.
-
Click Edit. Details of the assignment or exam are displayed in edit mode.
-
Modify the required details. Items marked with an asterisk are required.
-
Click Save. Details of the assignment or exams are modified.
-
To upload a document:
-
Type detailed information about the document you want to upload in the File Description field of the Attach Documents section.
-
Click Browse and navigate to the document in your local folders.
-
Click Upload. The document is uploaded to Portal.
-
Post Grades
You can enter grades of students who have taken courses that are assigned to you from the Course Details page. You can score the assignments or exams of the selected courses.
Faculty Portal only allows posting of final grades when all attendance is posted for the class and all assignments and exams are updated with scores. The instructor selects a grade from the grade scale assigned to the program version for each student in the class.
When the last assignment/exam (lesson) scores and final grades are posted, they cannot be modified in Faculty Portal.
Posting of final grades updates the Anthology Student records in real time.
Score Assignments and Examinations
-
Click the Assignments & Exam tab on the Course Details page of the selected course. All existing assignments and exams of the selected course are displayed.
-
Click the View Details link of an assignment or exam. Details of the assignment or exam are displayed.
-
Click Post Scores in the Student Scores section. The Student Scores section is displayed in edit mode.
-
Type the exam score in the Score field next to the required student.
-
Click Save Scores. The scores of the students for the selected assignments or exams are saved.
Post Midterm Grades
Note: Mid-term grades are an optional configuration.
-
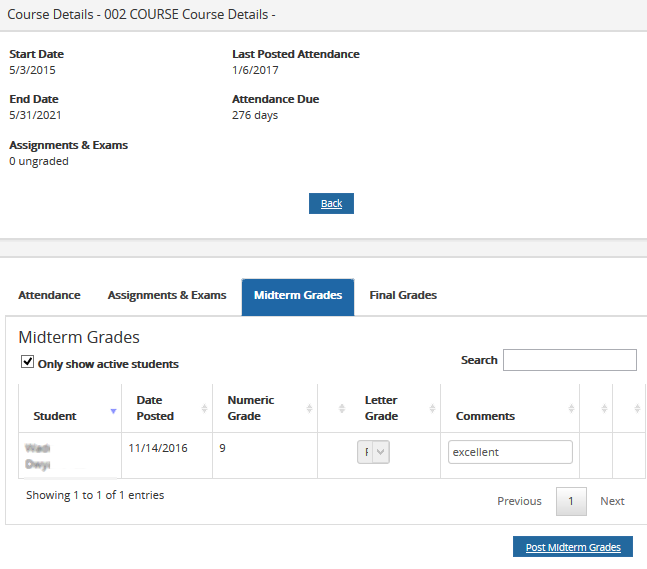
Click the Midterm Grades tab on the Course Details page of the selected course. Midterm grades of all active students taking the course are displayed.
Clear the Only Show Active Students check box to view all students who have taken the course.

-
Type the grade of the students in the Numeric Grade field.
-
Select the grade letter of the students in the Letter Grade list.
-
Type comments, if any, in the Comments field.
-
Click Post Midterm Grades. The midterm grades of the students are saved and the Date Posted field for these grades is modified.
Post Final Grades
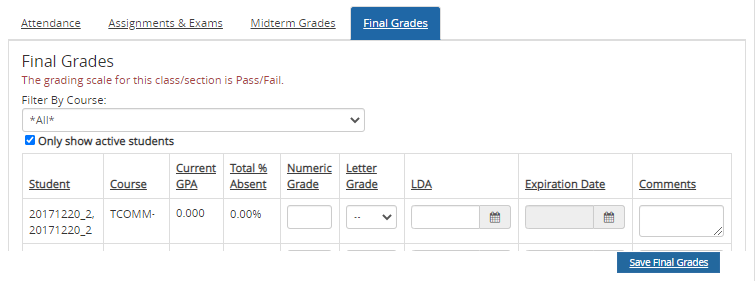
Instructors cannot post final grades until each student has a final grade.
-
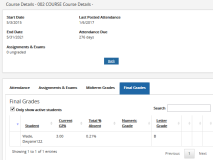
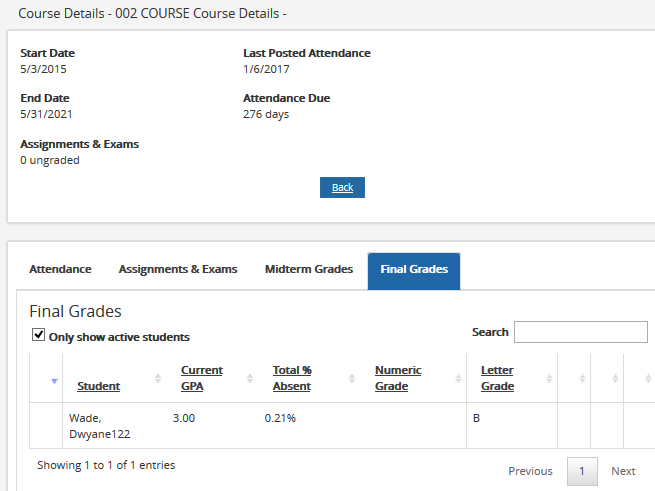
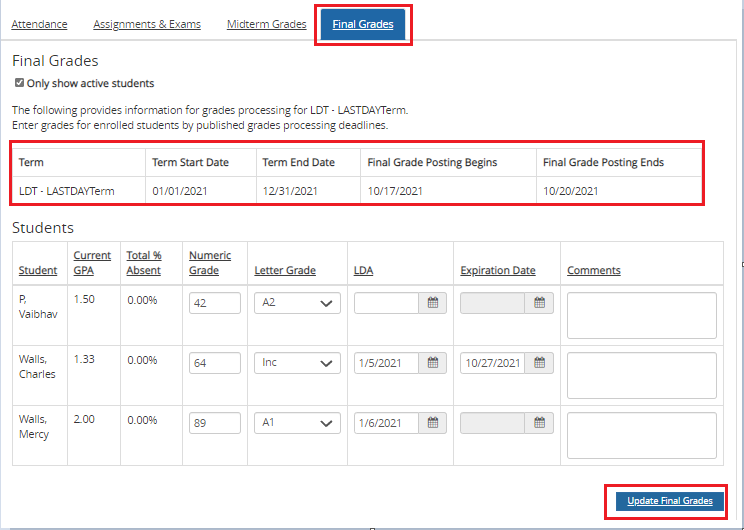
Click the Final Grades tab on the Course Details page of the selected course. The final grades of all active students in the course are displayed. The current GPA and attendance details of the students are also displayed.
Clear the Only Show Active Students check box to view all students who have taken the course.
-
Type the grade of the students in the Numeric Grade field.
-
Select the grade letter of the students in the Letter Grade list.
-
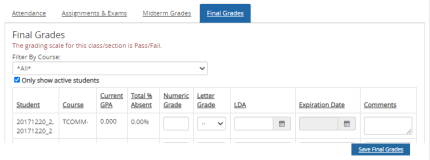
If Faculty Portal is configured to display the LDA, Expiration Date, and Comment fields, specify the following details for any student with a failed or incomplete grade:
-
LDA
Enter a last date of attendance (LDA) value that falls within the start and end date of the class section. For any student with a failed grade, if the LDA is not specified, the message "Please provide LDA for <student name>" is displayed when clicking Save Final Grade, and the record is not saved. When an LDA is provided, the record is saved.
-
Expiration Date
For any student with an incomplete grade, if the number of days to calculate the expiration date is configured on the Grade Scale, Course, or Campus Locations, the expiration date is calculated and auto-populated. The expiration date cannot be edited if the instructor does not have the staff level override permissions. If the expiration date is not configured, the field is not auto-populated.
If the instructor does not add an expiration date (when it is not calculated) or removes the default expiration date, the message "Please provide Expiration Deadline Date" is displayed when clicking Save Final Grade.
-
Comments
For any student with an incomplete grade, use the Comment field to specify any requirements to receive a complete grade. The content of the Comment fields will be included in an email notification to the student.
The Portal Configuration tool provides an option to configure whether the LDA, Expiration Date, and Comment fields are displayed. Navigate to Page Transactions > Staff Gradebook > Staff/Acad/Gradebook_detail.aspx and select Yes or No for the following option:

When Yes is selected, the Final Grades tab displays the LDA, Expiration Date, and Comment fields. Data entered in these fields is saved to the AdEnrollSched table.
When No is selected (default), the LDA, Expiration Date, and Comment fields are not displayed.
-
-
Select Save Final Grades to save the final grades.
Edit Final Grades
You can post grades for instructors using the Faculty Portal and Anthology Student and allow the instructor to post or edit grades for the configured duration.
Note: In Anthology Student, you must have enabled the check box for Allow Instructor Edit Final Grades under Instructor Grade Posting Deadlines in the Processes tile > Academic Records > Online Registration Configuration and specify the values accordingly.

-
Select the term under View Course List for Term. A list of courses is displayed.
-
Click on the course name and select Final Grades tab from the page displayed.

-
If you want you can edit the final grades and click the Update Final Grades button.

-
Click on Save Final Grades. The changes made to the final grades are saved.

Note: Instructors will be allowed to post or edit the grades only within the grade posting duration configured for the term.