Entity Picker - Customizing the Selection of Entities in Forms
Administrators can customize the list of values available for selection in fields. This means that only specific values from a global list can be made available depending on the institution’s business case. This behavior can be achieved using PCF (PowerApps component framework). Administrators can create components and fields to provide customized experience to users when selecting data in forms.
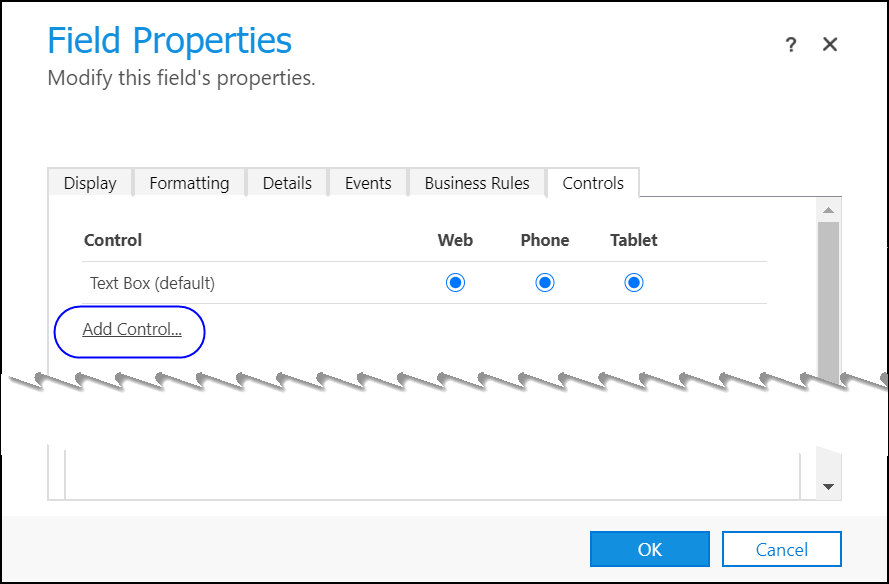
- In the form designer, double-click the field in which you want to customize the list of values that can be displayed. The Field Properties dialog will be displayed.

- In the Controls tab, click:
- Radio buttons of the interfaces (Web, Phone or Tablet) in which you want the control to appear.
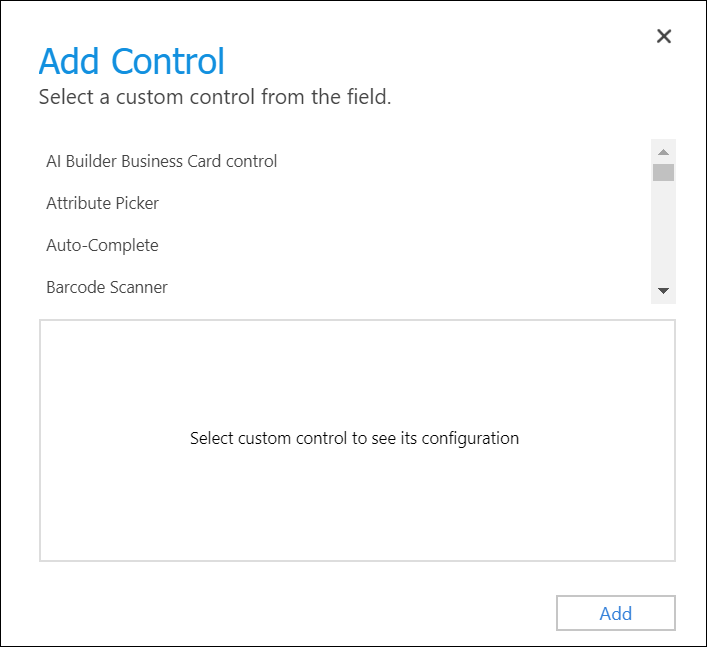
- Add Control – The Add Control dialog will be displayed.

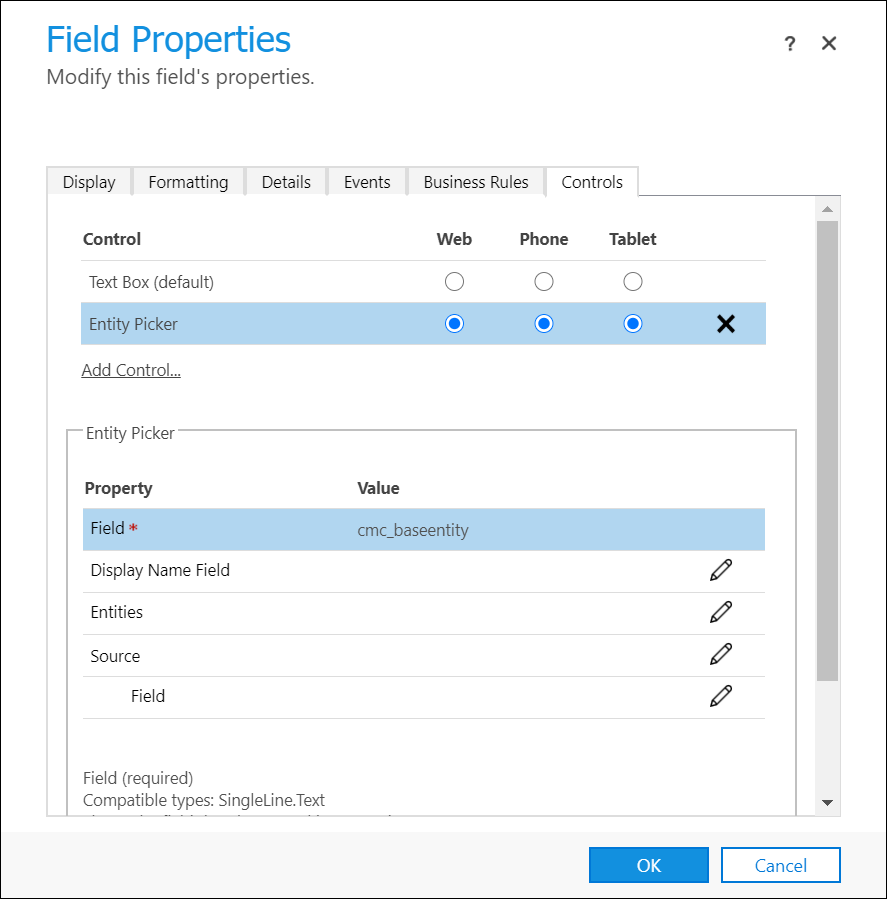
- Select Entity Picker and then click Add. The Entity Picker option will be displayed in the Control area of the Field Properties dialog.

- In the Entity Picker area, perform the following steps in the indicated fields:
- Field – Type the schema name of the field where the customized list of entities must be displayed.
- Display Name Field – The display name of the entity saved in step a will be saved to the field selected in this field.
Important
Perform the steps in point c or in points d – f. If steps c – f are performed, values set in step c will be considered. - Entities – Click
 and select one of the following values:
- Bind to a static value – specify the schema name of entities that must be displayed in the field selected in step 4a.
- Bind to a value on a field – select a field from the list that will be used as the entity value.
- Source – Set values in the following fields when you work with this option.

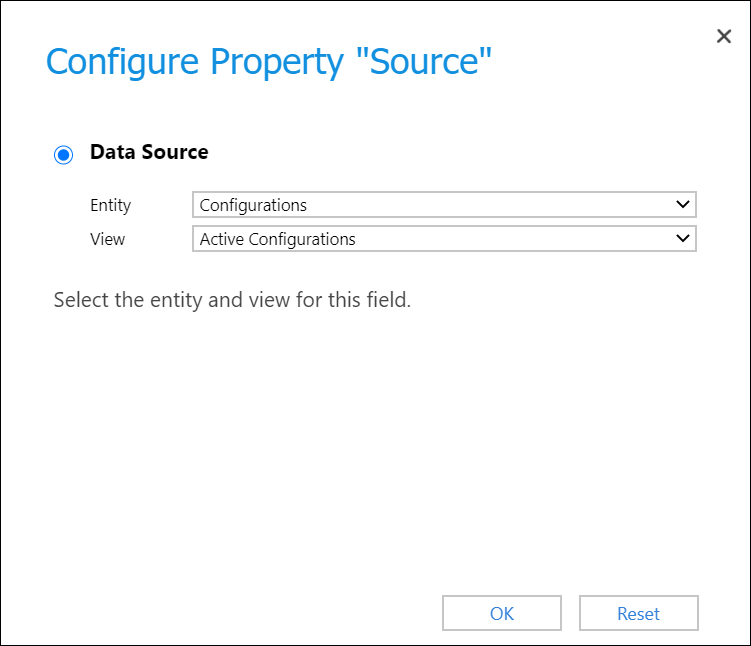
- In the Source field, click to view the following dialog:

- Entity – Select the entity from which the list of entities will be fetched. For instance, select Configurations.
- View – Select the view from which entity information must be fetched. In the above dialog, the view Active Configurations is selected.
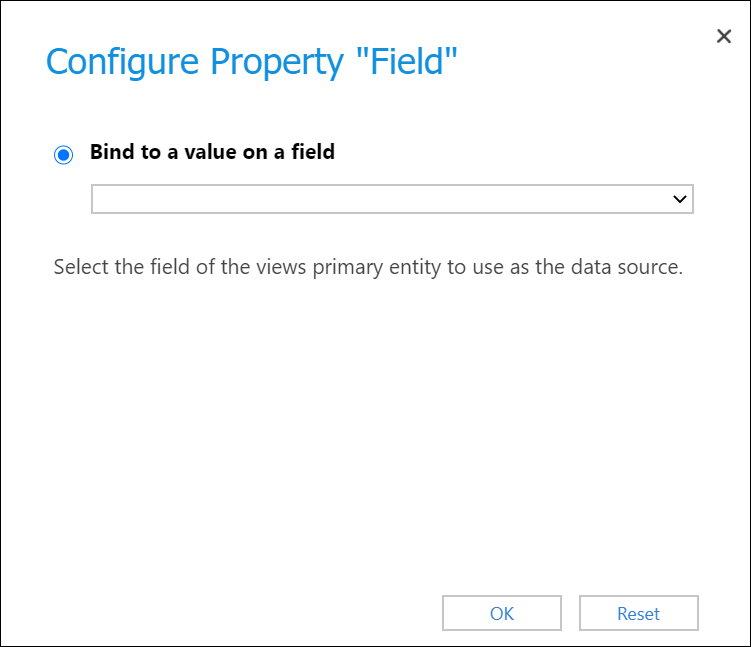
- Field – Click to view the following dialog:

Select the field from which the list of entities must be retrieved. For example, for the list of Active configurations in step e (ii), the administrator selects cmc_queryconditionentities, the schema name of the field Query Condition Entities in the Application Management tab of the Default Configuration page.
- Click the Hide Default Control option if your institution’s Dynamics 365 application supports custom controls. The configured controls and data will be displayed.
- Click OK to close the Field Properties dialog, and then click Publish, Save and Close.
The created custom controls will be available to users in your Anthology Reach implementation.