Add a Database to an Availability Group
-
Execute the following query against the Anthology Student database. Please follow instructions in the output of the script (error/message).
DECLARE @DbName NVARCHAR(255) = DB_NAME() , @Cmd NVARCHAR(MAX) = '' SELECT @Cmd = 'Service broker is not enabled on database ('+@DbName+ '). Please make sure that the restore scripts are executed before configuring AG!!' IF (SELECT is_broker_enabled FROM sys.databases WHERE database_id = DB_ID())= 0 RAISERROR(@Cmd, 16, 1) ELSE PRINT 'Service broker is enabled, please proceed with next steps from the AG document!' -
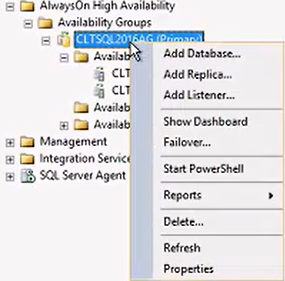
Right-click the primary replica and select Add Database. The “Add Database to Availability Group” wizard is displayed.
-
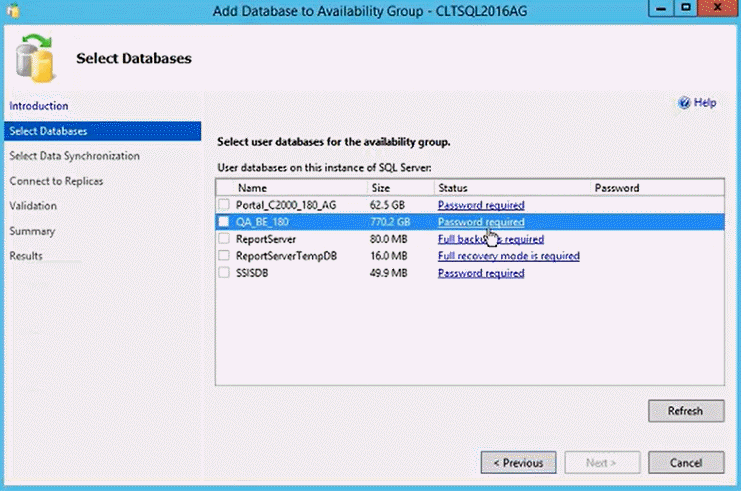
In the wizard, select Select Databases. A list of databases is displayed. Identify the database you want to add to the AG.
-
In the Status field, select the Password required link. The following message is displayed. Select OK to continue.

The reason for this message is that the Anthology Student database uses the Service Broker. As a part of Service Broker configuration, a database master key is set up. A password is required to get past the master key encryption. The master key can be found at the top of the Service Broker configuration script.
-
In a Query window in SQL Management Studio, open the Service Broker configuration script. Select and copy the encrypted password found near the top of the script.

-
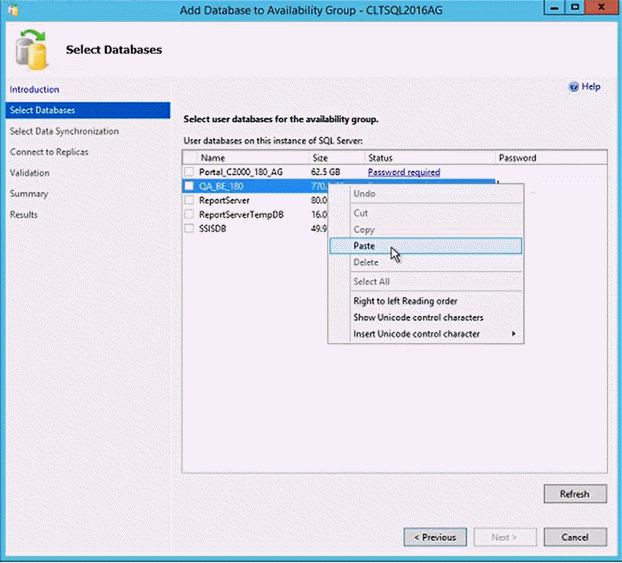
In the “Add Database to Availability Group” wizard, right-click the Password required link and paste in the password copied from the Service Broker configuration script.
-
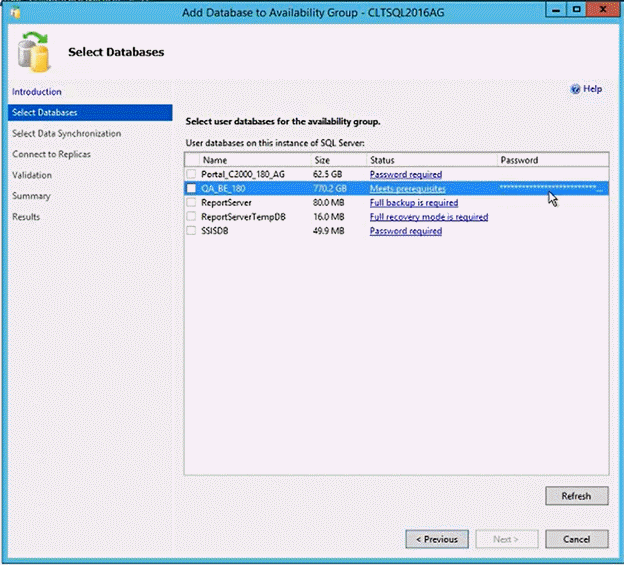
Select Refresh. The Status field now displays “Meets prerequisites” and the encrypted password appears in the Password field.
-
Select the check box next to the database and select Refresh again. The Next button becomes available.
-
Select Next. The wizard proceeds to the step “Select Data Synchronization”.
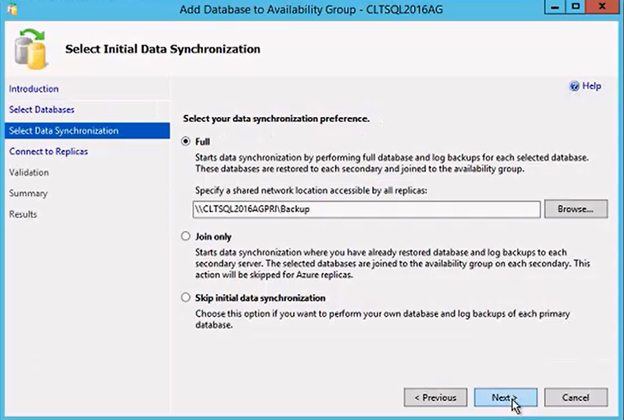
-
Specify the shared network location that the backups are going to be stored in during the synchronization for the AG. Select Browse.
-
In the “Connect to Existing Secondary Replicas” step, you will be prompted to specify the shared location for the secondary replica.
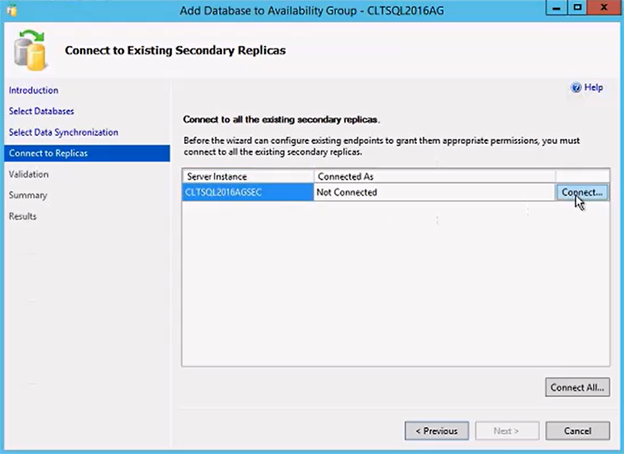
-
Select Connect.
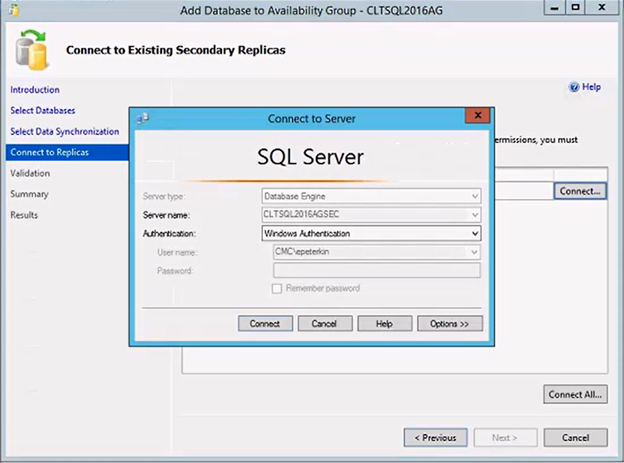
-
In our example, secondary replica is CLTSQL2016AGSEC, it has credentials for the secondary replica. Select Connect in the Connect to Server dialog.
-
The secondary replica is added to the “Add Database to Availability Group” window. Select Next.
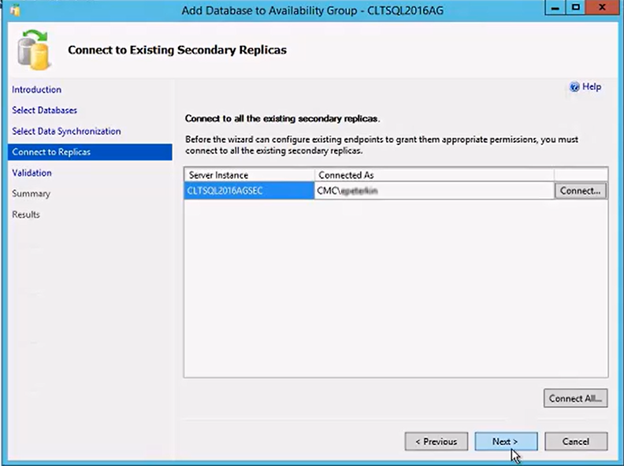
-
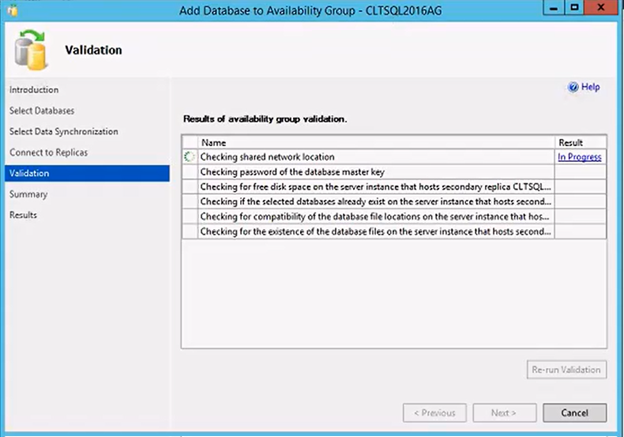
The wizard continues with the “Validation” step.
-
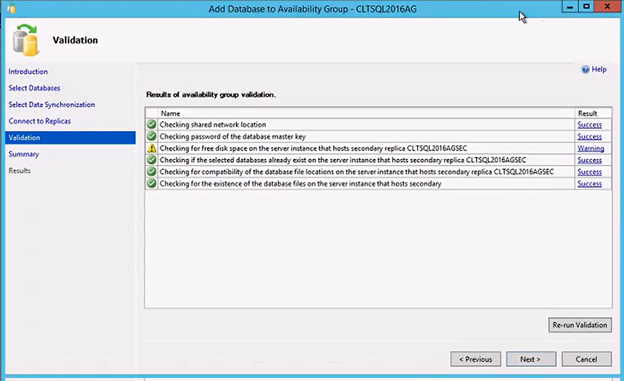
In our example, the validation process returns a warning indicating that there may not be enough disk space.
-
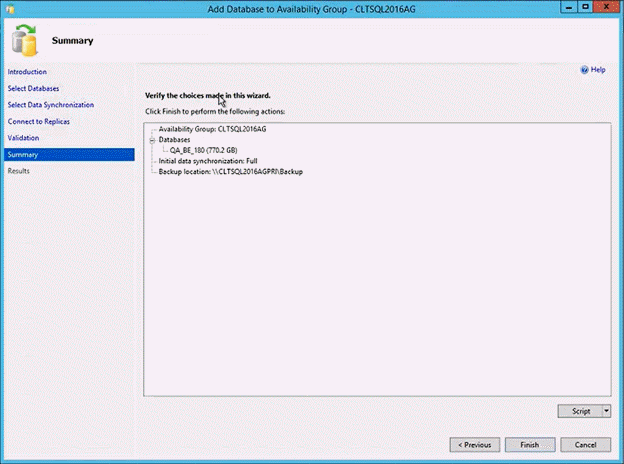
When the validation is successful, select Next. The “Summary” screen is displayed.
-
Select the drop-down on the Script button and generate a script for the steps of adding a database to the AG. You can the use the script to add a database to the AG instead of the wizard. When you run the script, in case of errors, SQL Management Studio will provide more detailed error messages than the wizard.

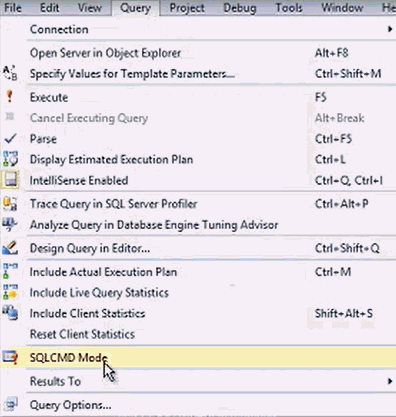
Note that the script must be run in SQLCMD mode.

-
To run the script in SQL Management Studio menu, select Query > SQLCMD Mode.
-
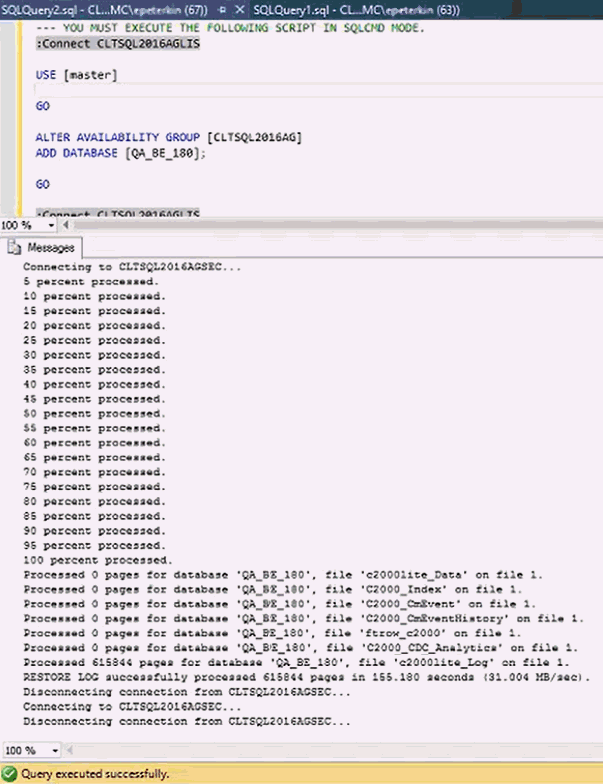
Execute the script. Depending on the size of the database, this will take multiple hours. The script will take a backup of the existing database at the primary replica and restore it at the secondary replica.

-
When the script is completed successfully, the database is replicated to the AG.
-
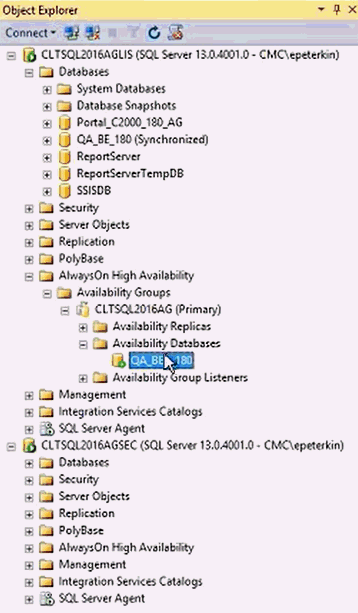
In Object Explorer, expand the primary AG folder, navigate to Availability Databases, select the database, right-click, and select Refresh. Our database is now part of the AG.
-
In a Query window in SQL Management Studio, open the “CampusVue_<XX.x.x.xxx>_AvailabilityGroup.sql” script from the following folder path
“C:\Program Files (x86)\CMC\CampusNexus Installation Manager\Packages\Cmc.Installer.Modules.Student.<XX.x.x>\SetupFiles\Database\CampusVue\Other”
located on the machine where Installation Manager is installed.
Here <XX.x.x.xxx> represents the Anthology Student version and build number, for example: CampusVue_18.0.0.433_AvailabilityGroup.sql).
Execute this script on the secondary replica database to create the Anthology Student SQL Server jobs on the secondary replica instance.
-
Similarly, if Regulatory package is selected for installation or upgrade, and a Availability Group script “CampusVue_Regulatory_<XX.x.x.xxx>_AvailabilityGroup.sql” exists in the
“C:\Program Files (x86)\CMC\CampusNexus Installation Manager\Packages\Cmc.Installer.Modules.Regulatory.<XX.x.x>\SetupFiles\Database\CampusVue\Other”
folder located on the machine where Installation Manager is installed.
Here <XX.x.x.xxx> represents the Anthology Student Regulatory version and build number, for example: CampusVue_Regulatory_9.2.0.22_AvailabilityGroup.sql).
Execute this script on the secondary replica database to create the Anthology Student Regulatory SQL Server jobs on the secondary replica instance.
-
Execute the script below on the secondary replica of the Anthology Student database if it contains Regulatory version 10.x and above.
EXECUTE dbo.cmc_CreateJob
	@JobName = 'Process_FaSSCR_EnrollmentStatusAndDate',
	@Command = 'Exec dbo.sproc_System_FinancialAid_SSCR_CalculateEnrollments_REG; ',
	@Desc = 'This job runs once a day at 1:00 AM. Invokes SSCR status and date calculation.',
	@Sched = 1,
	@SchedInterval = 'D',
	@SchedDailyTime = '010000'
GO
EXECUTE dbo.cmc_CreateJob
	@JobName = 'Process_FaStudentAY_LoanPeriod_COA_Recalculate',
	@Command = 'Exec dbo.Sproc_School_FinancialAid_StudentAY_LoanPeriod_COA_Recalculate_Regulatory; ',
	@Desc = 'This job runs four times a day. Invokes Cost of Attendance calculation.',
	@Sched = 1,
	@SchedInterval = 'H',
	@SchedDailyTime = '000000',
	@SchedMinuteInterval = 6
GO
This completes the addition of the database to the AG.
