Prerequisites and Configurations for LMS Trends Report
The topics in this section provide information on the prerequisites and configurations for enabling the integration with Blackboard Learn.
Prerequisites
-
The institution must be live (installed and configured) with Anthology Reach and Blackboard Learn Ultra.
-
Register Anthology Reach Tenant with Blackboard Learn Tenant. This step must be performed by an Anthology Reach DevOps professional. The implementation team should create a Service Desk ticket for the Deployment team to initiate the tenant registration.
-
Ensure a common unique student identifier exists between Anthology Reach and Blackboard Learn.
-
A current contract for the Anthology Succeed module.
-
There may be some limits to the availability of this feature based on the region where the institution’s Blackboard Learn data is hosted. Please inquire for more details.
Configurations to Enable the LMS Trends Report
The following steps provide information on enabling the LMS Trends Report in Anthology Reach.
-
In the Anthology Reach environment, open the Blackboard Integration Model-Driven App.
-
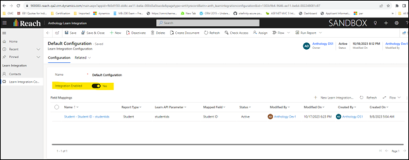
Open the Default Configuration page (under Learn Integration > Learn Integration Configuration).
-
In the Default Configuration page, set the Integration Enabled field to Yes.
-
In the Field Mappings sub grid, click the Student - Student ID - studentids record to view.
-
In the Mapped Field, select Student Id from the drop-down.
This is the common unique identifier between Anthology Reach and Blackboard Learn. This field should have the same value as that is configured in the person batch_UID (External Person Key) field in Blackboard Learn to associate the Contact record in Reach with the student record in Blackboard Learn to generate the LMS Trends Report. If a custom field is configured for student identification in Reach, select the custom field in the Mapped Field.
-
Click Save.
Anthology Reach users will be able to view the LMS Trends Report tab on the out-of-the-box Contact (Advising) form. To view the LMS Trends Report tab on custom forms, see Configurations to Add the 'LMS Trends Report' tab in Custom Contact Form(s).
For information on the content of the LMS Trends Report, see LMS Trends Report.
Configurations to Add the 'LMS Trends Report' tab in Custom Contact Form(s)
To add the LMS Trends Report tab on custom Contact forms in Reach, perform the following steps:
-
Log in to https://make.powerapps.com, and open the required the form in edit mode from the unmanaged solution.
-
Add a 1-column tab component to the form, and configure the following properties:
-
Label - LmsReport Tab
-
Name - LmsReport_Tab
-
Select the Expand this tab by default check box.
-
(Recommended) Select the Hide check box.
-
-
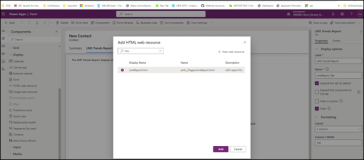
Add a section and click HTML web resource in the Display area.
-
In the Add HTML web resource page, select LmsReport.html and click Add.
-
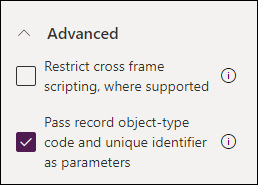
In the Web resource Properties > Advanced, select the check box, Pass record object-type code and unique identifier as parameters.

-
Add the LmsReportForm.js javascript to the On Load event of the form. To do so:
-
Click the Form Properties > Events > On Load.
-
Click Event Handler to view the Configure Event dialog box,
-
Click Add Library, and select LmsReportForm.js and click Add.
-
In the Function field, specify Anthology.Common.D365.Forms.LearnIntegration.LmsReportForm.executeOnLoad
-
In the list of parameters box, specify "LmsReport_Tab".
-
Click Done.
-
-
Save and publish the form.


