COD Import
You can use the COD Import process to import all types of COD response files. After files are exported and sent to the Common Origination and Disbursement (COD) system for evaluation, the COD returns responses using the EDconnect software. EdConnect extracts the files from the COD server and places them on a local drive. From the local drive, the files are available to be imported into Regulatory.
The import of COD files involves two tabs on the COD Import page.
-
On the Process tab, specify the data selection criteria and queue the job. The job will run in the background.
-
On the History tab, review the result of the background job.
To view the process report, go to Regulatory Process Results. Find the batch and inspect the records included in the batch.
Financial Aid Processes File Management
Anthology Student version 22.0 and later enables customers to manage files in Azure File Storage using the Financial Aid Processes File Management form under Processes > System Administration. Without this form, users cannot upload or download files to Azure File Storage due to security restrictions. The file management functionality enables you to place files in the location where specific financial aid processes (e.g., Application Data Export/Import, Clearinghouse, NSLDS Reports, and others) expect to find the files. For more details, see Financial Aid Processes File Management.
Prerequisites
You must have the following authorization:
-
Common - Processes - View
-
Financial Aid - Processes - COD Import - Import COD File
To use the Upload File option on the Process tab, you must have the following additional authorization:
-
Regulatory - CodImport - UploadCodImportFile
-
Regulatory - CodImport - ValidateUploadCodImportFile
You should also be familiar with Background for COD Processing and Set Permissions for the Local EDE Share.
Access Method
Select the Processes tile > expand Financial Aid > select COD Import.
Procedure to Import COD Files
Process Tab
-
In the Fund Source drop-down list, select one of the following options:
- All (default)
- Direct Loan
- Pell
- TEACH
-
Select an Award Year or accept the session default.
-
In the Message Class drop-down list, select one of the following options. The list is filtered based on the selected fund source.
- COD - Common Record Response Files - default (Can apply to Pell and DL fund sources.)
- Direct Loan - Credit Status Response
- Direct Loan - DL Entrance Counseling Acknowledgment
- Direct Loan - Informed Borrowing Response
- Direct Loan - MPN Response
- Direct Loan - Origination Fee Response
- Direct Loan - School Account Statement
- Direct Loan - Subsidized Usage
- Direct Loan - YTD Rebuild
- Pell - Data Request Acknowledgment
- Pell - Electronic Statement of Account
- Pell - Lifetime Eligibility Used Report
- Pell - Multiple Reporting Records
- Pell - Reconciliation File Report
- Pell - School Account Statement
- Pell - Year-to-Date Records
- TEACH - ATS Note Acknowledgment, Award Year Specific
- TEACH - Counseling Acknowledgment
- TEACH - Multiple Reporting Records
- TEACH - School Account Statement
- TEACH - YTD Rebuild
The Message Classes are listed in the 2024–2025 COD Technical Reference (May 2024 Update).
-
The Campus EDE Path of the user's default campus is displayed.
-
In the File Option drop-down list, select one of the following options:
-
Choose From Campus EDE Path (default)
-
Upload File
To use the Upload File option, you must have the following authorization:
- Regulatory - CodImport - UploadCodImportFile
- Regulatory - CodImport - ValidateUploadCodImportFile
The Upload File functionality validates that the file name provided for upload does not already exist in the destination EDE path. Only the file name is verified against any existing file in EDE Path. The contents of the file are not compared to determine a duplicate file. When attempting to import a file from a location other than the EDE Path, you will receive an error message if a file with the same name already exists in the EDE Path.
The system accepts files for manual upload irrespective of the letter case used in the file name (lower-case, upper-case, or a mix of both). The system converts the file names to upper-case before the validation process.
The convention for COD import file names is:
CRxxyyOP.001, where:
- xx = Message Class
- yy = award year
- OP = COD import file (Once an import file has been processed, it's renamed to BK.)
Example: CRBN18OP.001 will be renamed to CRBN18BK.001.
-
-
Choose a file in the Available Files drop-down list.
-
If you selected the Upload File option, select the Choose File button, navigate to the file in File Explorer, and select the Upload button.
-
If you selected the Direct Loan - YTD Rebuild message class and the file chosen has already been imported, the Update Database check box is displayed. When you select the Update Database check box, the following dialog is displayed: "This file has already been imported. Do you want to reimport the file?" You can reimport or cancel.
When you select Reimport, Anthology Student imports the file, updates the database, and creates a history record.
Tip: Use Notepad++ to view the raw text files.
-
Select the Queue Import button.
The Submit Batch window displays the default Batch Name. You can edit the Batch Name.
-
Select Submit in the Submit Batch window.
This starts the background job to process the data and create batches asynchronously from the selection criteria.
The notification “The COD Import was successfully queued” indicates that the process is called and in a queue.
The notification “[Batch Name] [Status]” indicates that the process is finished. The hyperlink on the message points to the COD Import > History tab.
-
The job status “Succeeded” indicates that the process is finished with no exceptions.
-
The job status “Completed” indicates that the process is finished with exceptions.
Continue with the History tab.
Note: You can use the COD Exceptions process to review any exceptions that are generated when a COD file is imported. Exceptions are data mismatches between the imported file and the records in the Anthology Student database. The exceptions indicate that either a student record or an award could not be matched in the database.
-
History Tab
-
The History tab displays a grid listing the final batches from the COD import.
 Note
Note
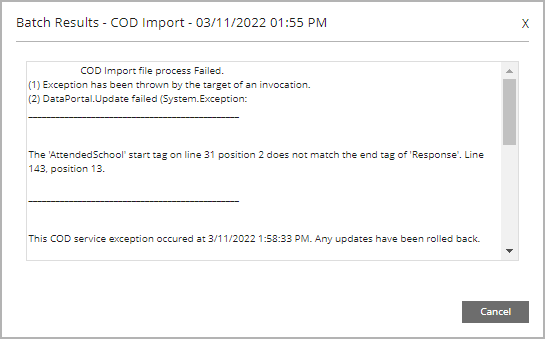
If the job status is Completed, the Results column displays a Details link that opens a popup with details about the reasons why the job did not succeed.
The following is an example of batch results details for a YTD Rebuild batch:
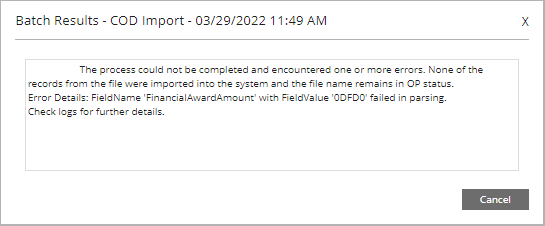
The following is an example of batch results details for a COMREC batch:
To view the process report, go to Regulatory Process Results. Find the batch and inspect the records included in the batch.
-
If the job status is Failed or Completed, select the Retry Batch button in the grid toolbar to resubmit the job.
For a Completed job status, the Results column displayed a Details link that opens a popup with detailed information about the job.