Multi Route Forms
In Forms Builder 2.x, the Multi Route Rule was used to control the flow of forms and sequences dynamically based on a user's selection in a form field. The Multi Route Rule enabled you to define which form or sequence was displayed when a user selected a specific value in a form field.
In Forms Builder 3.x and later, the multi route functionality is implemented using sequence workflows. For general information about workflows created through Sequence Designer, see State Machine Workflows.
Multi route sequences consists of multiple forms, at minimum a main form and two or more sub forms linked to the options available on the main form.
Example
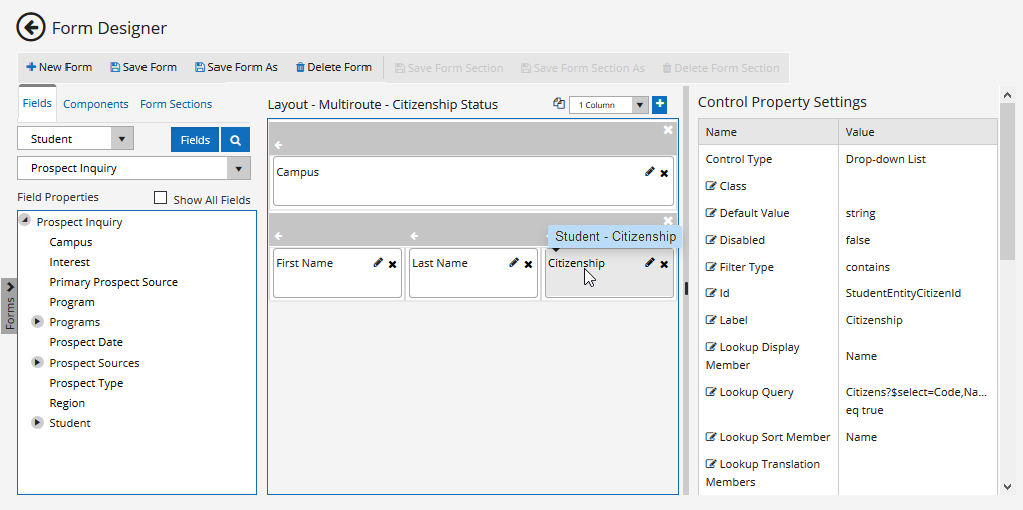
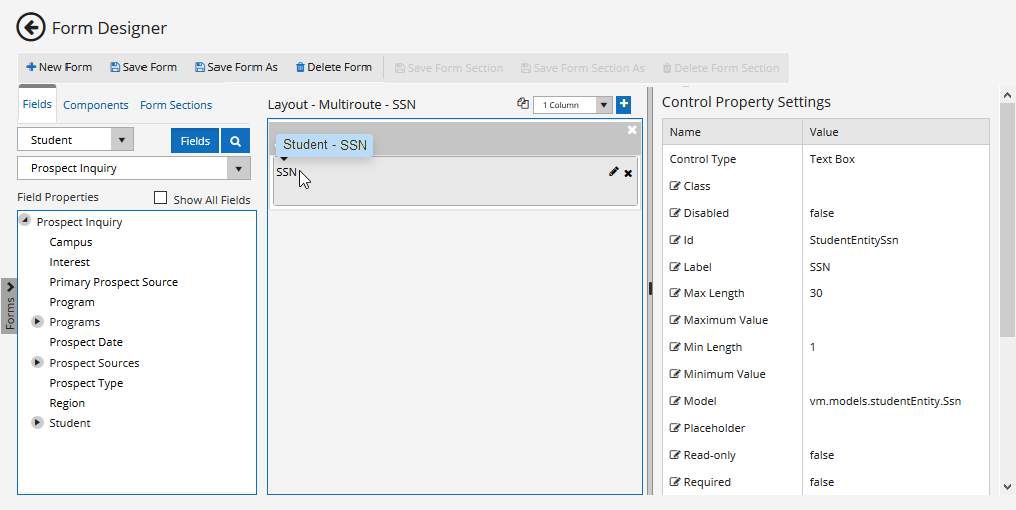
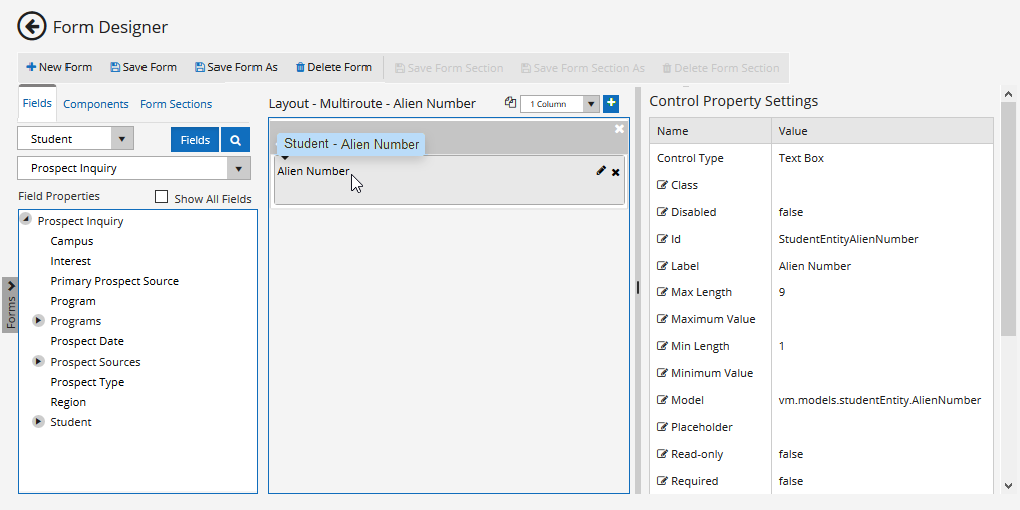
The main form allows the user to select a citizenship status, e.g., US Citizen or Eligible Non-Citizen. If US Citizen is selected, a sub form presents a text field to enter the Social Security Number. If Eligible Non-Citizen is selected, a sub form presents field to enter the Alien Number.
Step 1: Create forms for the sequence
-
Browse to Form Designer to create and save the main form. The main form contains the field(s) that trigger the branching into multiple routes.
In our example the value selected in the Student - Citizenship drop-down list will trigger the branching.

-
In Form Designer, create and save the sub forms. A sub form is required for each route.
In our example one sub form (form A) is created for the input of the social security number (SSN). This form is displayed when the user selects US Citizen in the Student - Citizenship Status drop-down list on the main form.

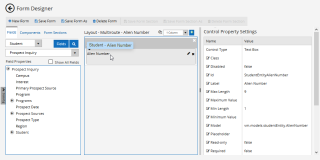
In our example a second sub form (form B) is created for the input of the Alien Number. This form is displayed when the user selects Eligible Non-Citizen in the Student - Citizenship Status drop-down list on the main form.
When all forms for all possible routes of a multi route sequence have been created, continue with Step B.
Step 2: Build the sequence
-
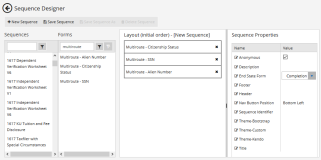
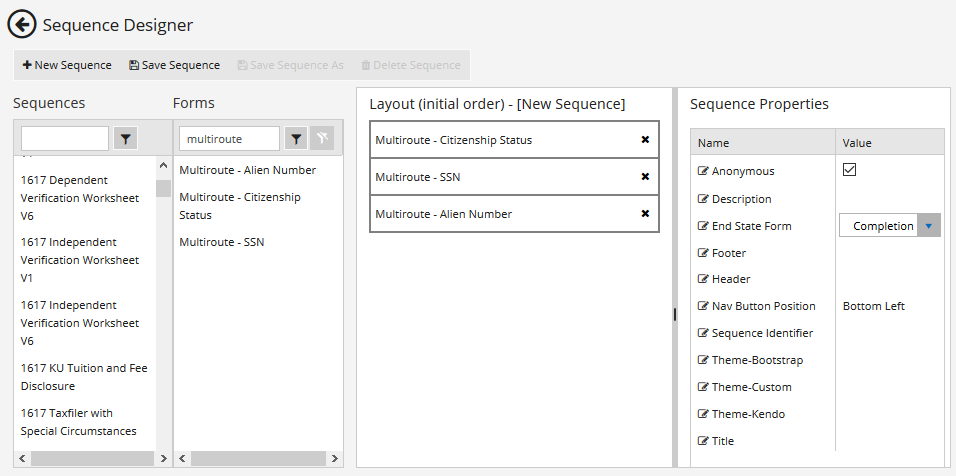
Browse to Sequence Designer and drag the main form and the sub forms to the Layout pane.
Note: The order of the sub forms in the Layout pane of the Sequence does not matter as long as they are grouped together after the main form is added. The branching/flow of the conditional sub forms will be specified when editing the workflow definition after the initial sequence is saved.
Please note, however, that while workflow determines the order of the forms, when the initial workflow is created, the order of the forms in the sequence is used to create the order of states in the state machine workflow. It is easier to sort the sub forms in Sequence Designer than to change the order of states in the workflow after the sequence is created.
-
Save the sequence with all required forms.
-
Launch Workflow Composer and open the workflow. See Open the Workflow for a Sequence.
Step 3: Define transitions in Workflow Composer
-
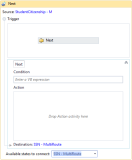
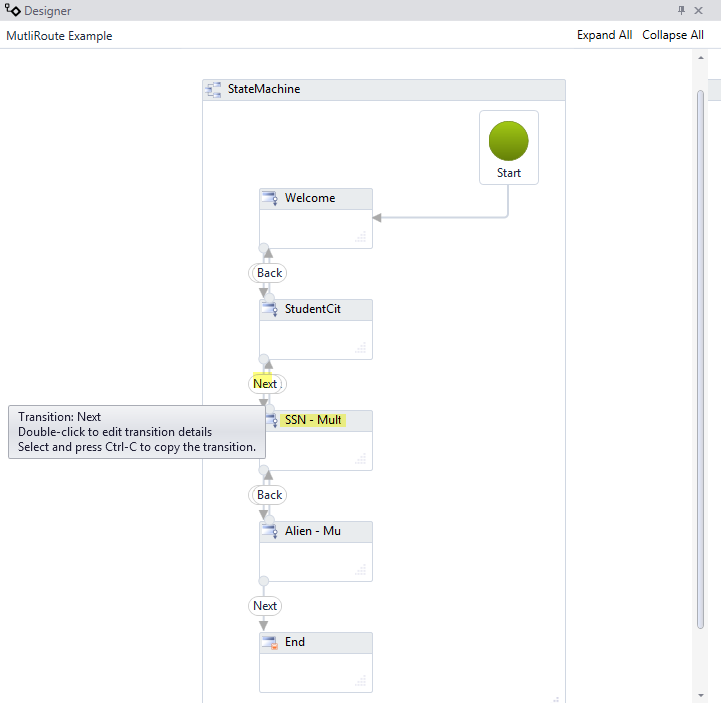
In Workflow Composer double-click on Next transition from the main form to form A.
Note: You can move the icons for states and transitions within the StateMachine sequence to get a clearer view of the links between the items.
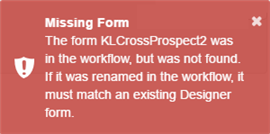
When editing a workflow definition, keep in mind that a state in the state machine workflow equates to a form within the sequence. The name of a State must match the name of a Form to be rendered properly. If Renderer encounters a State in workflow definition that does not match name of any Form created in Form Designer, an error similar to the following will be generated.
In our example the main form is named StudentCitizenship - MultiRoute.
The transition is expanded and displays Trigger, Condition, and Action fields.
-
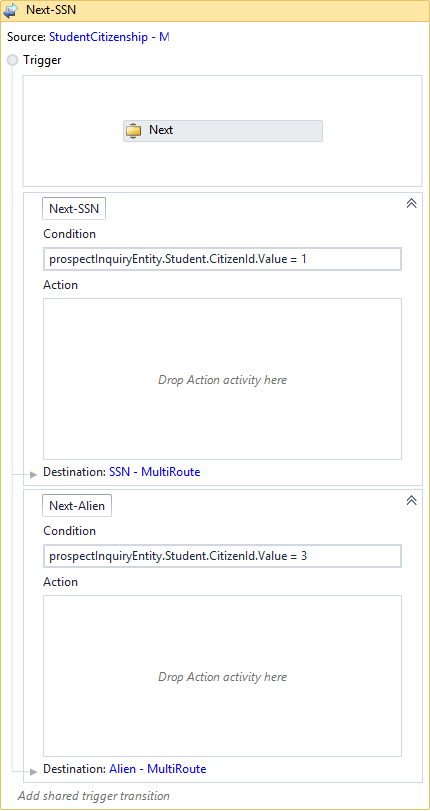
In the Condition field for the Next-SSN transition, enter the decision input property derived from the main form. In our example the condition is the US Citizen value selected in the Citizenship Status field, i.e., prospectInquiryEntity.Student.CitizenId.Value = 1.
-
At bottom of transition, click Add Shared Trigger Transition" and select form B. The name of form B is inserted into the Destination field.
-
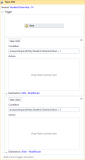
When created, change the default label on the transition from "T1" to "Next-Alien".
- In the Condition field for the Next-Alien transition, enter the decision input property derived from the main form. In our example the condition is the Eligible Non-Citizen value selected in the Citizenship Status field, i.e., prospectInquiryEntity.Student.CitizenId.Value = 3.
-
Add a condition for each transition based on decision input property in the main form (i.e., prospectInquiryEntity.Student.CitizenId.Value = 1 and prospectInquiryEntity.Student.CitizenId.Value = 3).
At this point shared transition is created for the Next button on the main form. Based on the selected CitizenId.Value value, the Next button will route the user to form A or form B.
-
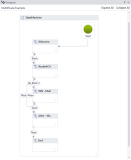
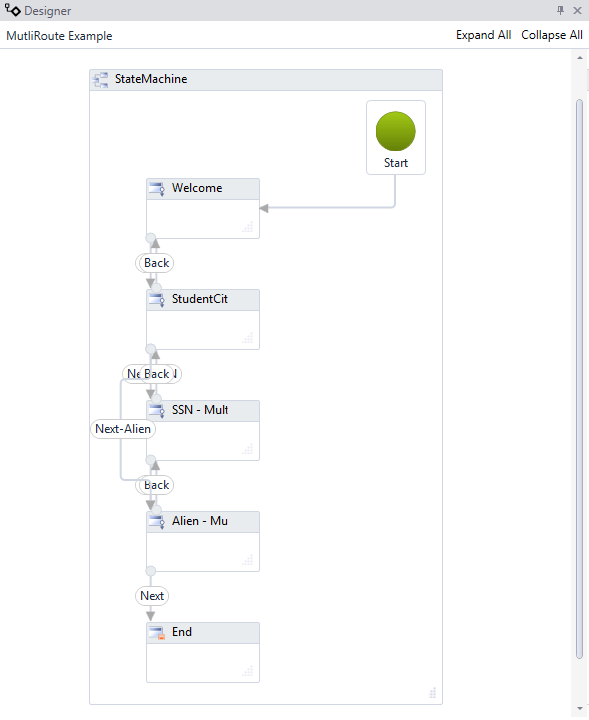
In the breadcrumbs at top of Designer window, select your sequence name (leftmost item). The Designer displays the entire StateMachine workflow view.
-
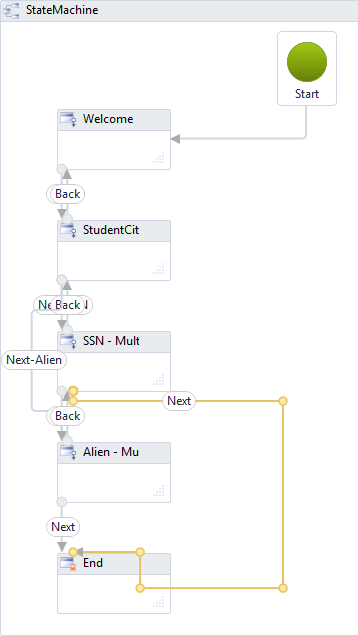
Select the Next transition on form A to form B and move the endpoint to the End state.

The Next transition on form A now points to the End state instead of form B.
-
Select the Back transition on form B to form A and move the endpoint to the main form.
The Back transition on form B now points to the main form instead of form A.
Note: If it is necessary to add new transitions, be sure to drag/drop the WaitForFormBookmark activity to the Trigger section of the transition.
-
Publish the updated workflow for the multi route form sequence. Be sure to select the Enable This Workflow option.

-
Click OK on the Publish Succeeded message.
The updated version of the sequence workflow is now enabled in your test environment.


Step 4: Render and test the sequence
-
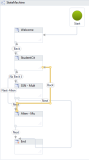
Browse to the Forms Renderer site and select the sequence just created.
The main form is displayed.

-
Fill out the form and select the value that takes the user to form B and click Next.
Form B is displayed.
-
Click the Back button on form B.
The main form is displayed.
-
Modify the value on the main form and select the value that takes the user to form A and click Next.
Form A is displayed.
-
Fill out the form and click Next.
The final form/end state is displayed with no buttons.
