The installation of the Workflow Tracking Database is optional. If it is needed, click the Package Manager tile in the Start screen of Installation Manager and download the package for the Workflow Tracking Database.
Set Up the Workflow Tracking Database
-
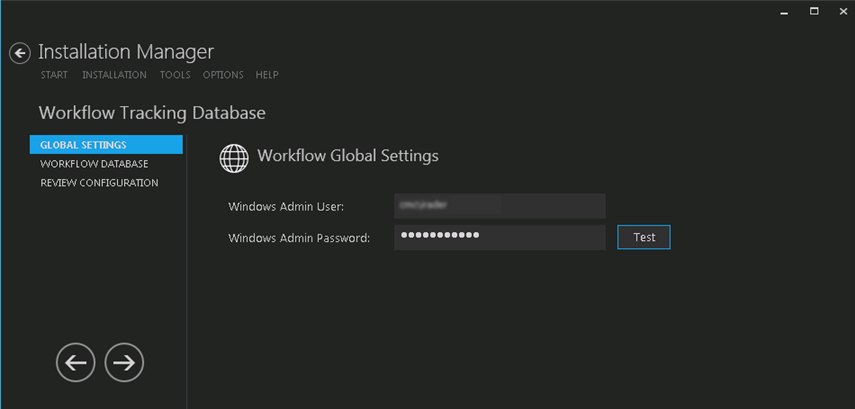
In the Start screen of Installation Manager, click Workflow Tracking Database. The Workflow Global Settings screen is displayed.

-
In the Windows Admin User field, specify the user name of the user with Administrator permissions on the computer on which the installation will occur. Depending on your network environment, specify one of the following:
- User name
- Domain\User name
- Email address of Admin User
-
In the Windows Admin Password field, specify the password for the Administrator user name. This password is used in the background for other installation steps.
-
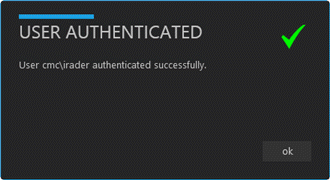
Click Test to ensure the user authentication settings are correct. A confirmation message is displayed.

-
If the user is authenticated, click OK and click
 to continue.
 -
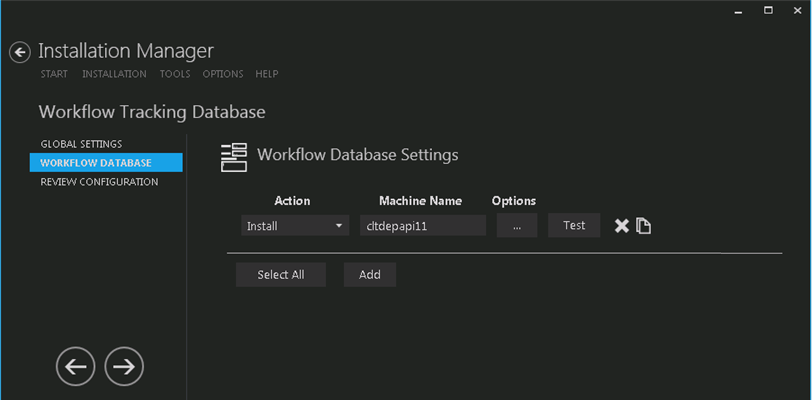
In the Installation menu, click Workflow Database. The Workflow Database Settings screen is displayed.

-
Click Add to add a line to the Settings screen.
-
Select an appropriate Action. The following Action values are available:
-
None – Performs no action.
-
Install – Performs a fresh installation or upgrade of a component. You can install or upgrade multiple components at same time.
-
Uninstall – Removes all subcomponents on that machine and uninstalls the component from Programs and Features.
Optional: Click Select All to set the Action field to Install for all components listed on this screen. Click Unselect All to set the Action field to None.
-
-
Enter the SQL Server where the WorkflowTracking database will be installed.
Note: Installation Manager does not provide an option to enter the name for this database because the name will always be WorkflowTracking.
-
Click
 to copy a line. Edit the copied line as needed.
 -
Click
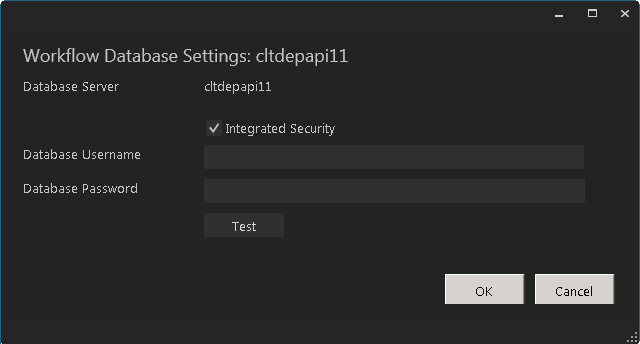
 to view and edit the Options for Workflow Database Settings. This form is used to specify the database where the workflows are stored.
Options Fields Field Description Database Server Name of the Workflow Tracking Database server. Database Username User name or account that will be used to connect to the Workflow Tracking Database when Integrated Security is not used. Can be left blank. Database Password Password used to connect to the Workflow Tracking Database when Integrated Security is not used. Can be left blank. Integrated Security Select the Integrated Security check box to use this feature and click Test to verify the connection. Clear this check box if the database user name and password will be used. -
Click OK to save changes on the Options form. The form is closed.
-
Click
 to delete a selected line.
 -
Click Test to ensure the setup for the corresponding line is correct. If a test on a particular line fails, check all associated fields and click Test again.
-
If all tests pass, click
 . The Prerequisite Validation screen is displayed.
 -
In the Prerequisite Validation screen, click Skip Prerequisite Check.

-
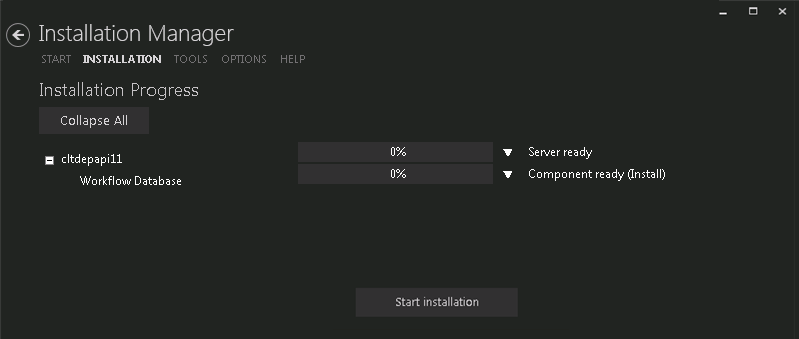
Click Start Installation on the Installation Progress screen. Progress bars display the percentage progress of the components that are being installed.
Note: The Start Installation button is disabled while the installation is in progress and upon successful installation of all components. If an error occurs during installation of one or more components, the Start Installation button is enabled again.
-
Once the progress bars have reached 100%, a message is displayed confirming the installation, or an error message is displayed.
-
To verify or troubleshoot the installation, click
 next to a progress bar to access installation logs and other tools (see Installation).
Related Topics
Related Tasks
Reference
Last Updated: 7/19/2019 | Installation Manager 1.20 | © 2019 Campus Management Corp. All rights reserved. | www.campusmanagement.com
