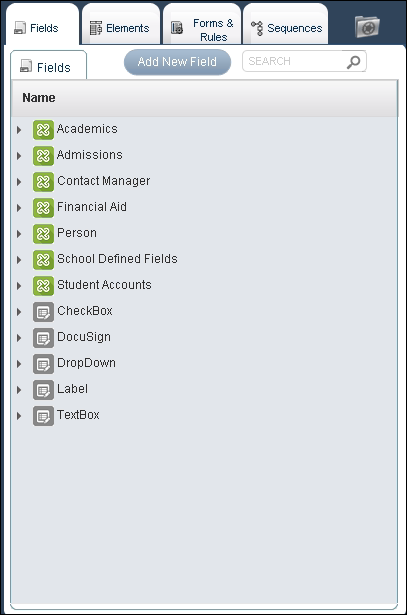
In Build mode, click the Fields tab. All existing Field Objects are displayed.
The Field Objects displayed below are relevant to CampusNexus Student. The fields displayed for CampusNexus CRM will be different.

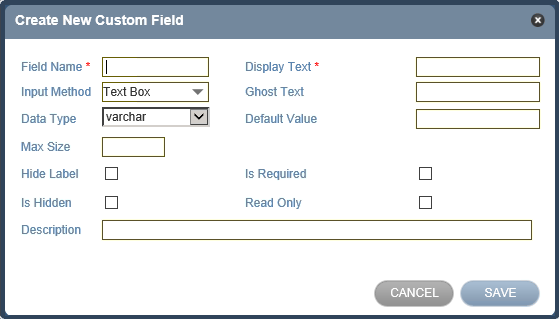
Click the Add New Field button. The Create new Custom Field dialog box is displayed on the Canvas.

Specify the required details. All required fields are indicated with an asterisk in the form.
| Field | Description | ||||||||||||||||||||||||||||||||
|---|---|---|---|---|---|---|---|---|---|---|---|---|---|---|---|---|---|---|---|---|---|---|---|---|---|---|---|---|---|---|---|---|---|
| Field Name * | Name of the field in the database. | ||||||||||||||||||||||||||||||||
| Display Text | Name of the Field displayed in the Fields tab. | ||||||||||||||||||||||||||||||||
| Input Method | Type of data that must be specified in the Field. The fields in the form vary based on the value that you select. The Data Type field is disabled if you select the following Input Methods:
|
||||||||||||||||||||||||||||||||
| Ghost Text | The hint text displayed in the Field. For example, Enter your password is the ghost text for the Password field. The Ghost Text field is displayed when you select either Secure Text Box or Text box in the Input Method list. | ||||||||||||||||||||||||||||||||
| Data Type | Data Type can be the following values:
*File Types and Extensions supported:
|
||||||||||||||||||||||||||||||||
| Default Value | The default value displayed in the Field. The Default Value field is not displayed for the DocuSign and File Upload input methods. |
||||||||||||||||||||||||||||||||
| Max Size | Max size for the field. For example, for a File Upload Input Method, you can specify the Max Size is 2 (GB). The value for file upload is in GB. The Max Size field is not displayed for the DocuSign and Check Box input methods. |
||||||||||||||||||||||||||||||||
| Hide Label | Hides the field label on the form when displayed. | ||||||||||||||||||||||||||||||||
| Is Required | The user will be required to fill a value in the field. Fields that contain the IsRequired property set to True are displayed with a red asterisk in the Fields tab. |
||||||||||||||||||||||||||||||||
| Is Hidden | The field will be hidden. This is useful when you want to use the field to perform internal calculations. | ||||||||||||||||||||||||||||||||
| Read Only | The field will be displayed as non-editable. | ||||||||||||||||||||||||||||||||
| Description | Detailed information about the Field. |
Click SAVE. The Field is saved and displayed in the Fields tab.