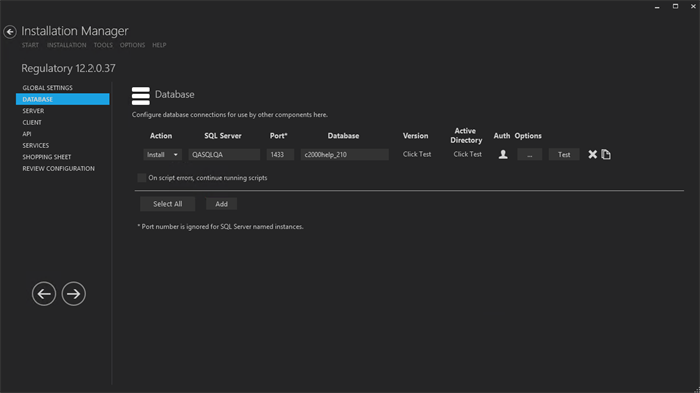
This Settings screen enables you to select the actions to be taken by Installation Manager (e.g., install) and to specify the machine name, the CampusNexus Student database, and additional databases for Portal and Talisma Fundraising.
Set Up the Database
-
In the Installation menu, click Database. The Database screen for Regulatory is displayed.

-
Click Add to add a line to the Settings screen.
-
Select an appropriate Action. The following Action values are available:
-
None – Performs no action.
-
Install – Performs a fresh installation or upgrade of a component. You can install or upgrade multiple components at same time.
Optional: Click Select All to set the Action field to Install for all components listed on this screen. Click Unselect All to set the Action field to None.
-
-
Enter the name of the SQL Server where the CampusNexus Student database is installed.
-
Specify the Port number for the SQL Server or accept the default (1433).
Note: The port number is ignored for named instances of SQL Server.
-
Specify the name of the Database for CampusNexus Student. The database name must be unique — ‘master’ is not allowed.
-
The Version field is populated when you click the Test button.
-
The Active Directory field is populated when you click the Test button.
-
Click
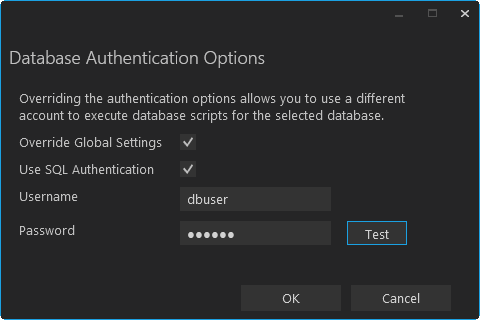
 in the Auth column if you want to override the authentication options from Global Settings for the selected database, for example, to give another user permissions to execute scripts for the selected database. The Database Authentication Options form is displayed.
-
Select the check box for On script errors, continue running scripts if you want the installation process to continue regardless of errors encountered.
By default, database upgrades will stop if the script encounters any errors. This selection is used if there are custom modifications to the database that are known to cause errors in the upgrade scripts. Selecting this option enables all scripts to be run against the specified database.
Whether the check box is selected or not, any errors are written to a separate error file for each script, which may be investigated after the script execution. Error logs are stored in the following folder:
DatabaseServer\C:\Logs\Output.The error log is the name of the script, SQL Server, and database name appended with
_Errors.txt, for example,CampusVue_17.1.00xx_{SQL Server}_{database_name}_Errors.txt)There is also an output file that has all of the script output:
CampusVue_17.1.00xx_{SQL Server}_{database_name}_Output.txt -
Click
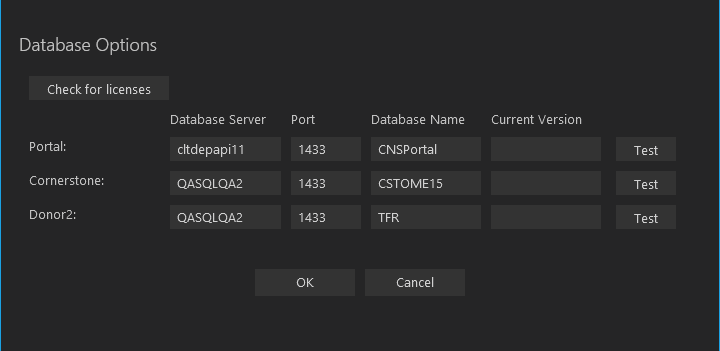
 to view and edit the Options form.
The Options form is used to specify databases for Portal and Talisma Fundraising. Corresponding licenses are required.
-
Entering a Portal database is only necessary for an installation that includes the e-Learning component that has a Portal component and license key associated with CampusNexus Student.
-
The Cornerstone and Donor2 databases are used for Talisma Fundraising in conjunction with the primary CampusNexus Student database. Installation Manager detects if Talisma Fundraising is enabled in the CampusNexus Student database.
Regulatory Database Options Fields Field Description Check for Licenses This button queries the CampusNexus Student database and checks for product licenses. Based on the licenses found, Installation Manager enables the Portal, Cornerstone, and Donor2 fields. If the licenses are not found, the Licensed? field indicates "False" and the fields remain disabled. Portal Database Server Name of the SQL server on which the Portal database resides. Port Specify the port number for the Portal database or accept the default (1433). Database Name Name of the Portal SQL database. Current Version This field is populated when you click the Test button. Cornerstone Database Server Name of the SQL Server on which the Cornerstone database resides. Port Specify the port number for the Cornerstone database or accept the default (1433). Database Name Name of the Cornerstone SQL database. Current Version This field is populated when you click the Test button. Donor2 Database Server Name of the SQL Server on which the Donor2 database resides. Port Specify the port number for the Donor2 database or accept the default (1433). Database Name Name of the Donor2 SQL database. Current Version This field is populated when you click the Test button. -
-
Click OK to save changes on the Options form. The form is closed.
-
Click
 to copy a line. Edit the copied line as needed.
 -
Click
 to delete a selected line.
 -
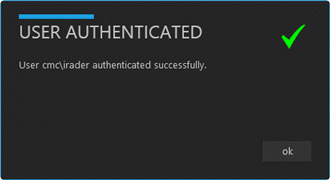
Click Test to ensure the setup for the corresponding line is correct. If a test on a particular line fails, check all associated fields and click Test again.
Note: The Test button operates as follows:
-
Queries the database to get the latest version of CampusNexus Student and populates the current version field.
-
Uses Windows Admin credentials (see Global Settings) and tests connectivity to the SQL server.
-
Uses the Student Admin user name (see Global Settings) and checks if it exists in the CampusNexus Student database.
-
-
If all tests pass, click
 .
.


