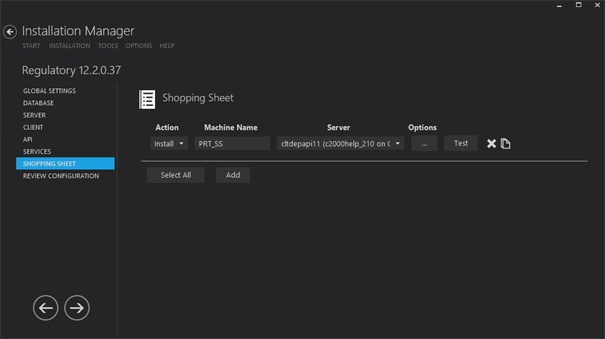
This Settings screen enables you to select the actions to be taken by Installation Manager (e.g., install, uninstall) and to specify the machine name, database, and options of the financial aid Shopping Sheet for Regulatory.
|
|
Shopping Sheet is typically installed on the Portal server. |
In award year 2020-2021 and later, the Shopping Sheet is also referred to as the College Finance Plan.
Set Up the Shopping Sheet
-
In the Installation menu, click Shopping Sheet. The Shopping Sheet screen for Regulatory is displayed.

-
Click Add to add a line to the Settings screen.
-
Select an appropriate Action. The following Action values are available:
-
None – Performs no action.
-
Install – Performs a fresh installation or upgrade of a component. You can install or upgrade multiple components at same time.
-
Uninstall – Removes all subcomponents on that machine and uninstalls the component from Programs and Features.
Optional: Click Select All to set the Action field to Install for all components listed on this screen. Click Unselect All to set the Action field to None.
-
-
Enter the Machine Name for the component to be installed.
-
Select the name of a Server. The drop-down list contains the servers and CampusNexus Student databases configured in the Database settings screen.
Note: Multiple clients can be installed against one server.
-
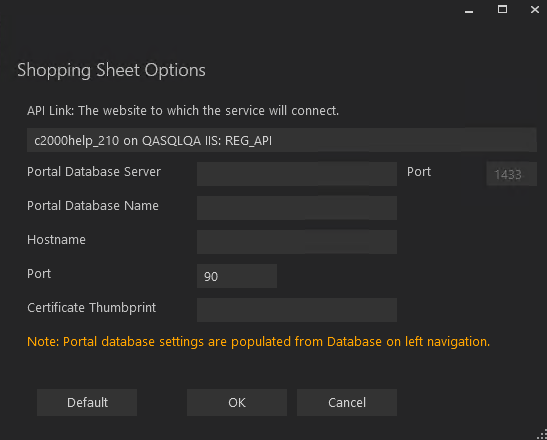
Click OK to save changes on the Options form. The form is closed.
-
Click
 to copy a line. Edit the copied line as needed.
 -
Click
 to delete a selected line.
 -
Click Test to ensure the setup for the corresponding line is correct. If a test on a particular line fails, check all associated fields and click Test again.
-
If all tests pass, click
 .
.


